TEXAS INSTRUMENTS の SimpleLink SensorTag CC2650 から BLE でデータ取得

 TEXAS INSTRUMENTS の SimpleLink CC2650 というセンサータグを買ってみたので、Raspberry Pi から BLE でセンサーデータを取得してみたいと思います。

www.tij.co.jp

 SimpleLink SensorTag CC2650 は気温、湿度、気圧、加速度、ジャイロ、磁気、照度などのセンサーを搭載しています。

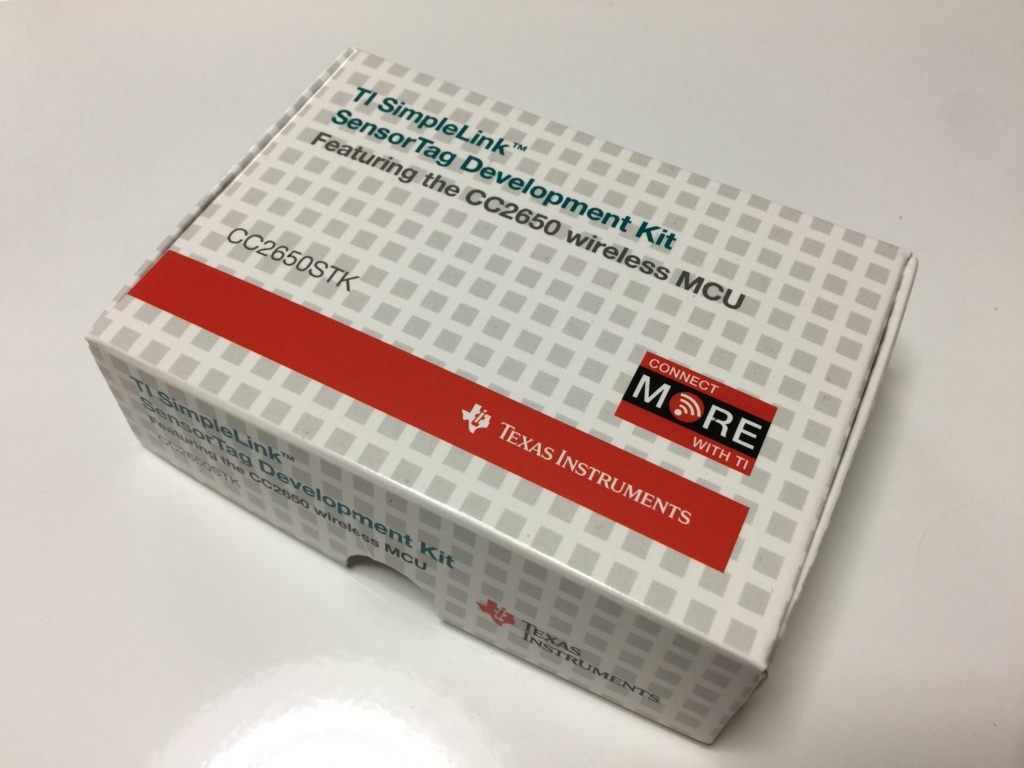
 外箱は下記のような感じです。

f:id:akanuma-hiroaki:20170717174130j:plain:w450

 デバイス本体は下記のようになります。写真だと大きく見えてしまいますが、約5cm x 4cm ぐらいの大きさです。

f:id:akanuma-hiroaki:20170717174141j:plain:w450

スマートフォンアプリからの接続

 まずは TEXAS INSTRUMENTS のセンサータグ用スマートフォンアプリからの接続を試してみたいと思います。自分で開発しなくても手軽にセンサーが取得しているデータを確認することができます。

TI SensorTag

TI SensorTag

  • Texas Instruments
  • ユーティリティ
  • 無料

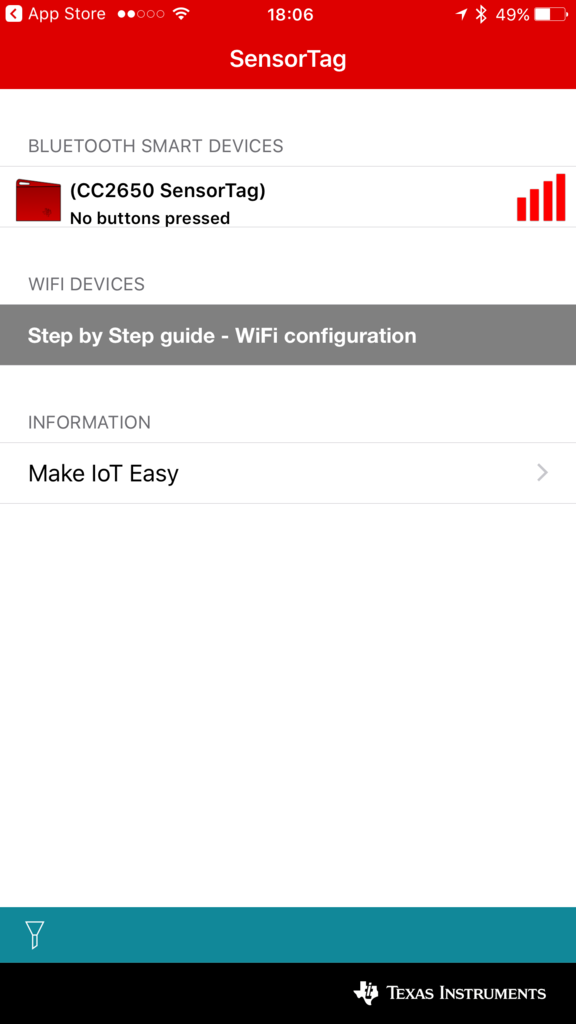
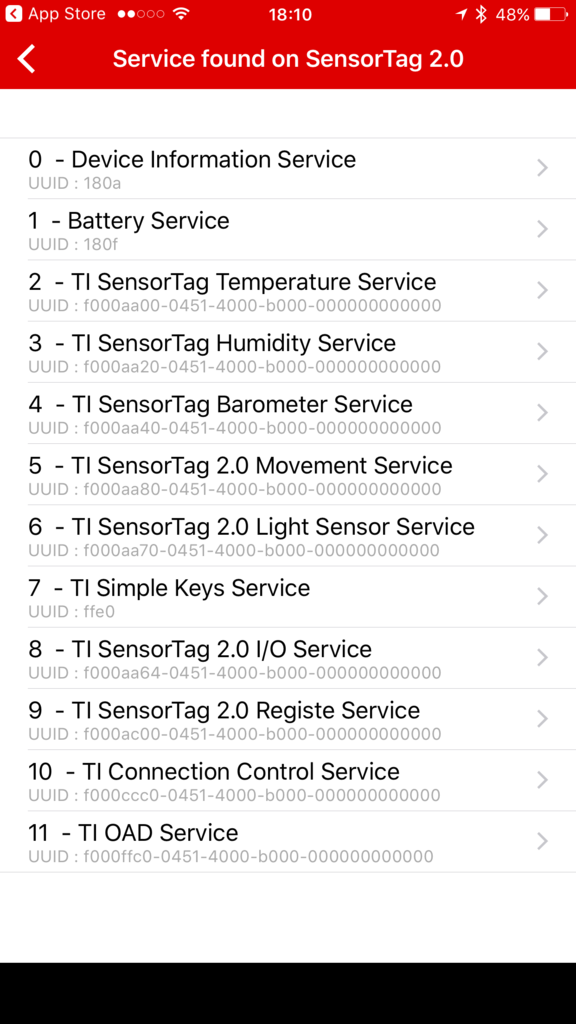
 アプリを起動して、SensorTagの側面にあるスイッチを押すと Advertising が始まり、リストにSensorTagが表示されます。そこからセンサーが取得しているデータや、GATT Service や Characteristic の UUID を確認できます。

f:id:akanuma-hiroaki:20170717174406p:plain:w300 f:id:akanuma-hiroaki:20170717174413p:plain:w300 f:id:akanuma-hiroaki:20170717174420p:plain:w300 f:id:akanuma-hiroaki:20170717174427p:plain:w300

Raspberry Pi からの接続

 それでは Raspberry Pi から SensorTag に接続して、データを取得してみたいと思います。基本的な処理内容は以前の記事(D-BusからBLEデバイスのNotificationを受け取る)で試したものと同様ですが、今回はデバイス固有の処理とBLEデバイス共通の処理を分割してみました。

 まずはBLEデバイス共通の処理のコード全体を載せておきます。BlueZによる処理をラップする形で、Device、Service、Characteristic のクラスを用意しています。エラーハンドリングはまだ考慮してません。Bluetoothのインタフェースもとりあえず hci0 を直接指定しています。

require 'bundler/setup'
require 'dbus'

class BLE
  attr_reader :bus

  SERVICE_NAME = 'org.bluez'
  SERVICE_PATH = '/org/bluez'
  ADAPTER      = 'hci0'

  DEVICE_IF          = 'org.bluez.Device1'
  SERVICE_IF         = 'org.bluez.GattService1'
  CHARACTERISTIC_IF  = 'org.bluez.GattCharacteristic1'
  DBUS_PROPERTIES_IF = 'org.freedesktop.DBus.Properties'

  SERVICE_RESOLVED_PROPERTY = 'ServicesResolved'
  UUID_PROPERTY             = 'UUID'

  PROPERTIES_CHANGED_SIGNAL = 'PropertiesChanged'

  SERVICE_RESOLVE_CHECK_INTERVAL = 0.1 # デバイスに接続後にサービスが解決されたかをチェックするインターバル
  DISCOVERY_WAITING_SECOND       = 10 # デバイス検出の待機時間

  module UUID
    GENERIC_ATTRIBUTE_SERVICE  = '00001801-0000-1000-8000-00805f9b34fb'
    DEVICE_INFORMATION_SERVICE = '0000180a-0000-1000-8000-00805f9b34fb'
    BATTERY_SERVICE            = '0000180f-0000-1000-8000-00805f9b34fb'

    BATTERY_DATA = '00002a19-0000-1000-8000-00805f9b34fb'
  end

  class Device
    attr_reader :bluez, :name, :address

    def initialize(bluez, bluez_device, name, address)
      @bluez        = bluez
      @bluez_device = bluez_device
      @name         = name
      @address      = address
    end

    # Device への接続処理。接続後に GATT Service が解決状態になるまで待機する
    def connect
      @bluez_device.introspect
      @bluez_device.Connect
      @bluez_device.introspect

      while !properties[SERVICE_RESOLVED_PROPERTY] do
        sleep(SERVICE_RESOLVE_CHECK_INTERVAL)
      end
    end

    def disconnect
      @bluez_device.Disconnect
    end

    def properties
      @bluez_device.introspect
      @bluez_device.GetAll(DEVICE_IF).first
    end

    # Device が持つ GATT Service のリストを返す
    def services
      services = []
      @bluez_device.subnodes.each do |node|
        service = @bluez.object("#{@bluez_device.path}/#{node}")
        service.introspect
        properties = service.GetAll(SERVICE_IF).first
        services << Service.new(@bluez, service, properties[UUID_PROPERTY])
      end

      services
    end

    def service_by_uuid(uuid)
      services.each do |service|
        return service if service.uuid == uuid
      end

      raise 'Service not found.'
    end

    def read_battery_level
      service = service_by_uuid(BLE::UUID::BATTERY_SERVICE)
      characteristic = service.characteristic_by_uuid(BLE::UUID::BATTERY_DATA)
      yield(characteristic.read.first)
      characteristic.start_notify do |v|
        yield(v.first)
      end
    end
  end

  class Service
    attr_reader :uuid

    def initialize(bluez, bluez_service, uuid)
      @bluez         = bluez
      @bluez_service = bluez_service
      @uuid          = uuid
    end

    def properties
      @bluez_service.introspect
      @bluez_service.GetAll(SERVICE_IF).first
    end

    # Service が持つ Characteristic のリストを返す
    def characteristics
      characteristics = []
      @bluez_service.subnodes.each do |node|
        characteristic = @bluez.object("#{@bluez_service.path}/#{node}")
        characteristic.introspect
        properties = characteristic.GetAll(CHARACTERISTIC_IF).first
        characteristics << Characteristic.new(characteristic, properties[UUID_PROPERTY])
      end

      characteristics
    end

    def characteristic_by_uuid(uuid)
      characteristics.each do |characteristic|
        return characteristic if characteristic.uuid == uuid
      end

      raise 'Characteristic not found.'
    end
  end

  class Characteristic
    attr_reader :uuid

    def initialize(bluez_characteristic, uuid)
      @bluez_characteristic = bluez_characteristic
      @uuid = uuid
    end

    def properties
      @bluez_characteristic.introspect
      @bluez_characteristic.GetAll(CHARACTERISTIC_IF).first
    end

    # Characteristic のプロパティに変更があった時にシグナルを受け取る
    # ブロックを渡してシグナル検知時にブロックを実行する
    def start_notify
      @bluez_characteristic.StartNotify
      @bluez_characteristic.default_iface = DBUS_PROPERTIES_IF
      @bluez_characteristic.on_signal(PROPERTIES_CHANGED_SIGNAL) do |_, v|
        yield(v['Value'])
      end
    end

    def write(value)
      @bluez_characteristic.WriteValue(value, {})
    end

    def read
      @bluez_characteristic.ReadValue({}).first
    end

    def inspect
      @bluez_characteristic.inspect
    end
  end

  def initialize
    @bus = DBus::system_bus
    @bluez = @bus.service(SERVICE_NAME)

    @adapter = @bluez.object("#{SERVICE_PATH}/#{ADAPTER}")
    @adapter.introspect
  end

  # Bluetoothアダプタ配下のBLEデバイスを検出して Device クラスのインスタンスのリストを返す
  # デバイス名や RSSI が nil のデバイスは除外
  def devices
    @adapter.StartDiscovery
    sleep(DISCOVERY_WAITING_SECOND)

    devices = []
    @adapter.introspect
    @adapter.subnodes.each do |node|
      device = @bluez.object("#{SERVICE_PATH}/#{ADAPTER}/#{node}")
      device.introspect

      next unless device.respond_to?(:GetAll)

      properties = device.GetAll(DEVICE_IF).first
      name    = properties['Name']
      address = properties['Address']
      rssi    = properties['RSSI']

      next if name.nil? || rssi.nil?

      devices << Device.new(@bluez, device, name, address)
    end

    @adapter.StopDiscovery
    devices
  end

  def device_by_name(name)
    devices.each do |device|
      return device if device.name.downcase.include?(name.downcase)
    end

    raise 'No devices found.'
  end
end

 BLEクラスを new して #device_by_name メソッドにデバイス名を渡すと、デバイス名を含んだBLEデバイスを検出して Device クラスのインスタンスとして返します。

 次にSensorTag固有の処理のコードです。こちらもまだエラーハンドリングは考慮してません。SensorTag クラスには基本的に各センサーを有効化する処理と、センサーデータ検出時にデータをコールバックのブロックに受け渡す処理を実装しています。各センサーから検出されるデータは生データなので、実際に利用するにはコンバートする必要があります。コンバート処理の内容はいろいろ調べたのですが間違っているかもしれないので、参考までということで。

require 'bundler/setup'
require './ble.rb' # 前述のBLEデバイス共通処理を読み込む

class SensorTag
  DEVICE_NAME = 'CC2650'
  SCALE_LSB = 0.03125

  module UUID
    IR_TEMPERATURE_SERVICE     = 'f000aa00-0451-4000-b000-000000000000'
    HUMIDITY_SERVICE           = 'f000aa20-0451-4000-b000-000000000000'
    BAROMETER_SERVICE          = 'f000aa40-0451-4000-b000-000000000000'
    MOVEMENT_SERVICE           = 'f000aa80-0451-4000-b000-000000000000'
    LUXOMETER_SERVICE          = 'f000aa70-0451-4000-b000-000000000000'
    SIMPLE_KEYS_SERVICE        = '0000ffe0-0000-1000-8000-00805f9b34fb'
    IO_SERVICE                 = 'f000aa64-0451-4000-b000-000000000000'
    REGISTER_SERVICE           = 'f000ac00-0451-4000-b000-000000000000'
    CONNECTION_CONTROL_SERVICE = 'f000ccc0-0451-4000-b000-000000000000'
    OAT_SERVICE                = 'f000ffc0-0451-4000-b000-000000000000'

    IR_TEMPERATURE_CONFIG = 'f000aa02-0451-4000-b000-000000000000'
    IR_TEMPERATURE_DATA   = 'f000aa01-0451-4000-b000-000000000000'
    HUMIDITY_CONFIG       = 'f000aa22-0451-4000-b000-000000000000'
    HUMIDITY_DATA         = 'f000aa21-0451-4000-b000-000000000000'
    MOVEMENT_CONFIG       = 'f000aa82-0451-4000-b000-000000000000'
    MOVEMENT_DATA         = 'f000aa81-0451-4000-b000-000000000000'
    BAROMETER_CONFIG      = 'f000aa42-0451-4000-b000-000000000000'
    BAROMETER_DATA        = 'f000aa41-0451-4000-b000-000000000000'
    LUXOMETER_CONFIG      = 'f000aa72-0451-4000-b000-000000000000'
    LUXOMETER_DATA        = 'f000aa71-0451-4000-b000-000000000000'
    IO_CONFIG             = 'f000aa66-0451-4000-b000-000000000000'
    IO_DATA               = 'f000aa65-0451-4000-b000-000000000000'
  end

  # SensorTag に接続
  def connect
    @ble = BLE.new
    @device = @ble.device_by_name(DEVICE_NAME)
    @device.connect
  end

  # 各センサーの有効化のための処理
  def enable(service, config_uuid, value = [0x01])
    characteristic = service.characteristic_by_uuid(config_uuid)
    characteristic.write(value)
  end

  def enable_ir_temperature
    service = @device.service_by_uuid(SensorTag::UUID::IR_TEMPERATURE_SERVICE)
    enable(service, SensorTag::UUID::IR_TEMPERATURE_CONFIG)
  end

  def enable_humidity
    service = @device.service_by_uuid(SensorTag::UUID::HUMIDITY_SERVICE)
    enable(service, SensorTag::UUID::HUMIDITY_CONFIG)
  end

  def enable_movement
    service = @device.service_by_uuid(SensorTag::UUID::MOVEMENT_SERVICE)
    enable(service, SensorTag::UUID::MOVEMENT_CONFIG, [0b11111111, 0b00000000])
  end

  def enable_barometer
    service = @device.service_by_uuid(SensorTag::UUID::BAROMETER_SERVICE)
    enable(service, SensorTag::UUID::BAROMETER_CONFIG)
  end

  def enable_luxometer
    service = @device.service_by_uuid(SensorTag::UUID::LUXOMETER_SERVICE)
    enable(service, SensorTag::UUID::LUXOMETER_CONFIG)
  end

  # 各センサーの生データをコンバートする処理
  def convert_ir_temperature_value(upper_byte, lower_byte)
    (((upper_byte << 8) + lower_byte) >> 2) * SCALE_LSB
  end

  def convert_temp_value(upper_byte, lower_byte)
    temp_byte = (upper_byte << 8) + lower_byte
    (temp_byte / 65536.0) * 165 - 40
  end

  def convert_humidity_value(upper_byte, lower_byte)
    hum_byte = (upper_byte << 8) + lower_byte
    (hum_byte / 65536.0) * 100
  end

  def convert_movement_value(upper_byte, lower_byte)
      value = (upper_byte << 8) + lower_byte
      if upper_byte > 0x7f
        value = ~value + 1
      end
      (value >> 2).to_f
  end

  def convert_gyro_value(upper_byte, lower_byte)
    convert_movement_value(upper_byte, lower_byte) / 128.0
  end

  def convert_acc_value(upper_byte, lower_byte)
    convert_movement_value(upper_byte, lower_byte) / (32768 / 2)
  end

  def convert_mag_value(upper_byte, lower_byte)
    convert_movement_value(upper_byte, lower_byte) * 4912.0 / 32768.0
  end

  def convert_barometer_value(upper_byte, middle_byte, lower_byte)
    ((upper_byte << 16) + (middle_byte << 8) + lower_byte) / 100.0
  end

  def convert_luxometer_value(upper_byte, lower_byte)
    lux = (upper_byte << 8) + lower_byte

    m = lux & 0x0fff
    e = (lux & 0xf000) >> 12
    e = (e == 0) ? 1 : 2 << (e - 1)
    m * (0.01 * e)
  end

  # 各センサーのデータを読み取り、コンバート後のデータをコールバックに渡す
  def read_ir_temperature
    service = @device.service_by_uuid(SensorTag::UUID::IR_TEMPERATURE_SERVICE)
    characteristic = service.characteristic_by_uuid(SensorTag::UUID::IR_TEMPERATURE_DATA)
    characteristic.start_notify do |v|
      amb_lower_byte = v[2]
      amb_upper_byte = v[3]
      ambient = convert_ir_temperature_value(amb_upper_byte, amb_lower_byte)

      obj_lower_byte = v[0]
      obj_upper_byte = v[1]
      object = convert_ir_temperature_value(obj_upper_byte, obj_lower_byte)

      yield(ambient, object)
    end
  end

  def read_humidity
    service = @device.service_by_uuid(SensorTag::UUID::HUMIDITY_SERVICE)
    characteristic = service.characteristic_by_uuid(SensorTag::UUID::HUMIDITY_DATA)
    characteristic.start_notify do |v|
      temp_lower_byte = v[0]
      temp_upper_byte = v[1]
      temp = convert_temp_value(temp_upper_byte, temp_lower_byte)

      hum_lower_byte = v[2]
      hum_upper_byte = v[3]
      hum = convert_humidity_value(hum_upper_byte, hum_lower_byte)

      yield(temp, hum)
    end
  end

  def read_movement
    service = @device.service_by_uuid(SensorTag::UUID::MOVEMENT_SERVICE)
    characteristic = service.characteristic_by_uuid(SensorTag::UUID::MOVEMENT_DATA)
    characteristic.start_notify do |v|
      gyro_x_lower = v[0]
      gyro_x_upper = v[1]
      gyro_y_lower = v[2]
      gyro_y_upper = v[3]
      gyro_z_lower = v[4]
      gyro_z_upper = v[5]

      gyro_x = convert_gyro_value(gyro_x_upper, gyro_x_lower)
      gyro_y = convert_gyro_value(gyro_y_upper, gyro_y_lower)
      gyro_z = convert_gyro_value(gyro_z_upper, gyro_z_lower)

      acc_x_lower = v[6]
      acc_x_upper = v[7]
      acc_y_lower = v[8]
      acc_y_upper = v[9]
      acc_z_lower = v[10]
      acc_z_upper = v[11]

      acc_x = convert_acc_value(acc_x_upper, acc_x_lower)
      acc_y = convert_acc_value(acc_y_upper, acc_y_lower)
      acc_z = convert_acc_value(acc_z_upper, acc_z_lower)

      mag_x_lower = v[12]
      mag_x_upper = v[13]
      mag_y_lower = v[14]
      mag_y_upper = v[15]
      mag_z_lower = v[16]
      mag_z_upper = v[17]

      mag_x = convert_mag_value(mag_x_upper, mag_x_lower)
      mag_y = convert_mag_value(mag_y_upper, mag_y_lower)
      mag_z = convert_mag_value(mag_z_upper, mag_z_lower)

      yield(gyro_x, gyro_y, gyro_z, acc_x, acc_y, acc_z, mag_x, mag_y, mag_z)
    end
  end

  def read_barometer
    service = @device.service_by_uuid(SensorTag::UUID::BAROMETER_SERVICE)
    characteristic = service.characteristic_by_uuid(SensorTag::UUID::BAROMETER_DATA)
    characteristic.start_notify do |v|
      temp_lower  = v[0]
      temp_middle = v[1]
      temp_upper  = v[2]
      temp = convert_barometer_value(temp_upper, temp_middle, temp_lower)

      press_lower  = v[3]
      press_middle = v[4]
      press_upper  = v[5]
      press = convert_barometer_value(press_upper, press_middle, press_lower)

      yield(temp, press)
    end
  end

  def read_luxometer
    service = @device.service_by_uuid(SensorTag::UUID::LUXOMETER_SERVICE)
    characteristic = service.characteristic_by_uuid(SensorTag::UUID::LUXOMETER_DATA)
    characteristic.start_notify do |v|
      lux_lower  = v[0]
      lux_upper  = v[1]
      lux = convert_luxometer_value(lux_upper, lux_lower)

      yield(lux)
    end
  end

  def read_battery_level
    @device.read_battery_level do |battery_level|
      yield(battery_level)
    end
  end

  # シグナルの待受を開始
  def run
    main = DBus::Main.new
    main << @ble.bus

    main.run
  end

  def disconnect
    @device.disconnect
  end
end

if $0 == __FILE__
  sensor_tag = SensorTag.new
  begin
    sensor_tag.connect

    ir_temperature_log = Logger.new('logs/ir_temperature.log')
    sensor_tag.enable_ir_temperature
    sensor_tag.read_ir_temperature do |ambient, object|
      ir_temperature_log.info("amb: #{ambient} obj: #{object}")
    end

    humidity_log = Logger.new('logs/humidity.log')
    sensor_tag.enable_humidity
    sensor_tag.read_humidity do |temp, hum|
      humidity_log.info("temp: #{temp} hum: #{hum}")
    end

    gyro_log = Logger.new('logs/gyro.log')
    acc_log = Logger.new('logs/acc.log')
    mag_log = Logger.new('logs/mag.log')
    sensor_tag.enable_movement
    sensor_tag.read_movement do |gyro_x, gyro_y, gyro_z, acc_x, acc_y, acc_z, mag_x, mag_y, mag_z|
      gyro_log.info("gyro: #{gyro_x} #{gyro_y} #{gyro_z}")
      acc_log.info("acc: #{acc_x} #{acc_y} #{acc_z}")
      mag_log.info("mag: #{mag_x} #{mag_y} #{mag_z}")
    end

    barometer_log = Logger.new('logs/barometer.log')
    sensor_tag.enable_barometer
    sensor_tag.read_barometer do |temp, press|
      barometer_log.info("temp: #{temp} press: #{press}")
    end

    lux_log = Logger.new('logs/lux.log')
    sensor_tag.enable_luxometer
    sensor_tag.read_luxometer do |lux|
      lux_log.info("lux: #{lux}")
    end

    battery_log = Logger.new('logs/battery.log')
    sensor_tag.read_battery_level do |battery_level|
      battery_log.info("battery: #{battery_level}")
    end

    sensor_tag.run
  rescue Interrupt => e
    puts e
  ensure
    sensor_tag.disconnect
  end
end

 今回はコールバックとして単純に各データをログに出力するようにしていますので、スクリプトを実行するとセンサーのデータが各ログファイルに出力されます。

f:id:akanuma-hiroaki:20170717215619p:plain

 データのコンバート処理はちゃんと実装する必要ありますが、SensorTag では手軽にいろいろなセンサーデータを取得できて面白いですね。今回はとりあえずデータを出力するだけでしたが、このデータを使って何か面白いことができないか考えてみたいと思います。

SORACOM Beam から Ruby で AWS IoT の Device Shadow を更新する

 前回 Raspberry Pi を SORACOM Beam 経由で AWS IoT に接続できるところまで確認したので、今回は AWS IoT の Shadow を使って状態を管理するところまでやってみたいと思います。

AWS IoT メッセージブローカーに Pub/Sub する

 まずは AWS IoT メッセージブローカーを MQTT Broker として単純に Pub/Sub してみたいと思います。

 今回は Ruby の MQTT クライアントとして ruby-mqtt を使ってみます。

github.com

 Gemfile に下記を追加して bundle install しておきます。

gem 'mqtt'

 Subscriber 側の実装は下記のようにしました。 SORACOM Beam に接続し、 topic/sample というトピックに Subscribe してメッセージを待ち受けます。

require 'bundler/setup'
require 'mqtt'

BEAM_URL = 'beam.soracom.io'
TOPIC = 'topic/sample'

MQTT::Client.connect(host: BEAM_URL) do |client|
  client.subscribe(TOPIC)
  puts "Subscribed to the topic: #{TOPIC}"

  client.get do |topic, message|
    puts "#{topic}: #{message}"
  end
end

 SORACOM Beam を使っているので認証情報等を書く必要がなく、とてもスッキリ書けます。

 次に Publisher 側です。 topic/sample というトピックにメッセージを一つ Publish して終了します。

require 'bundler/setup'
require 'mqtt'

BEAM_URL = 'beam.soracom.io'
TOPIC = 'topic/sample'

MQTT::Client.connect(host: BEAM_URL) do |client|
  now = Time.now
  client.publish(TOPIC, "Test from publisher.rb: #{now}")
  puts "Published to the topic '#{TOPIC}': #{now}"
end

 では動作を確認してみます。まずは Subscriber を起動してメッセージを待ち受けます。

pi@raspberrypi:~/aws_iot $ bundle exec ruby subscriber.rb  
Subscribed to the topic: topic/sample                           

 そして Publisher を起動してメッセージを Publish します。下記の例では二回起動して二回メッセージを Publish しています。

pi@raspberrypi:~/aws_iot $ bundle exec ruby publisher.rb 
Published to the topic 'topic/sample': 2017-07-12 23:17:33 +0000
pi@raspberrypi:~/aws_iot $ 
pi@raspberrypi:~/aws_iot $ bundle exec ruby publisher.rb 
Published to the topic 'topic/sample': 2017-07-12 23:17:48 +0000

 すると先ほど待ち受け状態にした Subscriber 側で下記のように受け取ったメッセージが表示されます。

pi@raspberrypi:~/aws_iot $ bundle exec ruby subscriber.rb  
Subscribed to the topic: topic/sample                           
topic/sample: Test from publisher.rb: 2017-07-12 23:17:33 +0000 
topic/sample: Test from publisher.rb: 2017-07-12 23:17:48 +0000 

Device Shadow を更新して内容を表示する

 では続いて AWS IoT の Device Shadow を使ってみます。Device Shadow は AWS IoT でモノ(Thing)の状態を保存するために使用されるJSONドキュメントで、Thing Shadows サービスによって管理され、参照、更新することができます。

docs.aws.amazon.com

 Thing Shadows サービスでは MQTT トピックを使用してメッセージがやりとりされます。まずはシンプルに Device Shadow の更新を行い、その内容を受信して表示してみます。Thing Shadows のトピック名のベースは $aws/things/モノの名前/shadow となります。今回はモノの名前を raspberry_pi としていますので、 $aws/things/raspberry_pi/shadow となります。

 Subscriber は下記のようにしました。 Device Shadow に対する更新が正常に行われると、Thing Shadows では $awsthings/raspberry_pi/shadow/update/accepted というトピックにメッセージが Publish されますので、このトピックに Subscribe しておきます。

require 'bundler/setup'
require 'mqtt'
require 'json'

BEAM_URL = 'beam.soracom.io'
TOPIC = '$aws/things/raspberry_pi/shadow/update/accepted'

MQTT::Client.connect(host: BEAM_URL) do |client|
  client.subscribe(TOPIC)
  puts "Subscribed to the topic: #{TOPIC}"

  client.get do |topic, json|
    puts "#{topic}: #{JSON.parse(json)}"
  end
end

 次に Publisher 側です。Device Shadow の状態を更新するには $aws/things/raspberry_pi/shadow/update というトピックにメッセージを Publish します。

require 'bundler/setup'
require 'mqtt'
require 'json'

BEAM_URL = 'beam.soracom.io'
TOPIC = '$aws/things/raspberry_pi/shadow/update'

MQTT::Client.connect(host: BEAM_URL) do |client|
  statement = {
    state: {
      desired: {
        power: 'on'
      }
    }
  }

  client.publish(TOPIC, statement.to_json)
  puts "Published to the topic: '#{TOPIC}'"
end

 では動作確認です。まずは Subscriber を起動して、メッセージを待ち受けます。

pi@raspberrypi:~/aws_iot $ bundle exec ruby shadow_subscriber.rb                                                  
Subscribed to the topic: $aws/things/raspberry_pi/shadow/update/accepted                                               

 そして Publisher を起動して Device Shadow の更新を行います。

pi@raspberrypi:~/aws_iot $ bundle exec ruby shadow_publisher.rb 
Published to the topic: '$aws/things/raspberry_pi/shadow/update'
pi@raspberrypi:~/aws_iot $ 
pi@raspberrypi:~/aws_iot $ bundle exec ruby shadow_publisher.rb 
Published to the topic: '$aws/things/raspberry_pi/shadow/update'

 すると下記のように Subscriber 側で Device Shadow の更新内容が表示されます。実際に Publish した内容以外に metadate, version, timestamp が追加されています。

pi@raspberrypi:~/aws_iot $ bundle exec ruby shadow_subscriber.rb                                                  
Subscribed to the topic: $aws/things/raspberry_pi/shadow/update/accepted                                               
$aws/things/raspberry_pi/shadow/update/accepted: {"state"=>{"desired"=>{"power"=>"on"}}, "metadata"=>{"desired"=>{"power"=>{"timestamp"=>1499902096}}}, "version"=>8, "timestamp"=>1499902096}                                                
$aws/things/raspberry_pi/shadow/update/accepted: {"state"=>{"desired"=>{"power"=>"on"}}, "metadata"=>{"desired"=>{"power"=>{"timestamp"=>1499902128}}}, "version"=>9, "timestamp"=>1499902128}                                                

Device Shadow の更新差分を表示する

 先ほどの例では Device Shadow の更新のために Publish された情報をそのまま受信して表示していましたが、今度は Device Shadow の状態に変更があった場合だけその差分を表示するようにしてみます。

 Device Shadow にはモノの実際の状態を示す reported セクションと、アプリケーション側で望む状態である desired というセクションが含まれます。Device Shadow に対する更新が行われた時に、 reported セクションと desired セクションに差異が発生した場合には $aws/things/raspberry_pi/shadow/update/delta というトピックにメッセージが Publish されますので、このトピックに対して Subscribe しておけば差分が発生したことを検知できます。

 また、差分を検知するためにはまずモノの状態を reported セクションで登録しておく必要がありますので、下記の Subscriber の実装の中ではまず起動時にモノの状態を Publish してから、 delta トピックに Subscribe しています。

require 'bundler/setup'
require 'mqtt'
require 'json'

BEAM_URL = 'beam.soracom.io'
TOPIC = '$aws/things/raspberry_pi/shadow/update'
DELTA_TOPIC = "#{TOPIC}/delta"

MQTT::Client.connect(host: BEAM_URL) do |client|
  initial_statement = {
    state: {
      reported: {
        power: 'off'
      }
    }
  }

  client.publish(TOPIC, initial_statement.to_json)
  puts "Published initial statement."

  client.subscribe(DELTA_TOPIC)
  puts "Subscribed to the topic: #{DELTA_TOPIC}"

  client.get do |topic, json|
    puts "#{topic}: #{JSON.parse(json)}"
  end
end

 そして Publisher 側では desired セクションでモノの状態を Publish します。下記の例では Publish を4回行い、power の状態を on -> off -> off -> on と変更しています。

require 'bundler/setup'
require 'mqtt'
require 'json'

BEAM_URL = 'beam.soracom.io'
TOPIC = '$aws/things/raspberry_pi/shadow/update'

def statement(power)
  {
    state: {
      desired: {
        power: power
      }
    }
  }
end

def publish(client, power)
  client.publish(TOPIC, statement(power).to_json)
  puts "Published to the topic: '#{TOPIC}'. power: #{power}"
end

MQTT::Client.connect(host: BEAM_URL) do |client|
  power = 'on'
  publish(client, power)

  sleep(3)

  power = 'off'
  publish(client, power)

  sleep(3)

  publish(client, power)

  sleep(3)

  power = 'on'
  publish(client, power)
end

 では動作確認です。まず Subscriber を起動してメッセージを待ち受けます。

pi@raspberrypi:~/aws_iot $ bundle exec ruby shadow_subscriber.rb                                                  
Published initial statement.                                                                                           
Subscribed to the topic: $aws/things/raspberry_pi/shadow/update/delta                                                  

 そして Publisher を起動して Device Shadow を更新します。

pi@raspberrypi:~/aws_iot $ bundle exec ruby shadow_publisher.rb 
Published to the topic: '$aws/things/raspberry_pi/shadow/update'. power: on
Published to the topic: '$aws/things/raspberry_pi/shadow/update'. power: off
Published to the topic: '$aws/things/raspberry_pi/shadow/update'. power: on

 すると Subscriber 側でメッセージが受信されます。Publisher からはメッセージが4回 Publish されていますが、Subscriber 側では2件しか受信されていません。

pi@raspberrypi:~/aws_iot $ bundle exec ruby shadow_subscriber.rb                                                  
Published initial statement.                                                                                           
Subscribed to the topic: $aws/things/raspberry_pi/shadow/update/delta                                                  
$aws/things/raspberry_pi/shadow/update/delta: {"version"=>17, "timestamp"=>1499903040, "state"=>{"power"=>"on"}, "metad
ata"=>{"power"=>{"timestamp"=>1499903040}}}                                                                            
$aws/things/raspberry_pi/shadow/update/delta: {"version"=>20, "timestamp"=>1499903049, "state"=>{"power"=>"on"}, "metad
ata"=>{"power"=>{"timestamp"=>1499903049}}}                                                                            

 これは、 Subscriber 起動時に Device Shadow の reported を power: off で更新しているので、 Publisher から desired を power: off で Publish した場合は差分がないため delta にメッセージが Publish されないためです。また、差分を受け取っても特に reported の更新は行なっていないため、 reported は power: off のままになります。

Device Shadow の更新差分を受け取って reported を更新する

 では更新差分を受け取った場合はモノ(Thing)から reported を更新するようにしてみたいと思います。更新差分のメッセージを受信した場合はそのJSONをパースして、power の値を読み取り、reported の状態変更メッセージを Publish します。

require 'bundler/setup'
require 'mqtt'
require 'json'

BEAM_URL = 'beam.soracom.io'
TOPIC = '$aws/things/raspberry_pi/shadow/update'
DELTA_TOPIC = "#{TOPIC}/delta"

def statement(power)
  {
    state: {
      reported: {
        power: power
      }
    }
  }
end

MQTT::Client.connect(host: BEAM_URL) do |client|
  power = 'off'
  client.publish(TOPIC, statement(power).to_json)
  puts "Published initial statement. power: #{power}"

  client.subscribe(DELTA_TOPIC)
  puts "Subscribed to the topic: #{DELTA_TOPIC}"

  client.get do |topic, json|
    power = JSON.parse(json)['state']['power']
    client.publish(TOPIC, statement(power).to_json)
    puts "Changed power state to: #{power}"
    puts json
  end
end

 Publisher は一つ前の例とほぼ同じです。

require 'bundler/setup'
require 'mqtt'
require 'json'

BEAM_URL = 'beam.soracom.io'
TOPIC = '$aws/things/raspberry_pi/shadow/update'

def statement(power)
  {
    state: {
      desired: {
        power: power
      }
    }
  }
end

def publish(client, power)
  client.publish(TOPIC, statement(power).to_json)
  puts "Published to the topic: '#{TOPIC}'. power: #{power}"
end

MQTT::Client.connect(host: BEAM_URL) do |client|
  power = 'on'
  publish(client, power)

  sleep(3)

  power = 'off'
  publish(client, power)

  sleep(3)

  publish(client, power)

  sleep(3)

  power = 'on'
  publish(client, power)

  sleep(3)
end

 では動かしてみます。まず Subscriber を起動。

pi@raspberrypi:~/aws_iot $ bundle exec ruby shadow_subscriber.rb                                      
Published initial statement. power: off                                                                    
Subscribed to the topic: $aws/things/raspberry_pi/shadow/update/delta                                      

 そして Publisher を起動します。

pi@raspberrypi:~/aws_iot $ bundle exec ruby shadow_publisher.rb 
Published to the topic: '$aws/things/raspberry_pi/shadow/update'. power: on
Published to the topic: '$aws/things/raspberry_pi/shadow/update'. power: off
Published to the topic: '$aws/things/raspberry_pi/shadow/update'. power: on

 すると Subscriber 側で下記のようにメッセージが受信されます。

pi@raspberrypi:~/aws_iot $ bundle exec ruby shadow_subscriber.rb                                      
Published initial statement. power: off                                                                    
Subscribed to the topic: $aws/things/raspberry_pi/shadow/update/delta                                      
Changed power state to: on                                                                                 
{"version":38,"timestamp":1499903887,"state":{"power":"on"},"metadata":{"power":{"timestamp":1499903887}}} 
Changed power state to: off                                                                                
{"version":40,"timestamp":1499903889,"state":{"power":"off"},"metadata":{"power":{"timestamp":1499903889}}}
Changed power state to: on                                                                                 
{"version":43,"timestamp":1499903895,"state":{"power":"on"},"metadata":{"power":{"timestamp":1499903895}}} 

 今回はメッセージが3回受信されています。 Subscriber 側で差分通知を受け取った時に reported を更新するようにしたので、 Publisher から二回連続で power: off が Publish された時はメッセージが受信されていませんが、それ以外は差分が通知され、メッセージが受信されています。

 これでひとまず Device Shadow を使ったモノの管理ができるようになりました。SORACOM Beam を使うことで認証情報等は Beam にオフロードしてコードをシンプルにできますし、AWS IoT からは他のAWSサービスとの連携も簡単なので、色々と試してみたいと思います。

Raspberry Pi を SORACOM Beam から AWS IoT に接続する

 前回の記事で Raspberry Pi を AWS SDK を使って AWS IoT に接続してみましたが、今回は SORACOM Beam 経由で AWS IoT に接続してみたいと思います。

soracom.jp

 SORACOM Beam はデバイスからの接続先の設定やプロトコル変換処理をオフロードできるサービスで、例えばデバイスの中に認証情報を置いておかなくても、Beam から接続先にアクセスする際に認証用の情報を追加することができるので、セキュリティの面でも有効なサービスです。

 今回は下記のガイドを参考に Raspberry Pi から MQTT で AWS IoT に接続し、Amazon SNS からメールを送信する処理を実行してみたいと思います。

dev.soracom.io

AWS側の設定

 AWS IoT のモノの登録については、前回登録したものをそのまま使います。

 また、AWS IoT のルール作成時にIAMのロールの作成・参照権限が必要になりますので、今回はとりあえずIAMFullAccessポリシーをアタッチしてフル権限を付与しておきます。

f:id:akanuma-hiroaki:20170706091200p:plain

 そしてメール通知を行うためのSNSトピックを作成しておきます。サブスクリプション作成時の Protocol は Email を指定し、メールアドレスを登録しておきます。

f:id:akanuma-hiroaki:20170708104430p:plain

 ここではSNSのトピックとサブスクリプションの作成方法の詳細は割愛しますが、下記AWSドキュメントに記載されています。 

AWS IoT ルールの作成

 デバイスから送信された内容をハンドリングするためのルールを作成します。AWS IoTコンソールの左側のメニューから、 ルール をクリックします。

f:id:akanuma-hiroaki:20170706091933p:plain

 まだルールが作成されていない場合は下記のような画面が表示されますので、 ルールを作成する をクリックします。

f:id:akanuma-hiroaki:20170706092045p:plain

 ルールの作成フォームが表示されますので、「名前」と「説明」に自分がわかりやすい内容を設定します。

f:id:akanuma-hiroaki:20170706092330p:plain

 画面下部の「メッセージのリソース」の各項目で今回対象とするデータの条件を設定します。

 SQLバージョンはデフォルトのままです。また、今回はひとまず全データを対象とするので、属性には「*」を、トピックフィルターには「#」を設定します。条件はブランクのままにします。

 そしてデータが送信された時の処理を設定するために、 アクションの追加 をクリックします。

f:id:akanuma-hiroaki:20170707005055p:plain

 アクションの選択画面が表示されますので、今回は SNSプッシュ通知としてメッセージを送信する`` を選択し、画面下部のアクションの設定``` ボタンをクイックします。

f:id:akanuma-hiroaki:20170707005647p:plain

 アクションの設定画面では、SNSターゲットとしてあらかじめ作成しておいたSNSトピックを選択し、メッセージ形式はRAW形式を選択します。

 そして、SNSリソースにAWS IoTへのアクセス権限を付与するためのロールを作成するため、 新しいロールの作成 をクリックします。

f:id:akanuma-hiroaki:20170707055500p:plain

 ロール名の入力フォームが表示されますので、任意のロール名を入力して 新しいロールの作成 をクリックします。

f:id:akanuma-hiroaki:20170707060041p:plain

 作成したロールが選択できるようになりますので、選択して アクションの追加 をクリックします。

f:id:akanuma-hiroaki:20170707060413p:plain

 下記のようにルールにアクションが追加されたことが確認できます。

f:id:akanuma-hiroaki:20170707060645p:plain

SORACOM Beam の設定

 まずは SORACOM Beam からのアクセス先となる、 AWS IoT 側のカスタムエンドポイントを確認しておきます。カスタムエンドポイントは AWS IoT を使用する各AWSアカウントごとに割り当てられるエンドポイントです。

 AWS IoT コンソールの左下の 設定 をクリックします。

f:id:akanuma-hiroaki:20170707075144p:plain

 するとカスタムエンドポイントが確認できます。

f:id:akanuma-hiroaki:20170707075152p:plain

 次に SORACOM Beam の設定を行います。

 SORACOM Consoleのメニューから Cellular -> Groups を選択し、対象のAir Sim が属するグループを選択したら、Basic settingsタブの SORACOM Beam をクリックして展開し、 から MQTT entry point を選択します。

f:id:akanuma-hiroaki:20170707073555p:plain

 入力フォームが表示されますので、 Configuration name には後で自分がわかりやすい任意の名前を設定します。

 Protocol は MQTTS、Host name には先ほど確認した AWS IoT のカスタムエンドポイント、Port number には 8883 を設定します。また、AWS IoT の認証に証明書を使うので、 Client cert を ON にします。そして、証明書を登録するために + をクリックします。

f:id:akanuma-hiroaki:20170707074014p:plain

 登録には秘密鍵、証明書、ルート証明書が必要になります。このうち秘密鍵、証明書は前回ダウンロードした connect_device_package.zip に含まれる下記ファイルを使います。

  • 秘密鍵:raspberry_pi.private.key

  • 証明書:raspberry_pi.cert.pem

 また、ルート証明書はSymantec社のサイトからダウンロードできます

https://www.symantec.com/content/en/us/enterprise/verisign/roots/VeriSign-Class%203-Public-Primary-Certification-Authority-G5.pem

 これらの内容ををそれぞれ Key、Cert、CA のフォームに入力します。Typeはデフォルトで X.509 certificate が選択されているのでそのままにしておきます。Credentials set ID と Description はわかりやすい内容を任意で登録します。入力が終わったら Register をクリックします。

f:id:akanuma-hiroaki:20170707074356p:plain

 するとプルダウンで先ほど登録した Credentials Set が選択できるようになっているので選択し、 Save をクリックします。

f:id:akanuma-hiroaki:20170707074530p:plain

 SORACOM Beam の設定が追加されたことが確認できます。

f:id:akanuma-hiroaki:20170707074758p:plain

Raspberry Pi から接続してみる

 ここまでで設定は完了なので、 Raspberry Pi から接続してみます。今回は MQTT Broker のオープンソース実装である Mosquitto を使用しますので、下記コマンドでインストールします。

pi@raspberrypi:~ $ sudo apt-get install mosquitto mosquitto-clients

 そして SORACOM Air で接続した上で、下記コマンドを実行してデータを送信します。

pi@raspberrypi:~ $ mosquitto_pub -d -h beam.soracom.io -t beamdemo -m "Hello, World from AWS IoT!"
Client mosqpub/1224-raspberryp sending CONNECT
Client mosqpub/1224-raspberryp received CONNACK
Client mosqpub/1224-raspberryp sending PUBLISH (d0, q0, r0, m1, 'beamdemo', ... (26 bytes))
Client mosqpub/1224-raspberryp sending DISCONNECT

 すると下記のようにメールが送信されます。

f:id:akanuma-hiroaki:20170707082336p:plain

 ひとまずこれで Raspberry Pi から SORACOM Beam を経由して AWS IoT に送信されたデータがルールによって処理され Amazon SNS へ送信され、メールが送られたことが確認できました。Raspberry Pi からの送信時は特に証明書等は指定せず、 SORACOM Beam に登録した証明書が使われていますので、 Raspberry Pi に証明書を置く必要なく処理が行えるようになっています。

 デバイスからの送信だけであれば SORACOM Funnel でも良いかもしれませんが、サーバからデバイスへの送信も行いたい場合は SORACOM Beam を使う必要があります。今回はデバイスからの送信だけでしたが、デバイスへの送信も試してみたいと思います。

 また、先日の SORACOM Conference 2017 で SORACOM Inventory が発表されました。

新サービス: SORACOM Inventory を発表 - SORACOM Blog

 まだ Limited Preview ということで実際には使えていませんが、用途としては AWS IoT に近いものだと思いますので、 SORACOM Air を使うデバイスであれば、 SORACOM Inventory だけでも良いのかもしれません。とりあえず Limited Preview の利用申請はしてみたので、使えるようになったら試してみたいと思います。

Raspberry Pi を AWS IoT に接続する

 今回はRaspberry PiをAWS IoTに接続してみたいと思います。AWS IoTとは簡単に言うと、IoTデバイスをAWS上のプラットフォームに登録しておき、デバイスの状態を記録するとともに、複数のデバイス間やデバイスとAWSサービス間の通信のハンドリングを行うことができるサービスです。

docs.aws.amazon.com

 デバイスとAWS IoTプラットフォーム間のプロトコルとしては MQTT, HTTP, WebSocket に対応していて、AWSサービスとの連携としては Lambda や DynamoDB、Kinesis、SNSなどに対応しています。

 今のところまだどういった連携をしていくか決めていませんが、ひとまずは Raspberry Pi を AWS IoT に登録して、接続ができるところまでを行ってみたいと思います。

AWS側の環境構築

 AWS IoT コンソールからデバイスの登録等を行うにはAWS IoT関連の権限が付与されている必要があります。今回はテストということで、 AWSIoTFullAccess ポリシーをアタッチして、AWS IoTに関する全ての権限を付与しました。実際のサービス提供時は最低限の権限に絞って付与した方が良いかと思います。

docs.aws.amazon.com

 権限が付与されたら該当のユーザでAWSマネジメントコンソールにログインし、サービスのリストから AWS IoT を選択して AWS IoT のコンソールへ移動します。

f:id:akanuma-hiroaki:20170701120135p:plain

 今すぐ始める をクリックします。

f:id:akanuma-hiroaki:20170701120553p:plain

 AWS IoT コンソールが表示されますので、 「AWS IoT に接続する」の 接続オプションの表示 をクリックします。

f:id:akanuma-hiroaki:20170701121115p:plain

 今回は Raspberry Pi を接続するので、「デバイスの設定」の 今すぐ始める をクリックします。

f:id:akanuma-hiroaki:20170701121210p:plain

 ステップの案内ページが表示されますので、 今すぐ始める をクリックします。

f:id:akanuma-hiroaki:20170701121336p:plain

 プラットフォームとSDKの選択画面が表示されますので、今回は Linux と Python を選択して、画面右下の 次へ をクリックします。

f:id:akanuma-hiroaki:20170701133125p:plain

 モノ(IoTデバイス)の登録画面になりますので、名前を決めて入力し、 次のステップ をクリックします。

f:id:akanuma-hiroaki:20170701133847p:plain

 作成されるモノの情報と接続キットの情報が表示されますので、 Linux/OSX をクリックして接続キットをダウンロードします。ダウンロードすると画面右下の 次のステップ ボタンが活性化しますので、クリックして次へ進みます。

f:id:akanuma-hiroaki:20170701134046p:plain

 デバイス上でのテスト手順が表示されます。

f:id:akanuma-hiroaki:20170701134441p:plain

Raspberry Pi 側からの接続操作

 ダウンロードした接続キットをscp等で Raspberry Pi 上に転送し、上記手順を実行します。

pi@raspberrypi:~/aws_iot $ ls
connect_device_package.zip
pi@raspberrypi:~/aws_iot $ 
pi@raspberrypi:~/aws_iot $ unzip connect_device_package.zip 
Archive:  connect_device_package.zip
  inflating: raspberry_pi.private.key  
  inflating: raspberry_pi.public.key  
  inflating: raspberry_pi.cert.pem   
  inflating: start.sh                
pi@raspberrypi:~/aws_iot $ 
pi@raspberrypi:~/aws_iot $ ls
connect_device_package.zip  raspberry_pi.cert.pem  raspberry_pi.private.key  raspberry_pi.public.key  start.sh
pi@raspberrypi:~/aws_iot $ 
pi@raspberrypi:~/aws_iot $ chmod +x start.sh 
pi@raspberrypi:~/aws_iot $ 
pi@raspberrypi:~/aws_iot $ ls -l
total 20
-rw-r--r-- 1 pi pi 3620 Jul  1 02:05 connect_device_package.zip
-rw-r--r-- 1 pi pi 1224 Jul  1 02:01 raspberry_pi.cert.pem
-rw-r--r-- 1 pi pi 1679 Jul  1 02:01 raspberry_pi.private.key
-rw-r--r-- 1 pi pi  451 Jul  1 02:01 raspberry_pi.public.key
-rwxr-xr-x 1 pi pi  928 Jul  1 02:01 start.sh
pi@raspberrypi:~/aws_iot $ 
pi@raspberrypi:~/aws_iot $ ./start.sh 

Downloading AWS IoT Root CA certificate from Symantec...
  % Total    % Received % Xferd  Average Speed   Time    Time     Time  Current
                                 Dload  Upload   Total   Spent    Left  Speed
100  1758  100  1758    0     0  12381      0 --:--:-- --:--:-- --:--:-- 12468

Installing AWS SDK...
Cloning into 'aws-iot-device-sdk-python'...
remote: Counting objects: 116, done.
remote: Compressing objects: 100% (19/19), done.
remote: Total 116 (delta 3), reused 15 (delta 3), pack-reused 92
Receiving objects: 100% (116/116), 117.74 KiB | 0 bytes/s, done.
Resolving deltas: 100% (35/35), done.
Checking connectivity... done.
~/aws_iot/aws-iot-device-sdk-python ~/aws_iot
running install
running build
running build_py
creating build
creating build/lib.linux-armv7l-2.7
creating build/lib.linux-armv7l-2.7/AWSIoTPythonSDK
copying AWSIoTPythonSDK/MQTTLib.py -> build/lib.linux-armv7l-2.7/AWSIoTPythonSDK
copying AWSIoTPythonSDK/__init__.py -> build/lib.linux-armv7l-2.7/AWSIoTPythonSDK
creating build/lib.linux-armv7l-2.7/AWSIoTPythonSDK/core
copying AWSIoTPythonSDK/core/__init__.py -> build/lib.linux-armv7l-2.7/AWSIoTPythonSDK/core
creating build/lib.linux-armv7l-2.7/AWSIoTPythonSDK/exception
copying AWSIoTPythonSDK/exception/operationTimeoutException.py -> build/lib.linux-armv7l-2.7/AWSIoTPythonSDK/exception
copying AWSIoTPythonSDK/exception/AWSIoTExceptions.py -> build/lib.linux-armv7l-2.7/AWSIoTPythonSDK/exception
copying AWSIoTPythonSDK/exception/operationError.py -> build/lib.linux-armv7l-2.7/AWSIoTPythonSDK/exception
copying AWSIoTPythonSDK/exception/__init__.py -> build/lib.linux-armv7l-2.7/AWSIoTPythonSDK/exception
creating build/lib.linux-armv7l-2.7/AWSIoTPythonSDK/core/shadow
copying AWSIoTPythonSDK/core/shadow/shadowManager.py -> build/lib.linux-armv7l-2.7/AWSIoTPythonSDK/core/shadow
copying AWSIoTPythonSDK/core/shadow/deviceShadow.py -> build/lib.linux-armv7l-2.7/AWSIoTPythonSDK/core/shadow
copying AWSIoTPythonSDK/core/shadow/__init__.py -> build/lib.linux-armv7l-2.7/AWSIoTPythonSDK/core/shadow
creating build/lib.linux-armv7l-2.7/AWSIoTPythonSDK/core/util
copying AWSIoTPythonSDK/core/util/sigV4Core.py -> build/lib.linux-armv7l-2.7/AWSIoTPythonSDK/core/util
copying AWSIoTPythonSDK/core/util/offlinePublishQueue.py -> build/lib.linux-armv7l-2.7/AWSIoTPythonSDK/core/util
copying AWSIoTPythonSDK/core/util/__init__.py -> build/lib.linux-armv7l-2.7/AWSIoTPythonSDK/core/util
copying AWSIoTPythonSDK/core/util/progressiveBackoffCore.py -> build/lib.linux-armv7l-2.7/AWSIoTPythonSDK/core/util
creating build/lib.linux-armv7l-2.7/AWSIoTPythonSDK/core/protocol
copying AWSIoTPythonSDK/core/protocol/__init__.py -> build/lib.linux-armv7l-2.7/AWSIoTPythonSDK/core/protocol
copying AWSIoTPythonSDK/core/protocol/mqttCore.py -> build/lib.linux-armv7l-2.7/AWSIoTPythonSDK/core/protocol
creating build/lib.linux-armv7l-2.7/AWSIoTPythonSDK/core/protocol/paho
copying AWSIoTPythonSDK/core/protocol/paho/client.py -> build/lib.linux-armv7l-2.7/AWSIoTPythonSDK/core/protocol/paho
copying AWSIoTPythonSDK/core/protocol/paho/__init__.py -> build/lib.linux-armv7l-2.7/AWSIoTPythonSDK/core/protocol/paho
creating build/lib.linux-armv7l-2.7/AWSIoTPythonSDK/core/protocol/paho/securedWebsocket
copying AWSIoTPythonSDK/core/protocol/paho/securedWebsocket/securedWebsocketCore.py -> build/lib.linux-armv7l-2.7/AWSIoTPythonSDK/core/protocol/paho/securedWebsocket
copying AWSIoTPythonSDK/core/protocol/paho/securedWebsocket/__init__.py -> build/lib.linux-armv7l-2.7/AWSIoTPythonSDK/core/protocol/paho/securedWebsocket
running install_lib
creating /usr/local/lib/python2.7/dist-packages/AWSIoTPythonSDK
error: could not create '/usr/local/lib/python2.7/dist-packages/AWSIoTPythonSDK': Permission denied
pi@raspberrypi:~/aws_iot $ 
pi@raspberrypi:~/aws_iot $ sudo ./start.sh                                                                                                                                                                                                    

Running pub/sub sample application...
Traceback (most recent call last):
  File "aws-iot-device-sdk-python/samples/basicPubSub/basicPubSub.py", line 18, in <module>
    from AWSIoTPythonSDK.MQTTLib import AWSIoTMQTTClient
ImportError: No module named AWSIoTPythonSDK.MQTTLib
pi@raspberrypi:~/aws_iot $ 

 AWSIoTPythonSDK がみつからないということなので、インストールします。

pi@raspberrypi:~/aws_iot $ sudo pip install AWSIoTPythonSDK                                                                                                                                                                                   
Downloading/unpacking AWSIoTPythonSDK
  Downloading AWSIoTPythonSDK-1.1.2.tar.gz (55kB): 55kB downloaded
  Running setup.py (path:/tmp/pip-build-06EpCW/AWSIoTPythonSDK/setup.py) egg_info for package AWSIoTPythonSDK
    
Installing collected packages: AWSIoTPythonSDK
  Running setup.py install for AWSIoTPythonSDK
    
Successfully installed AWSIoTPythonSDK
Cleaning up...
pi@raspberrypi:~/aws_iot $ 

 再度テスト用スクリプトを実行します。

pi@raspberrypi:~/aws_iot $ sudo ./start.sh                                                                                                                                                                                                    

Running pub/sub sample application...
2017-07-01 02:14:37,153 - AWSIoTPythonSDK.core.protocol.mqttCore - DEBUG - Paho MQTT Client init.
2017-07-01 02:14:37,153 - AWSIoTPythonSDK.core.protocol.mqttCore - INFO - ClientID: basicPubSub
2017-07-01 02:14:37,153 - AWSIoTPythonSDK.core.protocol.mqttCore - INFO - Protocol: MQTTv3.1.1
2017-07-01 02:14:37,154 - AWSIoTPythonSDK.core.protocol.mqttCore - DEBUG - Register Paho MQTT Client callbacks.
2017-07-01 02:14:37,154 - AWSIoTPythonSDK.core.protocol.mqttCore - DEBUG - mqttCore init.
2017-07-01 02:14:37,154 - AWSIoTPythonSDK.core.protocol.mqttCore - DEBUG - Load CAFile from: root-CA.crt
2017-07-01 02:14:37,154 - AWSIoTPythonSDK.core.protocol.mqttCore - DEBUG - Load Key from: raspberry_pi.private.key
2017-07-01 02:14:37,155 - AWSIoTPythonSDK.core.protocol.mqttCore - DEBUG - Load Cert from: raspberry_pi.cert.pem
2017-07-01 02:14:37,155 - AWSIoTPythonSDK.core.protocol.mqttCore - DEBUG - Custom setting for backoff timing: baseReconnectTime = 1 sec
2017-07-01 02:14:37,155 - AWSIoTPythonSDK.core.protocol.mqttCore - DEBUG - Custom setting for backoff timing: maximumReconnectTime = 32 sec
2017-07-01 02:14:37,155 - AWSIoTPythonSDK.core.protocol.mqttCore - DEBUG - Custom setting for backoff timing: minimumConnectTime = 20 sec
2017-07-01 02:14:37,155 - AWSIoTPythonSDK.core.protocol.mqttCore - DEBUG - Custom setting for publish queueing: queueSize = -1
2017-07-01 02:14:37,156 - AWSIoTPythonSDK.core.protocol.mqttCore - DEBUG - Custom setting for publish queueing: dropBehavior = Drop Newest
2017-07-01 02:14:37,156 - AWSIoTPythonSDK.core.protocol.mqttCore - DEBUG - Custom setting for draining interval: 0.5 sec
2017-07-01 02:14:37,156 - AWSIoTPythonSDK.core.protocol.mqttCore - DEBUG - Set maximum connect/disconnect timeout to be 10 second.
2017-07-01 02:14:37,156 - AWSIoTPythonSDK.core.protocol.mqttCore - DEBUG - Set maximum MQTT operation timeout to be 5 second
2017-07-01 02:14:37,157 - AWSIoTPythonSDK.core.protocol.mqttCore - INFO - Connection type: TLSv1.2 Mutual Authentication
2017-07-01 02:14:37,507 - AWSIoTPythonSDK.core.protocol.mqttCore - DEBUG - Connect result code 0
2017-07-01 02:14:37,510 - AWSIoTPythonSDK.core.protocol.mqttCore - INFO - Connected to AWS IoT.
2017-07-01 02:14:37,510 - AWSIoTPythonSDK.core.protocol.mqttCore - DEBUG - Connect time consumption: 70.0ms.
2017-07-01 02:14:37,511 - AWSIoTPythonSDK.core.protocol.mqttCore - DEBUG - Started a subscribe request 1
2017-07-01 02:14:37,559 - AWSIoTPythonSDK.core.protocol.mqttCore - DEBUG - _resubscribeCount: -1
2017-07-01 02:14:37,560 - AWSIoTPythonSDK.core.protocol.mqttCore - DEBUG - Subscribe request 1 sent.
2017-07-01 02:14:37,561 - AWSIoTPythonSDK.core.protocol.mqttCore - DEBUG - Subscribe request 1 succeeded. Time consumption: 50.0ms.
2017-07-01 02:14:37,562 - AWSIoTPythonSDK.core.protocol.mqttCore - DEBUG - Recover subscribe context for the next request: subscribeSent: False
2017-07-01 02:14:39,565 - AWSIoTPythonSDK.core.protocol.mqttCore - DEBUG - Try to put a publish request 2 in the TCP stack.
2017-07-01 02:14:39,566 - AWSIoTPythonSDK.core.protocol.mqttCore - DEBUG - Publish request 2 succeeded.
Received a new message: 
New Message 0
from topic: 
sdk/test/Python
--------------


2017-07-01 02:14:40,568 - AWSIoTPythonSDK.core.protocol.mqttCore - DEBUG - Try to put a publish request 3 in the TCP stack.
2017-07-01 02:14:40,569 - AWSIoTPythonSDK.core.protocol.mqttCore - DEBUG - Publish request 3 succeeded.
Received a new message: 
New Message 1
from topic: 
sdk/test/Python
--------------


2017-07-01 02:14:41,571 - AWSIoTPythonSDK.core.protocol.mqttCore - DEBUG - Try to put a publish request 4 in the TCP stack.
2017-07-01 02:14:41,572 - AWSIoTPythonSDK.core.protocol.mqttCore - DEBUG - Publish request 4 succeeded.
Received a new message: 
New Message 2
from topic: 
sdk/test/Python
--------------


2017-07-01 02:14:42,575 - AWSIoTPythonSDK.core.protocol.mqttCore - DEBUG - Try to put a publish request 5 in the TCP stack.
2017-07-01 02:14:42,576 - AWSIoTPythonSDK.core.protocol.mqttCore - DEBUG - Publish request 5 succeeded.
Received a new message: 
New Message 3
from topic: 
sdk/test/Python
--------------


2017-07-01 02:14:43,578 - AWSIoTPythonSDK.core.protocol.mqttCore - DEBUG - Try to put a publish request 6 in the TCP stack.
2017-07-01 02:14:43,579 - AWSIoTPythonSDK.core.protocol.mqttCore - DEBUG - Publish request 6 succeeded.
Received a new message: 
New Message 4
from topic: 
sdk/test/Python
--------------

 エラーなく実行され、メッセージが送信され続けているようです。コンソール側を確認すると、 デバイスからのメッセージを待機中 となっていたところが下記のように変わり、メッセージが受信されていることが確認できます。

f:id:akanuma-hiroaki:20170701134928p:plain

 上記画面の「ステップ 4: デバイスにメッセージを送信する」フォームに「Hello, IoT!!」のように入力して メッセージの送信 をクリックすると、Raspberry Pi 側でメッセージが受信され、下記のように出力されます。

Received a new message: 
Hello, IoT!!
from topic: 
sdk/test/Python

 ここまででひとまずデバイスの登録から接続の確認までは完了です。AWS IoT コンソールのダッシュボードを表示すると、下記のように処理の状況が確認できます。

f:id:akanuma-hiroaki:20170701135615p:plain

f:id:akanuma-hiroaki:20170701135628p:plain

f:id:akanuma-hiroaki:20170701135643p:plain

 テスト用のサンプルはMQTTによる接続なので、プロトコルとしてMQTTがカウントされています。

 ちなみにダッシュボードの情報を表示するには CloudWatch の表示権限が必要になります。今回はテストということで、 CloudWatchFullAccess ポリシーをアタッチしました。実際のサービス提供時は最低限の権限に絞って許可した方が良いかと思います。

 ひとまず今回は接続まででしたが、ダッシュボード上でデバイスの通信状況が確認できるというのはとても便利そうに思えました。他のAWSとの連携や、SORACOM Beamを通しての接続も簡単にできるようなので、色々と組み合わせて動かしていってみたいと思います。

D-BusからBLE Advertisementを送信する

 今まではRaspberry PiをBLEのCentralとして他のデバイスへの接続などを試していましたが、今回はPeripheralとしてAdvertisementを送信してみました。

 PythonでAdvertisementを送信している例があったので下記サイトを参考にさせてもらいました。

qiita.com

 また、BLEについての下記サイトも参考にさせてもらいました。

http://events.linuxfoundation.org/sites/events/files/slides/Doing%20Bluetooth%20Low%20Energy%20on%20Linux.pdf

インタフェースの確認と設定

 Advertisementを送信するには、 org.bluez.LEAdvertisingManager1RegisterAdvertisement() メソッドを使うようなので、まずはインタフェースを確認してみます。

irb(main):001:0> require 'dbus'
irb(main):002:0> bus = DBus::SystemBus.instance
irb(main):003:0> bluez = bus.service('org.bluez')
irb(main):004:0> adapter = bluez.object('/org/bluez/hci0')
irb(main):005:0> adapter.introspect
〜〜〜ここまでのアウトプットは省略〜〜〜
irb(main):006:0> adapter.interfaces
=> ["org.freedesktop.DBus.Introspectable", "org.bluez.Adapter1", "org.freedesktop.DBus.Properties", "org.bluez.GattManager1", "org.bluez.Media1", "org.bluez.NetworkServer1"]

 該当のインタフェースが存在していない様子。試しに bluetoothctl でも見てみます。

[bluetooth]# advertise on
LEAdvertisingManager not found

 やはりインタフェースがみつからないようです。

 BlueZのドキュメントを確認してみます。

advertising-api.txt\doc - bluez.git - Bluetooth protocol stack for Linux

Service org.bluez
Interface org.bluez.LEAdvertisingManager1 [Experimental]
Object path /org/bluez/{hci0,hci1,…}

 org.bluez.LEAdvertisingManager1 は Experimental となっているようです。

 BlueZのインストール時の内容を確認してみましたが、 --enable-experimental オプションは付けてビルドしてました。

blog.akanumahiroaki.com

 bluetoothd のプロセスを確認してみます。

pi@raspberrypi:~ $ ps aux | grep bluetoothd
root       658  0.0  0.3   4780  3280 ?        Ss   22:23   0:00 /usr/local/libexec/bluetooth/bluetoothd
pi        1122  0.0  0.2   4276  2008 pts/3    S+   22:54   0:00 grep --color=auto bluetoothd

 下記記事を参照したところ、 --experimental オプションを付けて bluetoothd を起動する必要があるようです。

blog.mrgibbs.io

 /etc/systemd/system/bluetooth.target.wants/bluetooth.service を下記のように編集します。

ExecStart=/usr/local/libexec/bluetooth/bluetoothd  
 ↓  
ExecStart=/usr/local/libexec/bluetooth/bluetoothd --experimental

 編集後にRaspberry Piを再起動して、 bluetoothd を再確認します。

pi@raspberrypi:~ $ ps aux | grep bluetoothd
root       717  0.0  0.3   4780  3248 ?        Ss   23:05   0:00 /usr/local/libexec/bluetooth/bluetoothd --experimental
pi         910  0.0  0.1   4276  1812 pts/1    S+   23:09   0:00 grep --color=auto bluetoothd

 --experimental オプション付きで bluetoothd が起動しました。 bluetoothctl で確認してみます。

[bluetooth]# advertise on
Advertising object registered
[bluetooth]# advertise off
Advertising object unregistered
Agent unregistered

 bluetoothctl でも advertise コマンドが使えるようになりました。Rubyからも確認してみます

irb(main):006:0> adapter.interfaces
=> ["org.freedesktop.DBus.Introspectable", "org.bluez.Adapter1", "org.freedesktop.DBus.Properties", "org.bluez.GattManager1", "org.bluez.Media1", "org.bluez.NetworkServer1", "org.bluez.LEAdvertisingManager1"]

 org.bluez.LEAdvertisingManager1 インタフェースが追加されました。

Advertisementの送信(bluetoothctl)

 bluetoothctl でPeripheralとしてAdvertisementを送信してみます。

pi@raspberrypi:~ $ sudo bluetoothctl
[bluetooth]# advertise peripheral
Advertising object registered

 上記実行時のHCIの動作を hcidump で確認すると下記のようになりました。

pi@raspberrypi:~ $ sudo hcidump -i hci0
HCI sniffer - Bluetooth packet analyzer ver 5.23
device: hci0 snap_len: 1500 filter: 0xffffffff
< HCI Command: LE Set Advertising Parameters (0x08|0x0006) plen 15
    min 1280.000ms, max 1280.000ms
    type 0x00 (ADV_IND - Connectable undirected advertising) ownbdaddr 0x00 (Public)
    directbdaddr 0x00 (Public) 00:00:00:00:00:00
    channelmap 0x07 filterpolicy 0x00 (Allow scan from any, connection from any)
> HCI Event: Command Complete (0x0e) plen 4
    LE Set Advertising Parameters (0x08|0x0006) ncmd 1
    status 0x00
< HCI Command: LE Set Advertise Enable (0x08|0x000a) plen 1
> HCI Event: Command Complete (0x0e) plen 4
    LE Set Advertise Enable (0x08|0x000a) ncmd 1
    status 0x00

 PeripheralとしてAdvertisementを送信しているので、 ADV_IND - Connectable undirected advertising となっており、他のデバイスからの接続が可能なタイプのAdvertisementになっていることがわかります。

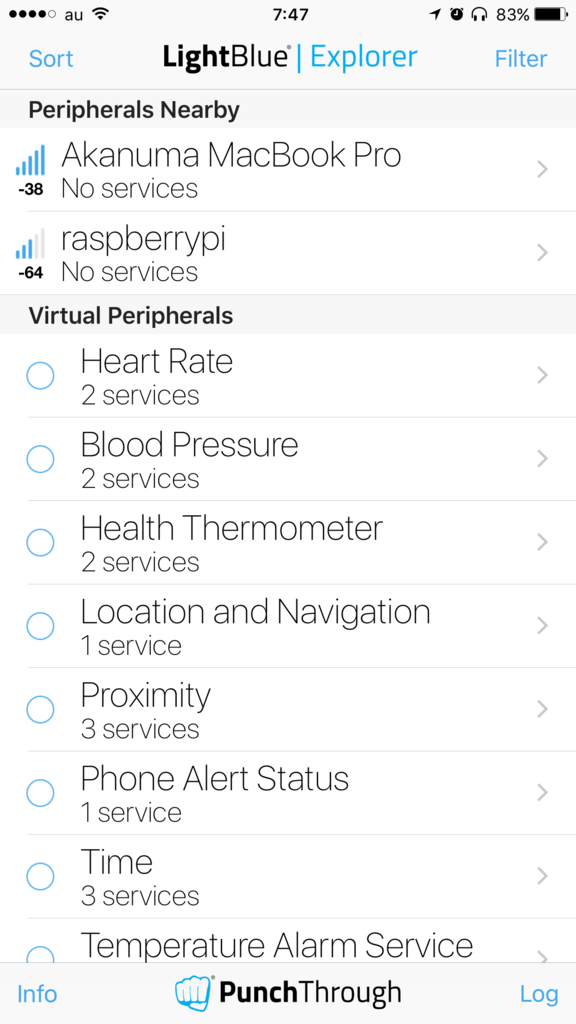
 ではLightBlueから接続してみます。

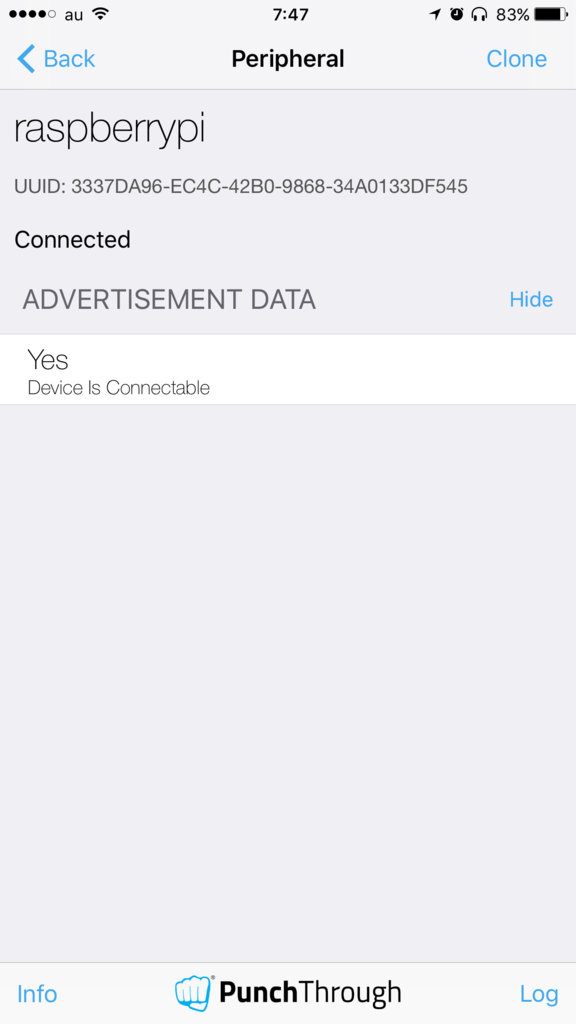
f:id:akanuma-hiroaki:20170621074917p:plain:w300 f:id:akanuma-hiroaki:20170621074923p:plain:w300

 デバイスの一覧に raspberrypi が表示され、タップして接続することができました。

 次にBroadcastで送信してみます。

[bluetooth]# advertise broadcast
Advertising object registered

 hcidump での出力は下記の通り。

< HCI Command: LE Set Advertising Data (0x08|0x0008) plen 32
> HCI Event: Command Complete (0x0e) plen 4
    LE Set Advertising Data (0x08|0x0008) ncmd 1
    status 0x00
< HCI Command: LE Set Random Address (0x08|0x0005) plen 6
    bdaddr 32:DC:0C:A9:69:2B
> HCI Event: Command Complete (0x0e) plen 4
    LE Set Random Address (0x08|0x0005) ncmd 1
    status 0x00
< HCI Command: LE Set Advertising Parameters (0x08|0x0006) plen 15
    min 1280.000ms, max 1280.000ms
    type 0x03 (ADV_NONCONN_IND - Non connectable undirected advertising) ownbdaddr 0x01 (Random)
    directbdaddr 0x00 (Public) 00:00:00:00:00:00
    channelmap 0x07 filterpolicy 0x00 (Allow scan from any, connection from any)
> HCI Event: Command Complete (0x0e) plen 4
    LE Set Advertising Parameters (0x08|0x0006) ncmd 1
    status 0x00
< HCI Command: LE Set Advertise Enable (0x08|0x000a) plen 1
> HCI Event: Command Complete (0x0e) plen 4
    LE Set Advertise Enable (0x08|0x000a) ncmd 1
    status 0x00

 今度は ADV_NONCONN_IND - Non connectable undirected advertising となっており、他のデバイスからの接続はできない(Advertisementパケットの参照だけできる)タイプのAdvertisementになっていることがわかります。

 とりあえず bluetoothctl からAdvertisementを送信して他のデバイスから検知することができましたが、Rubyから送信することにはかなり調べたもののまだ成功していないので、今後実現していきたいと思います。

D-BusからBLEデバイスのNotificationを受け取る

 前回の記事で、Raspberry Pi上でRuby(irb)からD-Busを使ってBLEデバイスに接続し、値を読み取るというところまでやりましたが、今回はPeripheralからのNotificationを受け取って値の変化を検知するところまでを実装してみました。前回はirbから試してみましたが、今回はスクリプトにまとめてあります。また、対象のBLEデバイスは前回同様にLightBlueで擬似Peripheralデバイスを作成して使用しています。

スクリプト全体

 まずはスクリプト全体を掲載しておきます。

require 'bundler/setup'
require 'dbus'

SERVICE_PATH = '/org/bluez'
ADAPTER      = 'hci0'

DEVICE_IF         = 'org.bluez.Device1'
SERVICE_IF        = 'org.bluez.GattService1'
CHARACTERISTIC_IF = 'org.bluez.GattCharacteristic1'
PROPERTIES_IF     = 'org.freedesktop.DBus.Properties'

HEARTRATE_SERVICE_UUID = '0000180d-0000-1000-8000-00805f9b34fb'
HEARTRATE_UUID         = '00002a37-0000-1000-8000-00805f9b34fb'

log = Logger.new('ble_notification.log')

bus = DBus::SystemBus.instance
bluez = bus.service('org.bluez')

adapter = bluez.object("#{SERVICE_PATH}/#{ADAPTER}")
adapter.introspect
puts 'Discoverying Nodes...'
adapter.StartDiscovery
sleep(10)

nodes = adapter.subnodes
connected_device = nil

begin
  nodes.each do |node|
    device = bluez.object("#{SERVICE_PATH}/#{ADAPTER}/#{node}")
    device.introspect

    properties = device.GetAll(DEVICE_IF)[0]
    name    = properties['Name']
    address = properties['Address']
    rssi    = properties['RSSI']

    next if name.nil? || rssi.nil?
    next unless name.downcase.include?('heart rate')

    puts "Connecting to the device: #{address} #{name} RSSI:#{properties['RSSI']}"
    begin
      device.Connect
      puts 'Connected. Resolving Services...'
      device.introspect

      while !properties['ServicesResolved'] do
        sleep(0.5)
        device.introspect
        properties = device.GetAll(DEVICE_IF)[0]
      end
      puts 'Resolved.'

      connected_device = device
      break
    rescue => e
      puts e
    end
  end

  raise 'No device connected.' if connected_device.nil?

  heartrate_service = nil
  nodes = connected_device.subnodes
  nodes.each do |node|
    service = bluez.object("#{connected_device.path}/#{node}")
    service.introspect

    properties = service.GetAll(SERVICE_IF)[0]
    uuid = properties['UUID']

    next unless uuid == HEARTRATE_SERVICE_UUID

    heartrate_service = service
  end

  nodes = heartrate_service.subnodes
  nodes.each do |node|
    characteristic = bluez.object("#{heartrate_service.path}/#{node}")
    characteristic.introspect

    properties = characteristic.GetAll(CHARACTERISTIC_IF)[0]
    uuid = properties['UUID']

    next unless uuid == HEARTRATE_UUID

    characteristic.StartNotify
    characteristic.default_iface = PROPERTIES_IF
    characteristic.on_signal('PropertiesChanged') do |_, v|
      log.info("#{heartrate_service.path.split('/')[4]} #{v}")
    end
  end

  main = DBus::Main.new
  main << bus

  puts 'Monitoring Heart Rate...'
  main.run
rescue Interrupt => e
  puts e
  puts "Interrupted."
rescue => e
  puts e
ensure
  connected_device.Disconnect unless connected_device.nil?
  adapter.StopDiscovery
end

 それでは各パートごとに説明していきます。

Peripheralへの接続

 まずはBluetoothアダプタのDiscoveryModeをONにし、BLEデバイスを検索します。今回はとりあえず10秒間は検索のために待機しています。

bus = DBus::SystemBus.instance
bluez = bus.service('org.bluez')

adapter = bluez.object("#{SERVICE_PATH}/#{ADAPTER}")
adapter.introspect
puts 'Discoverying Nodes...'
adapter.StartDiscovery
sleep(10)

nodes = adapter.subnodes

 そして見つかった各デバイスのデバイス名を確認して、対象のデバイスであれば接続します。そして配下のGATTサービスが検知されて ServicesResolved のプロパティがtrueになるのを待ってから次の処理に進みます。

nodes.each do |node|
  device = bluez.object("#{SERVICE_PATH}/#{ADAPTER}/#{node}")
  device.introspect

  properties = device.GetAll(DEVICE_IF)[0]
  name    = properties['Name']
  address = properties['Address']
  rssi    = properties['RSSI']

  next if name.nil? || rssi.nil?
  next unless name.downcase.include?('heart rate')

  puts "Connecting to the device: #{address} #{name} RSSI:#{properties['RSSI']}"
  begin
    device.Connect
    puts 'Connected. Resolving Services...'
    device.introspect

    while !properties['ServicesResolved'] do
      sleep(0.5)
      device.introspect
      properties = device.GetAll(DEVICE_IF)[0]
    end
    puts 'Resolved.'

    connected_device = device
    break
  rescue => e
    puts e
  end
end

GATTサービスの取得

 次にデバイス配下の各サービスのUUIDを確認し、今回対象とするUUIDを持つサービスを取得します。

nodes = connected_device.subnodes
nodes.each do |node|
  service = bluez.object("#{connected_device.path}/#{node}")
  service.introspect

  properties = service.GetAll(SERVICE_IF)[0]
  uuid = properties['UUID']

  next unless uuid == HEARTRATE_SERVICE_UUID

  heartrate_service = service
end

GATTキャラクタリスティックの取得とシグナル検知時のコールバック設定

 サービス配下の各キャラクタリスティックのUUIDを確認し、今回対象とするUUIDを持つキャラクタリスティックを特定したら、Peripheralからのシグナルを検知して処理を行うためのコールバックの設定を行います。

nodes = heartrate_service.subnodes
nodes.each do |node|
  characteristic = bluez.object("#{heartrate_service.path}/#{node}")
  characteristic.introspect

  properties = characteristic.GetAll(CHARACTERISTIC_IF)[0]
  uuid = properties['UUID']

  next unless uuid == HEARTRATE_UUID

  characteristic.StartNotify
  characteristic.default_iface = PROPERTIES_IF
  characteristic.on_signal('PropertiesChanged') do |_, v|
    log.info("#{heartrate_service.path.split('/')[4]} #{v}")
  end
end

 上記のコールバック設定部分については、まず StartNotify メソッドでPeripheralからのシグナルの送信を開始しています。

characteristic.StartNotify

 そして on_signal メソッドでシグナル検知時のコールバックを指定するのですが、検知対象のインタフェースはデフォルトインタフェースになるので、先に default_iface メソッドでデフォルトインタフェースを指定しておきます。値の変更は D-Bus の org.freedesktop.DBus.Properties インタフェースで検知します。

characteristic.default_iface = PROPERTIES_IF

 シグナルとしては PropertiesChanged シグナルになりますので、 on_signal メソッドでシグナルを指定してコールバックを設定します。今回は検知時の処理としてはデバイスのアドレスと値をログに出力しています。

characteristic.on_signal('PropertiesChanged') do |_, v|
  log.info("#{heartrate_service.path.split('/')[4]} #{v}")
end

非同期処理の開始

 そして最後にイベントループでの非同期処理を開始します。

  main = DBus::Main.new
  main << bus
  main.run

 これでPeripheral側からシグナルが送信されると、下記のようにログに出力されるようになります。

I, [2017-06-14T18:40:31.151687 #3589]  INFO -- : dev_7C_12_A1_23_8C_21 {"Value"=>[0, 60]}
I, [2017-06-14T18:40:32.163818 #3589]  INFO -- : dev_7C_12_A1_23_8C_21 {"Value"=>[0, 60]}
I, [2017-06-14T18:40:33.110175 #3589]  INFO -- : dev_7C_12_A1_23_8C_21 {"Value"=>[0, 60]}
I, [2017-06-14T18:40:34.121697 #3589]  INFO -- : dev_7C_12_A1_23_8C_21 {"Value"=>[0, 80]}
I, [2017-06-14T18:40:35.134417 #3589]  INFO -- : dev_7C_12_A1_23_8C_21 {"Value"=>[0, 80]}
I, [2017-06-14T18:40:36.146261 #3589]  INFO -- : dev_7C_12_A1_23_8C_21 {"Value"=>[0, 80]}
I, [2017-06-14T18:40:37.159118 #3589]  INFO -- : dev_7C_12_A1_23_8C_21 {"Value"=>[0, 100]}
I, [2017-06-14T18:40:38.103964 #3589]  INFO -- : dev_7C_12_A1_23_8C_21 {"Value"=>[0, 100]}
I, [2017-06-14T18:40:39.184016 #3589]  INFO -- : dev_7C_12_A1_23_8C_21 {"Value"=>[0, 100]}

Raspberry Pi 3でD-BusからBLEデバイスにアクセスする

 Raspberry PiからBLEデバイスへの接続についていろいろ調べている中でD-Busについても調べたので、D-BusからBlueZを使ってBLEデバイスにアクセスしてみました。D-Busについては下記サイトでわかりやすく解説されていて、とても参考になりました。

www.silex.jp

 D-Busについての詳細は上記サイトを参照いただくとしてここでは割愛しますが、すごくざっくり言うと、コンピュータ上の複数のプログラム間で情報のやり取りをするためのIPC(Inter Process Communication)で、オブジェクト(プログラム)間でメッセージ(データ)を届けるためのものです。BlueZもD-Busのサービスの一つとして登録されるので、D-BusからBlueZを使用してBLEデバイスに接続することができます。

 また、下記資料も参考にさせていただきました。

Bluetooth on modern Linux
http://events.linuxfoundation.org/sites/events/files/slides/Bluetooth%20on%20Modern%20Linux_0.pdf

 接続対象のBLEデバイスとしては、LightBlueというアプリでiPhoneを擬似BLEデバイスとして使用してみました。

LightBlue Explorer - Bluetooth Low Energy

LightBlue Explorer - Bluetooth Low Energy

  • Punch Through
  • ユーティリティ
  • 無料

 いろいろな種類の擬似Peripheralを作成できるので、今回はHeart Rateを作成して使用してみます。Body Sensor Locationキャラクタリスティックを読み書きすることを目標とします。

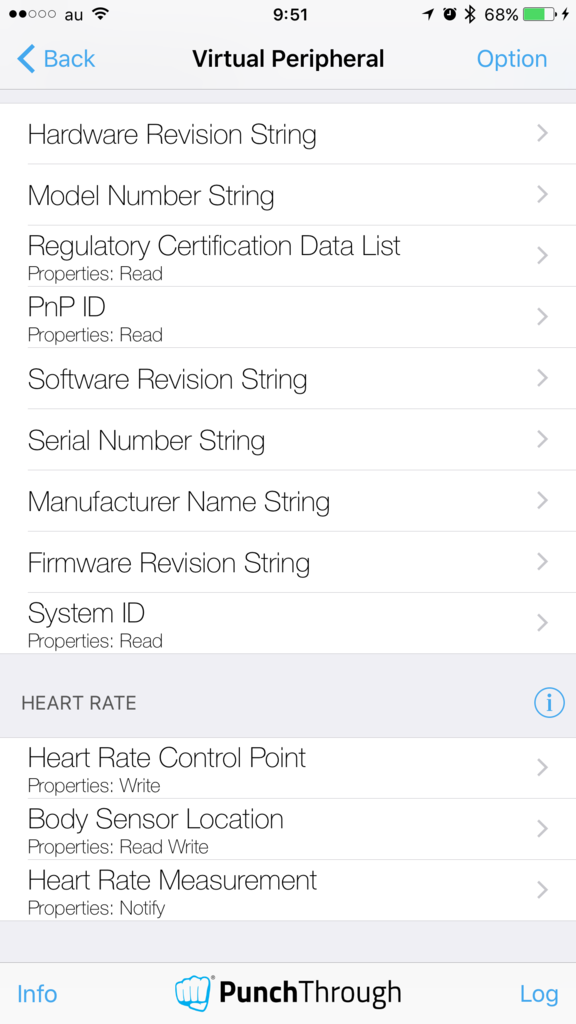
f:id:akanuma-hiroaki:20170610095856p:plain:w300 f:id:akanuma-hiroaki:20170610095902p:plain:w300

コマンドラインからD-Busを操作する

 Linux上でD-Busを操作するには dbus-send というコマンドを使います。

dbus-send
https://dbus.freedesktop.org/doc/dbus-send.1.html

 まずはD-Busにどんなサービスが登録されているかを確認してみます。

pi@raspberrypi:~ $ sudo dbus-send --print-reply --system --dest=org.freedesktop.DBus / --type=method_call org.freedesktop.DBus.ListNames                                                                                                      
method return sender=org.freedesktop.DBus -> dest=:1.6 reply_serial=2
   array [
      string "org.freedesktop.DBus"
      string ":1.3"
      string "org.freedesktop.login1"
      string "org.freedesktop.systemd1"
      string "org.freedesktop.Avahi"
      string ":1.0"
      string ":1.5"
      string "org.bluez"
      string ":1.1"
      string ":1.6"
      string ":1.2"
   ]

 サービス名は慣習としてサービスの開発元のドメイン名が使われます。サービス登録時にはサービス名を明示しなくても登録できますが、その場合には上記の string ":1.3" のようにD-Busサーバが適当に生成した数字が使われます。

 上記の結果の中の string "org.bluez" がBlueZのサービス名になります。BlueZのサービスが持つオブジェクトのリストを表示してみます。 --dest オプションで対象のサービスを指定し、引数として対象の階層を指定します。今回はサービス配下のトップレベルのオブジェクトのリストを表示するために引数として / を指定します。また、オブジェクトのリストを表示するためのメソッドは org.freedesktop.DBus.Introspectable.Introspect ですので、 --type オプションで method_call を指定し、引数にメソッド名を渡します。

pi@raspberrypi:~ $ sudo dbus-send --print-reply --system --dest=org.bluez / --type=method_call org.freedesktop.DBus.Introspectable.Introspect
method return sender=:1.3 -> dest=:1.7 reply_serial=2
   string "<!DOCTYPE node PUBLIC "-//freedesktop//DTD D-BUS Object Introspection 1.0//EN"
"http://www.freedesktop.org/standards/dbus/1.0/introspect.dtd">
<node><interface name="org.freedesktop.DBus.Introspectable"><method name="Introspect"><arg name="xml" type="s" direction="out"/>
</method></interface><interface name="org.freedesktop.DBus.ObjectManager"><method name="GetManagedObjects"><arg name="objects" type="a{oa{sa{sv}}}" direction="out"/>
</method><signal name="InterfacesAdded"><arg name="object" type="o"/>
<arg name="interfaces" type="a{sa{sv}}"/>
</signal>
<signal name="InterfacesRemoved"><arg name="object" type="o"/>
<arg name="interfaces" type="as"/>
</signal>
</interface><node name="org"/></node>"

 上記のように結果はXMLで出力されます。 <node name="org"/> とあることから、トップレベルのパスの配下に org というパスがあることがわかりますので、そこを掘り下げてみます。 --dest オプションの引数に /org を指定します。

pi@raspberrypi:~ $ sudo dbus-send --print-reply --system --dest=org.bluez /org --type=method_call org.freedesktop.DBus.Introspectable.Introspect                                                                                              
method return sender=:1.3 -> dest=:1.8 reply_serial=2
   string "<!DOCTYPE node PUBLIC "-//freedesktop//DTD D-BUS Object Introspection 1.0//EN"
"http://www.freedesktop.org/standards/dbus/1.0/introspect.dtd">
<node>
  <node name="bluez"/>
</node>
"

 するとさらに <node name="bluez"/> となって /org/bluez というパスがあることがわかるのでさらに掘り下げます。

pi@raspberrypi:~ $ sudo dbus-send --print-reply --system --dest=org.bluez /org/bluez --type=method_call org.freedesktop.DBus.Introspectable.Introspect                                                                                        
method return sender=:1.3 -> dest=:1.9 reply_serial=2
   string "<!DOCTYPE node PUBLIC "-//freedesktop//DTD D-BUS Object Introspection 1.0//EN"
"http://www.freedesktop.org/standards/dbus/1.0/introspect.dtd">
<node><interface name="org.freedesktop.DBus.Introspectable"><method name="Introspect"><arg name="xml" type="s" direction="out"/>
</method></interface><interface name="org.bluez.AgentManager1"><method name="RegisterAgent"><arg name="agent" type="o" direction="in"/>
<arg name="capability" type="s" direction="in"/>
</method><method name="UnregisterAgent"><arg name="agent" type="o" direction="in"/>
</method><method name="RequestDefaultAgent"><arg name="agent" type="o" direction="in"/>
</method></interface><interface name="org.bluez.ProfileManager1"><method name="RegisterProfile"><arg name="profile" type="o" direction="in"/>
<arg name="UUID" type="s" direction="in"/>
<arg name="options" type="a{sv}" direction="in"/>
</method><method name="UnregisterProfile"><arg name="profile" type="o" direction="in"/>
</method></interface><node name="hci0"/></node>"

 さらに <node name="hci0"/> となって、 /org/bluez/hci0 というパスがあることがわかります。 hci0 はBluetoothアダプタになりますので、複数のBluetoothアダプタがある場合は末尾の数字が連番になっていきます。さらに掘り下げてこのBluetoothアダプタが持っているオブジェクトのリストを表示します。

pi@raspberrypi:~ $ sudo dbus-send --print-reply --system --dest=org.bluez /org/bluez/hci0 --type=method_call org.freedesktop.DBus.Introspectable.Introspect                                                                                   
method return sender=:1.3 -> dest=:1.10 reply_serial=2
   string "<!DOCTYPE node PUBLIC "-//freedesktop//DTD D-BUS Object Introspection 1.0//EN"
"http://www.freedesktop.org/standards/dbus/1.0/introspect.dtd">
<node><interface name="org.freedesktop.DBus.Introspectable"><method name="Introspect"><arg name="xml" type="s" direction="out"/>
</method></interface><interface name="org.bluez.Adapter1"><method name="StartDiscovery"></method><method name="SetDiscoveryFilter"><arg name="properties" type="a{sv}" direction="in"/>
</method><method name="StopDiscovery"></method><method name="RemoveDevice"><arg name="device" type="o" direction="in"/>
</method><property name="Address" type="s" access="read"></property><property name="Name" type="s" access="read"></property><property name="Alias" type="s" access="readwrite"></property><property name="Class" type="u" access="read"></prop
erty><property name="Powered" type="b" access="readwrite"></property><property name="Discoverable" type="b" access="readwrite"></property><property name="DiscoverableTimeout" type="u" access="readwrite"></property><property name="Pairable
" type="b" access="readwrite"></property><property name="PairableTimeout" type="u" access="readwrite"></property><property name="Discovering" type="b" access="read"></property><property name="UUIDs" type="as" access="read"></property><pro
perty name="Modalias" type="s" access="read"></property></interface><interface name="org.freedesktop.DBus.Properties"><method name="Get"><arg name="interface" type="s" direction="in"/>
<arg name="name" type="s" direction="in"/>
<arg name="value" type="v" direction="out"/>
</method><method name="Set"><arg name="interface" type="s" direction="in"/>
<arg name="name" type="s" direction="in"/>
<arg name="value" type="v" direction="in"/>
</method><method name="GetAll"><arg name="interface" type="s" direction="in"/>
<arg name="properties" type="a{sv}" direction="out"/>
</method><signal name="PropertiesChanged"><arg name="interface" type="s"/>
<arg name="changed_properties" type="a{sv}"/>
<arg name="invalidated_properties" type="as"/>
</signal>
</interface><interface name="org.bluez.GattManager1"><method name="RegisterApplication"><arg name="application" type="o" direction="in"/>
<arg name="options" type="a{sv}" direction="in"/>
</method><method name="UnregisterApplication"><arg name="application" type="o" direction="in"/>
</method></interface><interface name="org.bluez.Media1"><method name="RegisterEndpoint"><arg name="endpoint" type="o" direction="in"/>
<arg name="properties" type="a{sv}" direction="in"/>
</method><method name="UnregisterEndpoint"><arg name="endpoint" type="o" direction="in"/>
</method><method name="RegisterPlayer"><arg name="player" type="o" direction="in"/>
<arg name="properties" type="a{sv}" direction="in"/>
</method><method name="UnregisterPlayer"><arg name="player" type="o" direction="in"/>
</method></interface><interface name="org.bluez.NetworkServer1"><method name="Register"><arg name="uuid" type="s" direction="in"/>
<arg name="bridge" type="s" direction="in"/>
</method><method name="Unregister"><arg name="uuid" type="s" direction="in"/>
</method></interface><node name="dev_49_25_2A_9A_90_44"/><node name="dev_43_19_24_21_00_5F"/><node name="dev_88_4A_EA_8A_3F_2B"/><node name="dev_FC_E9_98_21_23_B7"/></node>"

  <node name="dev_49_25_2A_9A_90_44"/> のようにこのBluetoothアダプタに検知されているBLEデバイスが表示されています。デバイスの情報を見る前にこのBluetoothアダプタのプロパティの一覧を表示してみます。プロパティ表示用のメソッドは org.freedesktop.DBus.Properties.GetAll で、引数にBlueZのインタフェース名を指定します。先ほどのIntrospectの結果に <interface name="org.bluez.Adapter1"> という内容が含まれていて、 org.bluez.Adapter1 というインタフェースがあることがわかりますので、これを指定します。

pi@raspberrypi:~ $ sudo dbus-send --print-reply --system --dest=org.bluez /org/bluez/hci0 --type=method_call org.freedesktop.DBus.Properties.GetAll string:org.bluez.Adapter1
method return sender=:1.3 -> dest=:1.11 reply_serial=2
   array [
      dict entry(
         string "Address"
         variant             string "B8:27:EB:19:76:07"
      )
      dict entry(
         string "Name"
         variant             string "raspberrypi"
      )
      dict entry(
         string "Alias"
         variant             string "raspberrypi"
      )
      dict entry(
         string "Class"
         variant             uint32 0
      )
      dict entry(
         string "Powered"
         variant             boolean true
      )
      dict entry(
         string "Discoverable"
         variant             boolean false
      )
      dict entry(
         string "DiscoverableTimeout"
         variant             uint32 180
      )
      dict entry(
         string "Pairable"
         variant             boolean true
      )
      dict entry(
         string "PairableTimeout"
         variant             uint32 0
      )
      dict entry(
         string "Discovering"
         variant             boolean false
      )
      dict entry(
         string "UUIDs"
         variant             array [
               string "00001801-0000-1000-8000-00805f9b34fb"
               string "0000110e-0000-1000-8000-00805f9b34fb"
               string "00001200-0000-1000-8000-00805f9b34fb"
               string "00001800-0000-1000-8000-00805f9b34fb"
               string "0000110c-0000-1000-8000-00805f9b34fb"
            ]
      )
      dict entry(
         string "Modalias"
         variant             string "usb:v1D6Bp0246d052D"
      )
   ]

 MACアドレスや、デバイスのスキャンを行なっているか(Discovering)といった情報が確認できます。

 それではhci0配下のデバイスの情報を見てみます。 --dest オプションの引数のパスにデバイスを追加します。

pi@raspberrypi:~ $ sudo dbus-send --print-reply --system --dest=org.bluez /org/bluez/hci0/dev_49_25_2A_9A_90_44 --type=method_call org.freedesktop.DBus.Introspectable.Introspect
method return sender=:1.3 -> dest=:1.9 reply_serial=2
   string "<!DOCTYPE node PUBLIC "-//freedesktop//DTD D-BUS Object Introspection 1.0//EN"
"http://www.freedesktop.org/standards/dbus/1.0/introspect.dtd">
<node><interface name="org.freedesktop.DBus.Introspectable"><method name="Introspect"><arg name="xml" type="s" direction="out"/>
</method></interface><interface name="org.bluez.Device1"><method name="Disconnect"></method><method name="Connect"></method><method name="ConnectProfile"><arg name="UUID" type="s" direction="in"/>
</method><method name="DisconnectProfile"><arg name="UUID" type="s" direction="in"/>
</method><method name="Pair"></method><method name="CancelPairing"></method><property name="Address" type="s" access="read"></property><property name="Name" type="s" access="read"></property><property name="Alias" type="s" access="readwrite"></property><property name="Class" type="u" access="read"></property><property name="Appearance" type="q" access="read"></property><property name="Icon" type="s" access="read"></property><property name="Paired" type="b" access="read"></property><property name="Trusted" type="b" access="readwrite"></property><property name="Blocked" type="b" access="readwrite"></property><property name="LegacyPairing" type="b" access="read"></property><property name="RSSI" type="n" access="read"></property><property name="Connected" type="b" access="read"></property><property name="UUIDs" type="as" access="read"></property><property name="Modalias" type="s" access="read"></property><property name="Adapter" type="o" access="read"></property><property name="ManufacturerData" type="a{qv}" access="read"></property><property name="ServiceData" type="a{sv}" access="read"></property><property name="TxPower" type="n" access="read"></property><property name="ServicesResolved" type="b" access="read"></property></interface><interface name="org.freedesktop.DBus.Properties"><method name="Get"><arg name="interface" type="s" direction="in"/>
<arg name="name" type="s" direction="in"/>
<arg name="value" type="v" direction="out"/>
</method><method name="Set"><arg name="interface" type="s" direction="in"/>
<arg name="name" type="s" direction="in"/>
<arg name="value" type="v" direction="in"/>
</method><method name="GetAll"><arg name="interface" type="s" direction="in"/>
<arg name="properties" type="a{sv}" direction="out"/>
</method><signal name="PropertiesChanged"><arg name="interface" type="s"/>
<arg name="changed_properties" type="a{sv}"/>
<arg name="invalidated_properties" type="as"/>
</signal>
</interface></node>"

 そしてこのデバイスに接続します。

pi@raspberrypi:~ $ sudo dbus-send --print-reply --system --dest=org.bluez /org/bluez/hci0/dev_49_25_2A_9A_90_44 --type=method_call org.bluez.Device1.Connect
method return sender=:1.3 -> dest=:1.14 reply_serial=2

 そして再度オブジェクトのリストを表示してみます。

pi@raspberrypi:~ $ sudo dbus-send --print-reply --system --dest=org.bluez /org/bluez/hci0/dev_49_25_2A_9A_90_44 --type=method_call org.freedesktop.DBus.Introspectable.Introspect
method return sender=:1.3 -> dest=:1.16 reply_serial=2
   string "<!DOCTYPE node PUBLIC "-//freedesktop//DTD D-BUS Object Introspection 1.0//EN"
"http://www.freedesktop.org/standards/dbus/1.0/introspect.dtd">
<node><interface name="org.freedesktop.DBus.Introspectable"><method name="Introspect"><arg name="xml" type="s" direction="out"/>
</method></interface><interface name="org.bluez.Device1"><method name="Disconnect"></method><method name="Connect"></method><method name="ConnectProfile"><arg name="UUID" type="s" direction="in"/>
</method><method name="DisconnectProfile"><arg name="UUID" type="s" direction="in"/>
</method><method name="Pair"></method><method name="CancelPairing"></method><property name="Address" type="s" access="read"></property><property name="Name" type="s" access="read"></property><property name="Alias" type="s" access="readwrite"></property><property name="Class" type="u" access="read"></property><property name="Appearance" type="q" access="read"></property><property name="Icon" type="s" access="read"></property><property name="Paired" type="b" access="read"></property><property name="Trusted" type="b" access="readwrite"></property><property name="Blocked" type="b" access="readwrite"></property><property name="LegacyPairing" type="b" access="read"></property><property name="RSSI" type="n" access="read"></property><property name="Connected" type="b" access="read"></property><property name="UUIDs" type="as" access="read"></property><property name="Modalias" type="s" access="read"></property><property name="Adapter" type="o" access="read"></property><property name="ManufacturerData" type="a{qv}" access="read"></property><property name="ServiceData" type="a{sv}" access="read"></property><property name="TxPower" type="n" access="read"></property><property name="ServicesResolved" type="b" access="read"></property></interface><interface name="org.freedesktop.DBus.Properties"><method name="Get"><arg name="interface" type="s" direction="in"/>
<arg name="name" type="s" direction="in"/>
<arg name="value" type="v" direction="out"/>
</method><method name="Set"><arg name="interface" type="s" direction="in"/>
<arg name="name" type="s" direction="in"/>
<arg name="value" type="v" direction="in"/>
</method><method name="GetAll"><arg name="interface" type="s" direction="in"/>
<arg name="properties" type="a{sv}" direction="out"/>
</method><signal name="PropertiesChanged"><arg name="interface" type="s"/>
<arg name="changed_properties" type="a{sv}"/>
<arg name="invalidated_properties" type="as"/>
</signal>
</interface><node name="service0006"/><node name="service000a"/><node name="service000e"/><node name="service0014"/><node name="service0019"/><node name="service0023"/><node name="service002f"/><node name="service0034"/><node name="service0039"/><node name="service004c"/></node>"

 接続前は表示されていなかった、 <node name="service0006"/> などのBLEサービスの情報が表示されているのがわかります。また、 org.bluez.Device1 というインタフェースがあることがわかります。

 デバイスのプロパティも確認してみます。

pi@raspberrypi:~ $ sudo dbus-send --print-reply --system --dest=org.bluez /org/bluez/hci0/dev_49_25_2A_9A_90_44 --type=method_call org.freedesktop.DBus.Properties.GetAll string:org.bluez.Device1
method return sender=:1.3 -> dest=:1.27 reply_serial=2
   array [
      dict entry(
         string "Address"
         variant             string "49:25:2A:9A:90:44"
      )
      dict entry(
         string "Name"
         variant             string "iPhone"
      )
      dict entry(
         string "Alias"
         variant             string "iPhone"
      )
      dict entry(
         string "Appearance"
         variant             uint16 64
      )
      dict entry(
         string "Icon"
         variant             string "phone"
      )
      dict entry(
         string "Paired"
         variant             boolean false
      )
      dict entry(
         string "Trusted"
         variant             boolean false
      )
      dict entry(
         string "Blocked"
         variant             boolean false
      )
      dict entry(
         string "LegacyPairing"
         variant             boolean false
      )
      dict entry(
         string "RSSI"
         variant             int16 -44
      )
      dict entry(
         string "Connected"
         variant             boolean true
      )
      dict entry(
         string "UUIDs"
         variant             array [
               string "00001800-0000-1000-8000-00805f9b34fb"
               string "00001801-0000-1000-8000-00805f9b34fb"
               string "00001805-0000-1000-8000-00805f9b34fb"
               string "0000180a-0000-1000-8000-00805f9b34fb"
               string "0000180d-0000-1000-8000-00805f9b34fb"
               string "0000180f-0000-1000-8000-00805f9b34fb"
               string "7905f431-b5ce-4e99-a40f-4b1e122d00d0"
               string "89d3502b-0f36-433a-8ef4-c502ad55f8dc"
               string "9fa480e0-4967-4542-9390-d343dc5d04ae"
               string "d0611e78-bbb4-4591-a5f8-487910ae4366"
            ]
      )
      dict entry(
         string "Adapter"
         variant             object path "/org/bluez/hci0"
      )
      dict entry(
         string "ServicesResolved"
         variant             boolean true
      )
   ]

 MACアドレスやデバイス名などが確認できます。

 続けてデバイス配下のBLEサービスの情報を参照してみます。

pi@raspberrypi:~ $ sudo dbus-send --print-reply --system --dest=org.bluez /org/bluez/hci0/dev_49_25_2A_9A_90_44/service004c --type=method_call org.freedesktop.DBus.Introspectable.Introspect
method return sender=:1.3 -> dest=:1.43 reply_serial=2
   string "<!DOCTYPE node PUBLIC "-//freedesktop//DTD D-BUS Object Introspection 1.0//EN"
"http://www.freedesktop.org/standards/dbus/1.0/introspect.dtd">
<node><interface name="org.freedesktop.DBus.Introspectable"><method name="Introspect"><arg name="xml" type="s" direction="out"/>
</method></interface><interface name="org.bluez.GattService1"><property name="UUID" type="s" access="read"></property><property name="Device" type="o" access="read"></property><property name="Primary" type="b" access="read"></property><property name="Includes" type="ao" access="read"></property></interface><interface name="org.freedesktop.DBus.Properties"><method name="Get"><arg name="interface" type="s" direction="in"/>
<arg name="name" type="s" direction="in"/>
<arg name="value" type="v" direction="out"/>
</method><method name="Set"><arg name="interface" type="s" direction="in"/>
<arg name="name" type="s" direction="in"/>
<arg name="value" type="v" direction="in"/>
</method><method name="GetAll"><arg name="interface" type="s" direction="in"/>
<arg name="properties" type="a{sv}" direction="out"/>
</method><signal name="PropertiesChanged"><arg name="interface" type="s"/>
<arg name="changed_properties" type="a{sv}"/>
<arg name="invalidated_properties" type="as"/>
</signal>
</interface><node name="char004d"/><node name="char0050"/><node name="char0052"/></node>"

 string:org.bluez.GattService1 というインタフェースがあることがわかりますのでプロパティを参照してみます。

pi@raspberrypi:~ $ sudo dbus-send --print-reply --system --dest=org.bluez /org/bluez/hci0/dev_49_25_2A_9A_90_44/service004c --type=method_call org.freedesktop.DBus.Properties.GetAll string:org.bluez.GattService1
method return sender=:1.3 -> dest=:1.44 reply_serial=2
   array [
      dict entry(
         string "UUID"
         variant             string "0000180d-0000-1000-8000-00805f9b34fb"
      )
      dict entry(
         string "Device"
         variant             object path "/org/bluez/hci0/dev_49_25_2A_9A_90_44"
      )
      dict entry(
         string "Primary"
         variant             boolean true
      )
      dict entry(
         string "Includes"
         variant             array [
            ]
      )
   ]

 さらにそのサービス配下のキャラクタリスティックを見てみます。

pi@raspberrypi:~ $ sudo dbus-send --print-reply --system --dest=org.bluez /org/bluez/hci0/dev_49_25_2A_9A_90_44/service004c/char0050 --type=method_call org.freedesktop.DBus.Introspectable.Introspect                                        
method return sender=:1.3 -> dest=:1.59 reply_serial=2
   string "<!DOCTYPE node PUBLIC "-//freedesktop//DTD D-BUS Object Introspection 1.0//EN"
"http://www.freedesktop.org/standards/dbus/1.0/introspect.dtd">
<node><interface name="org.freedesktop.DBus.Introspectable"><method name="Introspect"><arg name="xml" type="s" direction="out"/>
</method></interface><interface name="org.bluez.GattCharacteristic1"><method name="ReadValue"><arg name="options" type="a{sv}" direction="in"/>
<arg name="value" type="ay" direction="out"/>
</method><method name="WriteValue"><arg name="value" type="ay" direction="in"/>
<arg name="options" type="a{sv}" direction="in"/>
</method><method name="StartNotify"></method><method name="StopNotify"></method><property name="UUID" type="s" access="read"></property><property name="Service" type="o" access="read"></property><property name="Value" type="ay" access="re
ad"></property><property name="Notifying" type="b" access="read"></property><property name="Flags" type="as" access="read"></property></interface><interface name="org.freedesktop.DBus.Properties"><method name="Get"><arg name="interface" t
ype="s" direction="in"/>
<arg name="name" type="s" direction="in"/>
<arg name="value" type="v" direction="out"/>
</method><method name="Set"><arg name="interface" type="s" direction="in"/>
<arg name="name" type="s" direction="in"/>
<arg name="value" type="v" direction="in"/>
</method><method name="GetAll"><arg name="interface" type="s" direction="in"/>
<arg name="properties" type="a{sv}" direction="out"/>
</method><signal name="PropertiesChanged"><arg name="interface" type="s"/>
<arg name="changed_properties" type="a{sv}"/>
<arg name="invalidated_properties" type="as"/>
</signal>
</interface></node>"
pi@raspberrypi:~ $ 
pi@raspberrypi:~ $ sudo dbus-send --print-reply --system --dest=org.bluez /org/bluez/hci0/dev_49_25_2A_9A_90_44/service004c/char0050 --type=method_call org.freedesktop.DBus.Properties.GetAll string:org.bluez.GattCharacteristic1
method return sender=:1.3 -> dest=:1.58 reply_serial=2
   array [
      dict entry(
         string "UUID"
         variant             string "00002a38-0000-1000-8000-00805f9b34fb"
      )
      dict entry(
         string "Service"
         variant             object path "/org/bluez/hci0/dev_49_25_2A_9A_90_44/service004c"
      )
      dict entry(
         string "Value"
         variant             array [
            ]
      )
      dict entry(
         string "Flags"
         variant             array [
               string "read"
            ]
      )
   ]

 org.bluez.GattCharacteristic1 インタフェースには ReadValue メソッドがあり、キャラクタリスティックの値を参照するために使えます。ただ、このメソッドの引数には空の配列を渡したいのですが、 dbus-sendコマンドのドキュメントには下記のような記述があり、dbus-sendコマンドは空の配列やネストされた配列には対応してないようです。

D-Bus supports more types than these, but dbus-send currently does not. Also, dbus-send does not permit empty containers or nested containers (e.g. arrays of variants).

https://dbus.freedesktop.org/doc/dbus-send.1.html

 なので dbus-send での操作は一旦ここで諦め、RubyからD-Busを操作してみたいと思います。

RubyからD-Busを操作する

 RubyからD-Busを操作するためのgemとして、 ruby-dbus というgemが公開されているのでこちらを使用します。

github.com

 gemをインストールした上でirbを起動してrequireします。

pi@raspberrypi:~ $ sudo bundle exec irb
irb(main):001:0> require 'dbus'
=> true

 まずはD-Busのシステムバスのインスタンスを取得します。

irb(main):002:0> bus = DBus::SystemBus.instance
/home/pi/vendor/bundle/ruby/2.4.0/gems/ruby-dbus-0.13.0/lib/dbus/marshall.rb:299: warning: constant ::Fixnum is deprecated
=> #<DBus::SystemBus:0x56b32d08 @message_queue=#<DBus::MessageQueue:0x56b32cc0 @address="unix:path=/var/run/dbus/system_bus_socket", @buffer="l\x04\x01\x01\n\x00\x00\x00\x02\x00\x00\x00\x8D\x00\x00\x00\x01\x01o\x00\x15\x00\x00\x00/org/fre
edesktop/DBus\x00\x00\x00\x02\x01s\x00\x14\x00\x00\x00org.freedesktop.DBus\x00\x00\x00\x00\x03\x01s\x00\f\x00\x00\x00NameAcquired\x00\x00\x00\x00\x06\x01s\x00\x05\x00\x00\x00:1.46\x00\x00\x00\b\x01g\x00\x01s\x00\x00\a\x01s\x00\x14\x00\x00
\x00org.freedesktop.DBus\x00\x00\x00\x00\x05\x00\x00\x00:1.46\x00", @is_tcp=false, @socket=#<Socket:fd 9>, @client=#<DBus::Client:0x56b32570 @socket=#<Socket:fd 9>, @state=:Authenticated, @auth_list=[DBus::DBusCookieSHA1, DBus::Anonymous]
, @authenticator=#<DBus::External:0x56b31c70>>>, @unique_name=":1.46", @method_call_replies={}, @method_call_msgs={}, @signal_matchrules={}, @proxy=nil, @object_root=<DBus::Node {}>, @service=#<DBus::Service:0x56b17870 @name=":1.46", @bus
=#<DBus::SystemBus:0x56b32d08 ...>, @root=<DBus::Node {}>>>

 そして dbus-send の時と同様に、D-Busに登録されているサービスを確認してみます。

irb(main):003:0> bus.proxy.ListNames[0]
=> ["org.freedesktop.DBus", ":1.3", "org.freedesktop.login1", "org.freedesktop.systemd1", ":1.46", ":1.31", "org.freedesktop.Avahi", ":1.0", "org.bluez", ":1.1", ":1.2"]

 ruby-dbus でD-Busのサービスを参照するには、 service メソッドでサービス名を指定します。

irb(main):004:0> bluez = bus.service('org.bluez')
=> #<DBus::Service:0x56b0e8e8 @name="org.bluez", @bus=#<DBus::SystemBus:0x56b32d08 @message_queue=#<DBus::MessageQueue:0x56b32cc0 @address="unix:path=/var/run/dbus/system_bus_socket", @buffer="l\x04\x01\x01\n\x00\x00\x00\x02\x00\x00\x00\x
8D\x00\x00\x00\x01\x01o\x00\x15\x00\x00\x00/org/freedesktop/DBus\x00\x00\x00\x02\x01s\x00\x14\x00\x00\x00org.freedesktop.DBus\x00\x00\x00\x00\x03\x01s\x00\f\x00\x00\x00NameAcquired\x00\x00\x00\x00\x06\x01s\x00\x05\x00\x00\x00:1.46\x00\x00
\x00\b\x01g\x00\x01s\x00\x00\a\x01s\x00\x14\x00\x00\x00org.freedesktop.DBus\x00\x00\x00\x00\x05\x00\x00\x00:1.46\x00", @is_tcp=false, @socket=#<Socket:fd 9>, @client=#<DBus::Client:0x56b32570 @socket=#<Socket:fd 9>, @state=:Authenticated,
 @auth_list=[DBus::DBusCookieSHA1, DBus::Anonymous], @authenticator=#<DBus::External:0x56b31c70>>>, @unique_name=":1.46", @method_call_replies={}, @method_call_msgs={}, @signal_matchrules={}, @proxy=nil, @object_root=<DBus::Node {}>, @ser
vice=#<DBus::Service:0x56b17870 @name=":1.46", @bus=#<DBus::SystemBus:0x56b32d08 ...>, @root=<DBus::Node {}>>>, @root=<DBus::Node {}>>

 introspect メソッドでオブジェクトのリストを参照できます。

irb(main):005:0> bluez.introspect
=> #<DBus::Service:0x560d6990 @name="org.bluez", @bus=#<DBus::SystemBus:0x560f9448 @message_queue=#<DBus::MessageQueue:0x560f9388 @address="unix:path=/var/run/dbus/system_bus_socket", @buffer="", @is_tcp=false, @socket=#<Socket:fd 9>, @client=#<DBus::Client:0x560f8a58 @socket=#<Socket:fd 9>, @state=:Authenticated, @auth_list=[DBus::DBusCookieSHA1, DBus::Anonymous], @authenticator=#<DBus::External:0x560f89e0>>>, @unique_name=":1.6", @method_call_replies={36=>#<Proc:0x564acfb0@/home/pi/vendor/bundle/ruby/2.4.0/gems/ruby-dbus-0.13.0/lib/dbus/bus.rb:339>, 38=>#<Proc:0x5649f408@/home/pi/vendor/bundle/ruby/2.4.0/gems/ruby-dbus-0.13.0/lib/dbus/bus.rb:339>, 142=>#<Proc:0x55bc79b0@/home/pi/vendor/bundle/ruby/2.4.0/gems/ruby-dbus-0.13.0/lib/dbus/bus.rb:339>, 196=>#<Proc:0x56500038@/home/pi/vendor/bundle/ruby/2.4.0/gems/ruby-dbus-0.13.0/lib/dbus/bus.rb:339>, 216=>#<Proc:0x55dcebf0@/home/pi/vendor/bundle/ruby/2.4.0/gems/ruby-dbus-0.13.0/lib/dbus/bus.rb:339>, 224=>#<Proc:0x56135508@/home/pi/vendor/bundle/ruby/2.4.0/gems/ruby-dbus-0.13.0/lib/dbus/bus.rb:339>}, @method_call_msgs={36=>#<DBus::Message:0x564ad010 @message_type=1, @flags=0, @protocol=1, @body_length=0, @signature="", @serial=36, @params=[], @destination="org.bluez", @interface="org.bluez.Device1", @error_name=nil, @member="Connect", @path="/org/bluez/hci0/dev_53_B5_AD_3D_0E_8D", @reply_serial=nil, @sender=":1.6">, 38=>#<DBus::Message:0x5649f468 @message_type=1, @flags=0, @protocol=1, @body_length=0, @signature="", @serial=38, @params=[], @destination="org.bluez", @interface="org.bluez.Device1", @error_name=nil, @member="Disconnect", @path="/org/bluez/hci0/dev_53_B5_AD_3D_0E_8D", @reply_serial=nil, @sender=":1.6">, 142=>#<DBus::Message:0x55bc7a28 @message_type=1, @flags=0, @protocol=1, @body_length=0, @signature="", @serial=142, @params=[], @destination="org.bluez", @interface="org.bluez.Device1", @error_name=nil, @member="Connect", @path="/org/bluez/hci0/dev_55_6D_EC_78_2A_61", @reply_serial=nil, @sender=":1.6">, 196=>#<DBus::Message:0x565001d0 @message_type=1, @flags=0, @protocol=1, @body_length=34, @signature="s", @serial=196, @params=[["s", "org.bluez.GattCharacteristic1"]], @destination="org.bluez", @interface="org.freedesktop.DBus.Properties", @error_name=nil, @member="GetAll", @path="/org/bluez/hci0/dev_68_32_1E_76_3F_5D/service004c/char0050", @reply_serial=nil, @sender=":1.6">, 216=>#<DBus::Message:0x55dcf028 @message_type=1, @flags=0, @protocol=1, @body_length=16, @signature="aya{sv}", @serial=216, @params=[["ay", [3]], ["a{sv}", {}]], @destination="org.bluez", @interface="org.bluez.GattCharacteristic1", @error_name=nil, @member="WriteValue", @path="/org/bluez/hci0/dev_68_32_1E_76_3F_5D/service004c/char0050", @reply_serial=nil, @sender=":1.6">, 224=>#<DBus::Message:0x56135688 @message_type=1, @flags=0, @protocol=1, @body_length=16, @signature="aya{sv}", @serial=224, @params=[["ay", [3]], ["a{sv}", {}]], @destination="org.bluez", @interface="org.bluez.GattCharacteristic1", @error_name=nil, @member="WriteValue", @path="/org/bluez/hci0/dev_68_32_1E_76_3F_5D/service004c/char0050", @reply_serial=nil, @sender=":1.6">}, @signal_matchrules={}, @proxy=nil, @object_root=<DBus::Node {}>, @service=#<DBus::Service:0x560e0158 @name=":1.6", @bus=#<DBus::SystemBus:0x560f9448 ...>, @root=<DBus::Node {}>>>, @root=<DBus::Node 2b28631c {org => {bluez => 2b091c4c {hci0 => 2b0c82a0 {dev_04_05_F2_46_99_7D => 2b078efc {},dev_20_16_06_23_98_85 => 2adec438 {},dev_34_36_3B_C7_FB_E9 => 2b268f94 {},dev_43_19_24_21_00_5F => 2b0b3b64 {},dev_47_03_50_13_27_49 => 2b271ebc {},dev_55_6D_EC_78_2A_61 => 2b24713c {},dev_5A_81_CF_0B_28_3B => 2b094730 {},dev_5E_2A_AF_7F_B9_29 => 2ade5ab4 {},dev_68_32_1E_76_3F_5D => 2b264a34 {},dev_68_81_60_74_D0_31 => 2b23aa34 {},dev_69_96_A2_B0_24_B2 => 2af6fb88 {},dev_78_C3_DC_6E_59_BE => 2b275ad4 {},dev_88_4A_EA_8A_39_D2 => 2b242de0 {},dev_88_4A_EA_8A_3F_2B => 2af7da00 {},dev_FC_E9_98_21_23_B7 => 2afc0108 {}}}}}>>

 また、 root メソッドで配下のオブジェクトのツリー構造を確認することができます。

irb(main):006:0> bluez.root
=> <DBus::Node 2b28631c {org => {bluez => 2b091c4c {hci0 => 2b0c82a0 {dev_04_05_F2_46_99_7D => 2b078efc {},dev_20_16_06_23_98_85 => 2adec438 {},dev_34_36_3B_C7_FB_E9 => 2b268f94 {},dev_43_19_24_21_00_5F => 2b0b3b64 {},dev_47_03_50_13_27_49 => 2b271ebc {},dev_55_6D_EC_78_2A_61 => 2b24713c {},dev_5A_81_CF_0B_28_3B => 2b094730 {},dev_5E_2A_AF_7F_B9_29 => 2ade5ab4 {},dev_68_32_1E_76_3F_5D => 2b264a34 {},dev_68_81_60_74_D0_31 => 2b23aa34 {},dev_69_96_A2_B0_24_B2 => 2af6fb88 {},dev_78_C3_DC_6E_59_BE => 2b275ad4 {},dev_88_4A_EA_8A_39_D2 => 2b242de0 {},dev_88_4A_EA_8A_3F_2B => 2af7da00 {},dev_FC_E9_98_21_23_B7 => 2afc0108 {}}}}}>

 オブジェクトのインスタンスを取得するには object メソッドを使用します。hci0インタフェース配下のデバイスのインスタンスを取得してみます。

irb(main):007:0> device = bluez.object('/org/bluez/hci0/dev_55_6D_EC_78_2A_61')                                                                                                                                                               
=> #<DBus::ProxyObject:0x561831a8 @bus=#<DBus::SystemBus:0x560f9448 @message_queue=#<DBus::MessageQueue:0x560f9388 @address="unix:path=/var/run/dbus/system_bus_socket", @buffer="", @is_tcp=false, @socket=#<Socket:fd 9>, @client=#<DBus::Cl
ient:0x560f8a58 @socket=#<Socket:fd 9>, @state=:Authenticated, @auth_list=[DBus::DBusCookieSHA1, DBus::Anonymous], @authenticator=#<DBus::External:0x560f89e0>>>, @unique_name=":1.6", @method_call_replies={36=>#<Proc:0x564acfb0@/home/pi/ve
ndor/bundle/ruby/2.4.0/gems/ruby-dbus-0.13.0/lib/dbus/bus.rb:339>, 38=>#<Proc:0x5649f408@/home/pi/vendor/bundle/ruby/2.4.0/gems/ruby-dbus-0.13.0/lib/dbus/bus.rb:339>, 142=>#<Proc:0x55bc79b0@/home/pi/vendor/bundle/ruby/2.4.0/gems/ruby-dbus
-0.13.0/lib/dbus/bus.rb:339>}, @method_call_msgs={36=>#<DBus::Message:0x564ad010 @message_type=1, @flags=0, @protocol=1, @body_length=0, @signature="", @serial=36, @params=[], @destination="org.bluez", @interface="org.bluez.Device1", @err
or_name=nil, @member="Connect", @path="/org/bluez/hci0/dev_53_B5_AD_3D_0E_8D", @reply_serial=nil, @sender=":1.6">, 38=>#<DBus::Message:0x5649f468 @message_type=1, @flags=0, @protocol=1, @body_length=0, @signature="", @serial=38, @params=[
], @destination="org.bluez", @interface="org.bluez.Device1", @error_name=nil, @member="Disconnect", @path="/org/bluez/hci0/dev_53_B5_AD_3D_0E_8D", @reply_serial=nil, @sender=":1.6">, 142=>#<DBus::Message:0x55bc7a28 @message_type=1, @flags
=0, @protocol=1, @body_length=0, @signature="", @serial=142, @params=[], @destination="org.bluez", @interface="org.bluez.Device1", @error_name=nil, @member="Connect", @path="/org/bluez/hci0/dev_55_6D_EC_78_2A_61", @reply_serial=nil, @send
er=":1.6">}, @signal_matchrules={}, @proxy=nil, @object_root=<DBus::Node {}>, @service=#<DBus::Service:0x560e0158 @name=":1.6", @bus=#<DBus::SystemBus:0x560f9448 ...>, @root=<DBus::Node {}>>>, @destination="org.bluez", @path="/org/bluez/h
ci0/dev_68_32_1E_76_3F_5D", @introspected=false, @interfaces={}, @subnodes=[], @api=#<DBus::ApiOptions:0x55d91ee8 @proxy_method_returns_array=true>>
irb(main):008:0> 
irb(main):009:0* device.introspect
=> "<!DOCTYPE node PUBLIC \"-//freedesktop//DTD D-BUS Object Introspection 1.0//EN\"\n\"http://www.freedesktop.org/standards/dbus/1.0/introspect.dtd\">\n<node><interface name=\"org.freedesktop.DBus.Introspectable\"><method name=\"Introspe
ct\"><arg name=\"xml\" type=\"s\" direction=\"out\"/>\n</method></interface><interface name=\"org.bluez.Device1\"><method name=\"Disconnect\"></method><method name=\"Connect\"></method><method name=\"ConnectProfile\"><arg name=\"UUID\" ty
pe=\"s\" direction=\"in\"/>\n</method><method name=\"DisconnectProfile\"><arg name=\"UUID\" type=\"s\" direction=\"in\"/>\n</method><method name=\"Pair\"></method><method name=\"CancelPairing\"></method><property name=\"Address\" type=\"s
\" access=\"read\"></property><property name=\"Name\" type=\"s\" access=\"read\"></property><property name=\"Alias\" type=\"s\" access=\"readwrite\"></property><property name=\"Class\" type=\"u\" access=\"read\"></property><property name=
\"Appearance\" type=\"q\" access=\"read\"></property><property name=\"Icon\" type=\"s\" access=\"read\"></property><property name=\"Paired\" type=\"b\" access=\"read\"></property><property name=\"Trusted\" type=\"b\" access=\"readwrite\">
</property><property name=\"Blocked\" type=\"b\" access=\"readwrite\"></property><property name=\"LegacyPairing\" type=\"b\" access=\"read\"></property><property name=\"RSSI\" type=\"n\" access=\"read\"></property><property name=\"Connect
ed\" type=\"b\" access=\"read\"></property><property name=\"UUIDs\" type=\"as\" access=\"read\"></property><property name=\"Modalias\" type=\"s\" access=\"read\"></property><property name=\"Adapter\" type=\"o\" access=\"read\"></property>
<property name=\"ManufacturerData\" type=\"a{qv}\" access=\"read\"></property><property name=\"ServiceData\" type=\"a{sv}\" access=\"read\"></property><property name=\"TxPower\" type=\"n\" access=\"read\"></property><property name=\"Servi
cesResolved\" type=\"b\" access=\"read\"></property></interface><interface name=\"org.freedesktop.DBus.Properties\"><method name=\"Get\"><arg name=\"interface\" type=\"s\" direction=\"in\"/>\n<arg name=\"name\" type=\"s\" direction=\"in\"
/>\n<arg name=\"value\" type=\"v\" direction=\"out\"/>\n</method><method name=\"Set\"><arg name=\"interface\" type=\"s\" direction=\"in\"/>\n<arg name=\"name\" type=\"s\" direction=\"in\"/>\n<arg name=\"value\" type=\"v\" direction=\"in\"
/>\n</method><method name=\"GetAll\"><arg name=\"interface\" type=\"s\" direction=\"in\"/>\n<arg name=\"properties\" type=\"a{sv}\" direction=\"out\"/>\n</method><signal name=\"PropertiesChanged\"><arg name=\"interface\" type=\"s\"/>\n<ar
g name=\"changed_properties\" type=\"a{sv}\"/>\n<arg name=\"invalidated_properties\" type=\"as\"/>\n</signal>\n</interface></node>"

 Connectメソッドでデバイスに接続して、オブジェクトのリストを表示してみます。

irb(main):010:0* device.Connect
=> []
irb(main):011:0>
irb(main):012:0* device.introspect
=> "<!DOCTYPE node PUBLIC \"-//freedesktop//DTD D-BUS Object Introspection 1.0//EN\"\n\"http://www.freedesktop.org/standards/dbus/1.0/introspect.dtd\">\n<node><interface name=\"org.freedesktop.DBus.Introspectable\"><method name=\"Introspe
ct\"><arg name=\"xml\" type=\"s\" direction=\"out\"/>\n</method></interface><interface name=\"org.bluez.Device1\"><method name=\"Disconnect\"></method><method name=\"Connect\"></method><method name=\"ConnectProfile\"><arg name=\"UUID\" ty
pe=\"s\" direction=\"in\"/>\n</method><method name=\"DisconnectProfile\"><arg name=\"UUID\" type=\"s\" direction=\"in\"/>\n</method><method name=\"Pair\"></method><method name=\"CancelPairing\"></method><property name=\"Address\" type=\"s
\" access=\"read\"></property><property name=\"Name\" type=\"s\" access=\"read\"></property><property name=\"Alias\" type=\"s\" access=\"readwrite\"></property><property name=\"Class\" type=\"u\" access=\"read\"></property><property name=
\"Appearance\" type=\"q\" access=\"read\"></property><property name=\"Icon\" type=\"s\" access=\"read\"></property><property name=\"Paired\" type=\"b\" access=\"read\"></property><property name=\"Trusted\" type=\"b\" access=\"readwrite\">
</property><property name=\"Blocked\" type=\"b\" access=\"readwrite\"></property><property name=\"LegacyPairing\" type=\"b\" access=\"read\"></property><property name=\"RSSI\" type=\"n\" access=\"read\"></property><property name=\"Connect
ed\" type=\"b\" access=\"read\"></property><property name=\"UUIDs\" type=\"as\" access=\"read\"></property><property name=\"Modalias\" type=\"s\" access=\"read\"></property><property name=\"Adapter\" type=\"o\" access=\"read\"></property>
<property name=\"ManufacturerData\" type=\"a{qv}\" access=\"read\"></property><property name=\"ServiceData\" type=\"a{sv}\" access=\"read\"></property><property name=\"TxPower\" type=\"n\" access=\"read\"></property><property name=\"Servi
cesResolved\" type=\"b\" access=\"read\"></property></interface><interface name=\"org.freedesktop.DBus.Properties\"><method name=\"Get\"><arg name=\"interface\" type=\"s\" direction=\"in\"/>\n<arg name=\"name\" type=\"s\" direction=\"in\"
/>\n<arg name=\"value\" type=\"v\" direction=\"out\"/>\n</method><method name=\"Set\"><arg name=\"interface\" type=\"s\" direction=\"in\"/>\n<arg name=\"name\" type=\"s\" direction=\"in\"/>\n<arg name=\"value\" type=\"v\" direction=\"in\"
/>\n</method><method name=\"GetAll\"><arg name=\"interface\" type=\"s\" direction=\"in\"/>\n<arg name=\"properties\" type=\"a{sv}\" direction=\"out\"/>\n</method><signal name=\"PropertiesChanged\"><arg name=\"interface\" type=\"s\"/>\n<ar
g name=\"changed_properties\" type=\"a{sv}\"/>\n<arg name=\"invalidated_properties\" type=\"as\"/>\n</signal>\n</interface><node name=\"service0006\"/><node name=\"service000a\"/><node name=\"service000e\"/><node name=\"service0014\"/><no
de name=\"service0019\"/><node name=\"service0023\"/><node name=\"service002f\"/><node name=\"service0034\"/><node name=\"service0039\"/><node name=\"service004c\"/></node>"

 subnodes メソッドを使うと配下のオブジェクトのリストが参照できます。

irb(main):013:0> device.subnodes
=> ["service0006", "service000a", "service000e", "service0014", "service0019", "service0023", "service002f", "service0034", "service0039", "service004c"]

 配下のサービスとキャラクタリスティックを確認してみます。今回対象としているHeart Rateのサービスは service004c になります。

irb(main):014:0> service = bluez.object('/org/bluez/hci0/dev_55_6D_EC_78_2A_61/service004c')                                                                                                                                                  
=> #<DBus::ProxyObject:0x55ef9cd8 @bus=#<DBus::SystemBus:0x560f9448 @message_queue=#<DBus::MessageQueue:0x560f9388 @address="unix:path=/var/run/dbus/system_bus_socket", @buffer="", @is_tcp=false, @socket=#<Socket:fd 9>, @client=#<DBus::Cl
ient:0x560f8a58 @socket=#<Socket:fd 9>, @state=:Authenticated, @auth_list=[DBus::DBusCookieSHA1, DBus::Anonymous], @authenticator=#<DBus::External:0x560f89e0>>>, @unique_name=":1.6", @method_call_replies={36=>#<Proc:0x564acfb0@/home/pi/ve
ndor/bundle/ruby/2.4.0/gems/ruby-dbus-0.13.0/lib/dbus/bus.rb:339>, 38=>#<Proc:0x5649f408@/home/pi/vendor/bundle/ruby/2.4.0/gems/ruby-dbus-0.13.0/lib/dbus/bus.rb:339>}, @method_call_msgs={36=>#<DBus::Message:0x564ad010 @message_type=1, @fl
ags=0, @protocol=1, @body_length=0, @signature="", @serial=36, @params=[], @destination="org.bluez", @interface="org.bluez.Device1", @error_name=nil, @member="Connect", @path="/org/bluez/hci0/dev_53_B5_AD_3D_0E_8D", @reply_serial=nil, @se
nder=":1.6">, 38=>#<DBus::Message:0x5649f468 @message_type=1, @flags=0, @protocol=1, @body_length=0, @signature="", @serial=38, @params=[], @destination="org.bluez", @interface="org.bluez.Device1", @error_name=nil, @member="Disconnect", @
path="/org/bluez/hci0/dev_53_B5_AD_3D_0E_8D", @reply_serial=nil, @sender=":1.6">}, @signal_matchrules={}, @proxy=nil, @object_root=<DBus::Node {}>, @service=#<DBus::Service:0x560e0158 @name=":1.6", @bus=#<DBus::SystemBus:0x560f9448 ...>, 
@root=<DBus::Node {}>>>, @destination="org.bluez", @path="/org/bluez/hci0/dev_55_6D_EC_78_2A_61/service004c", @introspected=false, @interfaces={}, @subnodes=[], @api=#<DBus::ApiOptions:0x55d91ee8 @proxy_method_returns_array=true>>
irb(main):015:0> 
irb(main):016:0* service.introspect
=> "<!DOCTYPE node PUBLIC \"-//freedesktop//DTD D-BUS Object Introspection 1.0//EN\"\n\"http://www.freedesktop.org/standards/dbus/1.0/introspect.dtd\">\n<node><interface name=\"org.freedesktop.DBus.Introspectable\"><method name=\"Introspe
ct\"><arg name=\"xml\" type=\"s\" direction=\"out\"/>\n</method></interface><interface name=\"org.bluez.GattService1\"><property name=\"UUID\" type=\"s\" access=\"read\"></property><property name=\"Device\" type=\"o\" access=\"read\"></pr
operty><property name=\"Primary\" type=\"b\" access=\"read\"></property><property name=\"Includes\" type=\"ao\" access=\"read\"></property></interface><interface name=\"org.freedesktop.DBus.Properties\"><method name=\"Get\"><arg name=\"in
terface\" type=\"s\" direction=\"in\"/>\n<arg name=\"name\" type=\"s\" direction=\"in\"/>\n<arg name=\"value\" type=\"v\" direction=\"out\"/>\n</method><method name=\"Set\"><arg name=\"interface\" type=\"s\" direction=\"in\"/>\n<arg name=
\"name\" type=\"s\" direction=\"in\"/>\n<arg name=\"value\" type=\"v\" direction=\"in\"/>\n</method><method name=\"GetAll\"><arg name=\"interface\" type=\"s\" direction=\"in\"/>\n<arg name=\"properties\" type=\"a{sv}\" direction=\"out\"/>
\n</method><signal name=\"PropertiesChanged\"><arg name=\"interface\" type=\"s\"/>\n<arg name=\"changed_properties\" type=\"a{sv}\"/>\n<arg name=\"invalidated_properties\" type=\"as\"/>\n</signal>\n</interface><node name=\"char004d\"/><no
de name=\"char0050\"/><node name=\"char0052\"/></node>"
irb(main):017:0>
irb(main):018:0* service.subnodes
=> ["char004d", "char0050", "char0052"]

 そして Body Sensor Locationキャラクタリスティックは char0050 です。

irb(main):019:0* characteristic = bluez.object('/org/bluez/hci0/dev_55_6D_EC_78_2A_61/service004c/char0050')
=> #<DBus::ProxyObject:0x564f5418 @bus=#<DBus::SystemBus:0x560f9448 @message_queue=#<DBus::MessageQueue:0x560f9388 @address="unix:path=/var/run/dbus/system_bus_socket", @buffer="", @is_tcp=false, @socket=#<Socket:fd 9>, @client=#<DBus::Cl
ient:0x560f8a58 @socket=#<Socket:fd 9>, @state=:Authenticated, @auth_list=[DBus::DBusCookieSHA1, DBus::Anonymous], @authenticator=#<DBus::External:0x560f89e0>>>, @unique_name=":1.6", @method_call_replies={36=>#<Proc:0x564acfb0@/home/pi/ve
ndor/bundle/ruby/2.4.0/gems/ruby-dbus-0.13.0/lib/dbus/bus.rb:339>, 38=>#<Proc:0x5649f408@/home/pi/vendor/bundle/ruby/2.4.0/gems/ruby-dbus-0.13.0/lib/dbus/bus.rb:339>}, @method_call_msgs={36=>#<DBus::Message:0x564ad010 @message_type=1, @fl
ags=0, @protocol=1, @body_length=0, @signature="", @serial=36, @params=[], @destination="org.bluez", @interface="org.bluez.Device1", @error_name=nil, @member="Connect", @path="/org/bluez/hci0/dev_53_B5_AD_3D_0E_8D", @reply_serial=nil, @se
nder=":1.6">, 38=>#<DBus::Message:0x5649f468 @message_type=1, @flags=0, @protocol=1, @body_length=0, @signature="", @serial=38, @params=[], @destination="org.bluez", @interface="org.bluez.Device1", @error_name=nil, @member="Disconnect", @
path="/org/bluez/hci0/dev_53_B5_AD_3D_0E_8D", @reply_serial=nil, @sender=":1.6">}, @signal_matchrules={}, @proxy=nil, @object_root=<DBus::Node {}>, @service=#<DBus::Service:0x560e0158 @name=":1.6", @bus=#<DBus::SystemBus:0x560f9448 ...>, 
@root=<DBus::Node {}>>>, @destination="org.bluez", @path="/org/bluez/hci0/dev_55_6D_EC_78_2A_61/service004c/char0050", @introspected=false, @interfaces={}, @subnodes=[], @api=#<DBus::ApiOptions:0x55d91ee8 @proxy_method_returns_array=true>
>
irb(main):020:0> 
irb(main):021:0* characteristic.introspect                                                                                                                                                                                                    
=> "<!DOCTYPE node PUBLIC \"-//freedesktop//DTD D-BUS Object Introspection 1.0//EN\"\n\"http://www.freedesktop.org/standards/dbus/1.0/introspect.dtd\">\n<node><interface name=\"org.freedesktop.DBus.Introspectable\"><method name=\"Introspe
ct\"><arg name=\"xml\" type=\"s\" direction=\"out\"/>\n</method></interface><interface name=\"org.bluez.GattCharacteristic1\"><method name=\"ReadValue\"><arg name=\"options\" type=\"a{sv}\" direction=\"in\"/>\n<arg name=\"value\" type=\"a
y\" direction=\"out\"/>\n</method><method name=\"WriteValue\"><arg name=\"value\" type=\"ay\" direction=\"in\"/>\n<arg name=\"options\" type=\"a{sv}\" direction=\"in\"/>\n</method><method name=\"StartNotify\"></method><method name=\"StopN
otify\"></method><property name=\"UUID\" type=\"s\" access=\"read\"></property><property name=\"Service\" type=\"o\" access=\"read\"></property><property name=\"Value\" type=\"ay\" access=\"read\"></property><property name=\"Notifying\" t
ype=\"b\" access=\"read\"></property><property name=\"Flags\" type=\"as\" access=\"read\"></property></interface><interface name=\"org.freedesktop.DBus.Properties\"><method name=\"Get\"><arg name=\"interface\" type=\"s\" direction=\"in\"/
>\n<arg name=\"name\" type=\"s\" direction=\"in\"/>\n<arg name=\"value\" type=\"v\" direction=\"out\"/>\n</method><method name=\"Set\"><arg name=\"interface\" type=\"s\" direction=\"in\"/>\n<arg name=\"name\" type=\"s\" direction=\"in\"/>
\n<arg name=\"value\" type=\"v\" direction=\"in\"/>\n</method><method name=\"GetAll\"><arg name=\"interface\" type=\"s\" direction=\"in\"/>\n<arg name=\"properties\" type=\"a{sv}\" direction=\"out\"/>\n</method><signal name=\"PropertiesCh
anged\"><arg name=\"interface\" type=\"s\"/>\n<arg name=\"changed_properties\" type=\"a{sv}\"/>\n<arg name=\"invalidated_properties\" type=\"as\"/>\n</signal>\n</interface></node>"
irb(main):022:0> 
irb(main):023:0* characteristic.subnodes
=> []

 interfaces でオブジェクトが持っているインタフェースのリストを参照できます。

irb(main):024:0> characteristic.interfaces
=> ["org.freedesktop.DBus.Introspectable", "org.bluez.GattCharacteristic1", "org.freedesktop.DBus.Properties"]

 また、プロパティを参照するには GetAll メソッドを使用し、引数にインタフェース名を指定します。

irb(main):025:0> characteristic.GetAll('org.bluez.GattCharacteristic1')
=> [{"UUID"=>"00002a38-0000-1000-8000-00805f9b34fb", "Service"=>"/org/bluez/hci0/dev_55_6D_EC_78_2A_61/service004c", "Value"=>[], "Flags"=>["read"]}]

 そして、dbus-sendではできなかった、ReadValueメソッドを使った値の参照を実行してみます。LightBlueでBody Sensor Locationの値を 0x01 に設定しておきます。
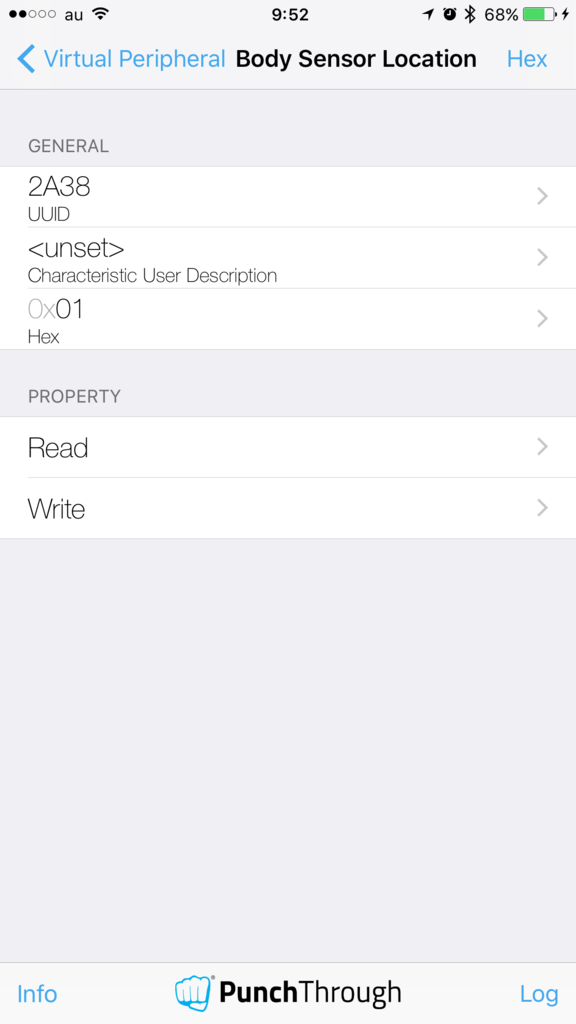
f:id:akanuma-hiroaki:20170610100405p:plain:w300

 ReadValueメソッドで参照してみます。

irb(main):026:0> characteristic.ReadValue([])
=> [[1]]

 配列として値が参照できました。LightBlueで値を 0x02 に変更してもう一度参照してみます。
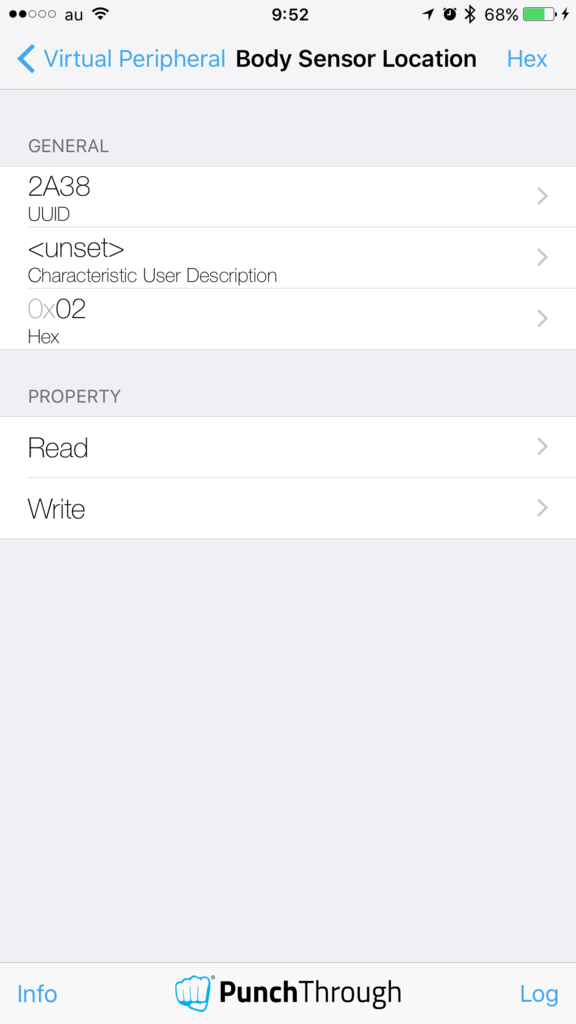
f:id:akanuma-hiroaki:20170610100721p:plain:w300

irb(main):027:0> characteristic.ReadValue([])
=> [[2]]

 今度はWriteValueメソッドで値を書き込んでみます。値は配列で指定します。また、第二引数にオプションをHashで指定しますが、今回は特にオプションはないので空のHashを渡します。

irb(main):028:0> characteristic.WriteValue([0x03], {})
=> []
irb(main):029:0> 
irb(main):030:0* characteristic.ReadValue([])                                                                                                                                                                                                 
=> [[3]]

 書き込んだ値が参照できました。LightBlue側で見ても値が変わっているのが確認できました。
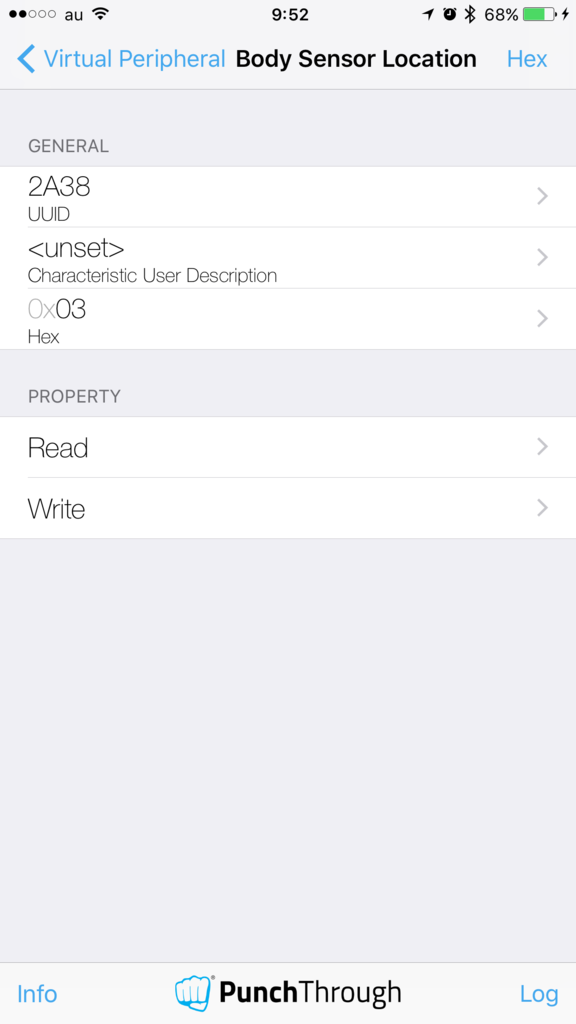
f:id:akanuma-hiroaki:20170610100922p:plain:w300

 今回は単純な値の読み書きだけで、Notificationなどはまだ使えていないですが、今後Notification周りも使えるようにして、デバイスの値の変化を検知して処理を行うようなものを作ってみたいと思います。