D-BusからBLEデバイスのNotificationを受け取る

 前回の記事で、Raspberry Pi上でRuby(irb)からD-Busを使ってBLEデバイスに接続し、値を読み取るというところまでやりましたが、今回はPeripheralからのNotificationを受け取って値の変化を検知するところまでを実装してみました。前回はirbから試してみましたが、今回はスクリプトにまとめてあります。また、対象のBLEデバイスは前回同様にLightBlueで擬似Peripheralデバイスを作成して使用しています。

スクリプト全体

 まずはスクリプト全体を掲載しておきます。

require 'bundler/setup'
require 'dbus'

SERVICE_PATH = '/org/bluez'
ADAPTER      = 'hci0'

DEVICE_IF         = 'org.bluez.Device1'
SERVICE_IF        = 'org.bluez.GattService1'
CHARACTERISTIC_IF = 'org.bluez.GattCharacteristic1'
PROPERTIES_IF     = 'org.freedesktop.DBus.Properties'

HEARTRATE_SERVICE_UUID = '0000180d-0000-1000-8000-00805f9b34fb'
HEARTRATE_UUID         = '00002a37-0000-1000-8000-00805f9b34fb'

log = Logger.new('ble_notification.log')

bus = DBus::SystemBus.instance
bluez = bus.service('org.bluez')

adapter = bluez.object("#{SERVICE_PATH}/#{ADAPTER}")
adapter.introspect
puts 'Discoverying Nodes...'
adapter.StartDiscovery
sleep(10)

nodes = adapter.subnodes
connected_device = nil

begin
  nodes.each do |node|
    device = bluez.object("#{SERVICE_PATH}/#{ADAPTER}/#{node}")
    device.introspect

    properties = device.GetAll(DEVICE_IF)[0]
    name    = properties['Name']
    address = properties['Address']
    rssi    = properties['RSSI']

    next if name.nil? || rssi.nil?
    next unless name.downcase.include?('heart rate')

    puts "Connecting to the device: #{address} #{name} RSSI:#{properties['RSSI']}"
    begin
      device.Connect
      puts 'Connected. Resolving Services...'
      device.introspect

      while !properties['ServicesResolved'] do
        sleep(0.5)
        device.introspect
        properties = device.GetAll(DEVICE_IF)[0]
      end
      puts 'Resolved.'

      connected_device = device
      break
    rescue => e
      puts e
    end
  end

  raise 'No device connected.' if connected_device.nil?

  heartrate_service = nil
  nodes = connected_device.subnodes
  nodes.each do |node|
    service = bluez.object("#{connected_device.path}/#{node}")
    service.introspect

    properties = service.GetAll(SERVICE_IF)[0]
    uuid = properties['UUID']

    next unless uuid == HEARTRATE_SERVICE_UUID

    heartrate_service = service
  end

  nodes = heartrate_service.subnodes
  nodes.each do |node|
    characteristic = bluez.object("#{heartrate_service.path}/#{node}")
    characteristic.introspect

    properties = characteristic.GetAll(CHARACTERISTIC_IF)[0]
    uuid = properties['UUID']

    next unless uuid == HEARTRATE_UUID

    characteristic.StartNotify
    characteristic.default_iface = PROPERTIES_IF
    characteristic.on_signal('PropertiesChanged') do |_, v|
      log.info("#{heartrate_service.path.split('/')[4]} #{v}")
    end
  end

  main = DBus::Main.new
  main << bus

  puts 'Monitoring Heart Rate...'
  main.run
rescue Interrupt => e
  puts e
  puts "Interrupted."
rescue => e
  puts e
ensure
  connected_device.Disconnect unless connected_device.nil?
  adapter.StopDiscovery
end

 それでは各パートごとに説明していきます。

Peripheralへの接続

 まずはBluetoothアダプタのDiscoveryModeをONにし、BLEデバイスを検索します。今回はとりあえず10秒間は検索のために待機しています。

bus = DBus::SystemBus.instance
bluez = bus.service('org.bluez')

adapter = bluez.object("#{SERVICE_PATH}/#{ADAPTER}")
adapter.introspect
puts 'Discoverying Nodes...'
adapter.StartDiscovery
sleep(10)

nodes = adapter.subnodes

 そして見つかった各デバイスのデバイス名を確認して、対象のデバイスであれば接続します。そして配下のGATTサービスが検知されて ServicesResolved のプロパティがtrueになるのを待ってから次の処理に進みます。

nodes.each do |node|
  device = bluez.object("#{SERVICE_PATH}/#{ADAPTER}/#{node}")
  device.introspect

  properties = device.GetAll(DEVICE_IF)[0]
  name    = properties['Name']
  address = properties['Address']
  rssi    = properties['RSSI']

  next if name.nil? || rssi.nil?
  next unless name.downcase.include?('heart rate')

  puts "Connecting to the device: #{address} #{name} RSSI:#{properties['RSSI']}"
  begin
    device.Connect
    puts 'Connected. Resolving Services...'
    device.introspect

    while !properties['ServicesResolved'] do
      sleep(0.5)
      device.introspect
      properties = device.GetAll(DEVICE_IF)[0]
    end
    puts 'Resolved.'

    connected_device = device
    break
  rescue => e
    puts e
  end
end

GATTサービスの取得

 次にデバイス配下の各サービスのUUIDを確認し、今回対象とするUUIDを持つサービスを取得します。

nodes = connected_device.subnodes
nodes.each do |node|
  service = bluez.object("#{connected_device.path}/#{node}")
  service.introspect

  properties = service.GetAll(SERVICE_IF)[0]
  uuid = properties['UUID']

  next unless uuid == HEARTRATE_SERVICE_UUID

  heartrate_service = service
end

GATTキャラクタリスティックの取得とシグナル検知時のコールバック設定

 サービス配下の各キャラクタリスティックのUUIDを確認し、今回対象とするUUIDを持つキャラクタリスティックを特定したら、Peripheralからのシグナルを検知して処理を行うためのコールバックの設定を行います。

nodes = heartrate_service.subnodes
nodes.each do |node|
  characteristic = bluez.object("#{heartrate_service.path}/#{node}")
  characteristic.introspect

  properties = characteristic.GetAll(CHARACTERISTIC_IF)[0]
  uuid = properties['UUID']

  next unless uuid == HEARTRATE_UUID

  characteristic.StartNotify
  characteristic.default_iface = PROPERTIES_IF
  characteristic.on_signal('PropertiesChanged') do |_, v|
    log.info("#{heartrate_service.path.split('/')[4]} #{v}")
  end
end

 上記のコールバック設定部分については、まず StartNotify メソッドでPeripheralからのシグナルの送信を開始しています。

characteristic.StartNotify

 そして on_signal メソッドでシグナル検知時のコールバックを指定するのですが、検知対象のインタフェースはデフォルトインタフェースになるので、先に default_iface メソッドでデフォルトインタフェースを指定しておきます。値の変更は D-Bus の org.freedesktop.DBus.Properties インタフェースで検知します。

characteristic.default_iface = PROPERTIES_IF

 シグナルとしては PropertiesChanged シグナルになりますので、 on_signal メソッドでシグナルを指定してコールバックを設定します。今回は検知時の処理としてはデバイスのアドレスと値をログに出力しています。

characteristic.on_signal('PropertiesChanged') do |_, v|
  log.info("#{heartrate_service.path.split('/')[4]} #{v}")
end

非同期処理の開始

 そして最後にイベントループでの非同期処理を開始します。

  main = DBus::Main.new
  main << bus
  main.run

 これでPeripheral側からシグナルが送信されると、下記のようにログに出力されるようになります。

I, [2017-06-14T18:40:31.151687 #3589]  INFO -- : dev_7C_12_A1_23_8C_21 {"Value"=>[0, 60]}
I, [2017-06-14T18:40:32.163818 #3589]  INFO -- : dev_7C_12_A1_23_8C_21 {"Value"=>[0, 60]}
I, [2017-06-14T18:40:33.110175 #3589]  INFO -- : dev_7C_12_A1_23_8C_21 {"Value"=>[0, 60]}
I, [2017-06-14T18:40:34.121697 #3589]  INFO -- : dev_7C_12_A1_23_8C_21 {"Value"=>[0, 80]}
I, [2017-06-14T18:40:35.134417 #3589]  INFO -- : dev_7C_12_A1_23_8C_21 {"Value"=>[0, 80]}
I, [2017-06-14T18:40:36.146261 #3589]  INFO -- : dev_7C_12_A1_23_8C_21 {"Value"=>[0, 80]}
I, [2017-06-14T18:40:37.159118 #3589]  INFO -- : dev_7C_12_A1_23_8C_21 {"Value"=>[0, 100]}
I, [2017-06-14T18:40:38.103964 #3589]  INFO -- : dev_7C_12_A1_23_8C_21 {"Value"=>[0, 100]}
I, [2017-06-14T18:40:39.184016 #3589]  INFO -- : dev_7C_12_A1_23_8C_21 {"Value"=>[0, 100]}

Raspberry Pi 3でD-BusからBLEデバイスにアクセスする

 Raspberry PiからBLEデバイスへの接続についていろいろ調べている中でD-Busについても調べたので、D-BusからBlueZを使ってBLEデバイスにアクセスしてみました。D-Busについては下記サイトでわかりやすく解説されていて、とても参考になりました。

www.silex.jp

 D-Busについての詳細は上記サイトを参照いただくとしてここでは割愛しますが、すごくざっくり言うと、コンピュータ上の複数のプログラム間で情報のやり取りをするためのIPC(Inter Process Communication)で、オブジェクト(プログラム)間でメッセージ(データ)を届けるためのものです。BlueZもD-Busのサービスの一つとして登録されるので、D-BusからBlueZを使用してBLEデバイスに接続することができます。

 また、下記資料も参考にさせていただきました。

Bluetooth on modern Linux
http://events.linuxfoundation.org/sites/events/files/slides/Bluetooth%20on%20Modern%20Linux_0.pdf

 接続対象のBLEデバイスとしては、LightBlueというアプリでiPhoneを擬似BLEデバイスとして使用してみました。

LightBlue Explorer - Bluetooth Low Energy

LightBlue Explorer - Bluetooth Low Energy

  • Punch Through
  • ユーティリティ
  • 無料

 いろいろな種類の擬似Peripheralを作成できるので、今回はHeart Rateを作成して使用してみます。Body Sensor Locationキャラクタリスティックを読み書きすることを目標とします。

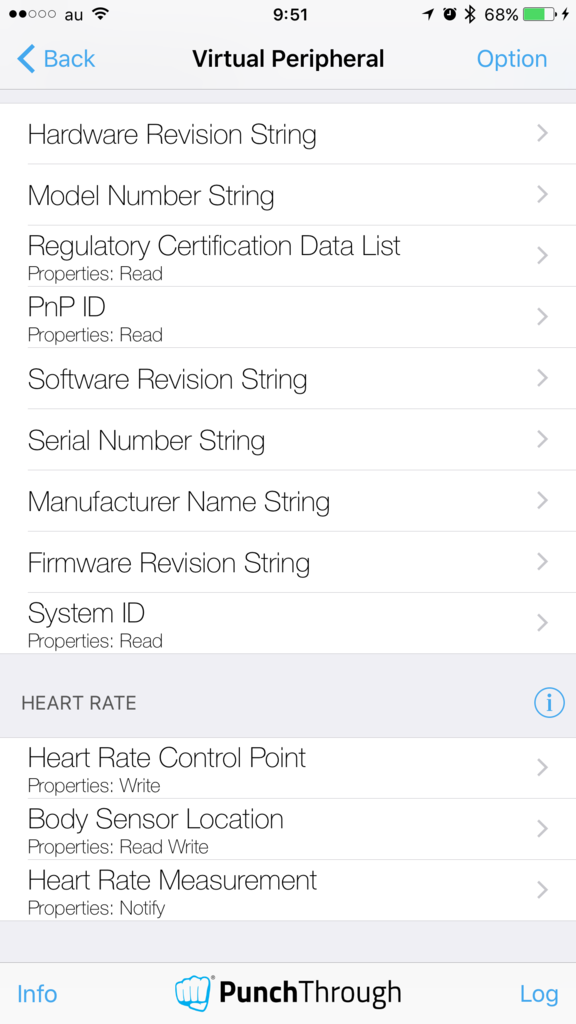
f:id:akanuma-hiroaki:20170610095856p:plain:w300 f:id:akanuma-hiroaki:20170610095902p:plain:w300

コマンドラインからD-Busを操作する

 Linux上でD-Busを操作するには dbus-send というコマンドを使います。

dbus-send
https://dbus.freedesktop.org/doc/dbus-send.1.html

 まずはD-Busにどんなサービスが登録されているかを確認してみます。

pi@raspberrypi:~ $ sudo dbus-send --print-reply --system --dest=org.freedesktop.DBus / --type=method_call org.freedesktop.DBus.ListNames                                                                                                      
method return sender=org.freedesktop.DBus -> dest=:1.6 reply_serial=2
   array [
      string "org.freedesktop.DBus"
      string ":1.3"
      string "org.freedesktop.login1"
      string "org.freedesktop.systemd1"
      string "org.freedesktop.Avahi"
      string ":1.0"
      string ":1.5"
      string "org.bluez"
      string ":1.1"
      string ":1.6"
      string ":1.2"
   ]

 サービス名は慣習としてサービスの開発元のドメイン名が使われます。サービス登録時にはサービス名を明示しなくても登録できますが、その場合には上記の string ":1.3" のようにD-Busサーバが適当に生成した数字が使われます。

 上記の結果の中の string "org.bluez" がBlueZのサービス名になります。BlueZのサービスが持つオブジェクトのリストを表示してみます。 --dest オプションで対象のサービスを指定し、引数として対象の階層を指定します。今回はサービス配下のトップレベルのオブジェクトのリストを表示するために引数として / を指定します。また、オブジェクトのリストを表示するためのメソッドは org.freedesktop.DBus.Introspectable.Introspect ですので、 --type オプションで method_call を指定し、引数にメソッド名を渡します。

pi@raspberrypi:~ $ sudo dbus-send --print-reply --system --dest=org.bluez / --type=method_call org.freedesktop.DBus.Introspectable.Introspect
method return sender=:1.3 -> dest=:1.7 reply_serial=2
   string "<!DOCTYPE node PUBLIC "-//freedesktop//DTD D-BUS Object Introspection 1.0//EN"
"http://www.freedesktop.org/standards/dbus/1.0/introspect.dtd">
<node><interface name="org.freedesktop.DBus.Introspectable"><method name="Introspect"><arg name="xml" type="s" direction="out"/>
</method></interface><interface name="org.freedesktop.DBus.ObjectManager"><method name="GetManagedObjects"><arg name="objects" type="a{oa{sa{sv}}}" direction="out"/>
</method><signal name="InterfacesAdded"><arg name="object" type="o"/>
<arg name="interfaces" type="a{sa{sv}}"/>
</signal>
<signal name="InterfacesRemoved"><arg name="object" type="o"/>
<arg name="interfaces" type="as"/>
</signal>
</interface><node name="org"/></node>"

 上記のように結果はXMLで出力されます。 <node name="org"/> とあることから、トップレベルのパスの配下に org というパスがあることがわかりますので、そこを掘り下げてみます。 --dest オプションの引数に /org を指定します。

pi@raspberrypi:~ $ sudo dbus-send --print-reply --system --dest=org.bluez /org --type=method_call org.freedesktop.DBus.Introspectable.Introspect                                                                                              
method return sender=:1.3 -> dest=:1.8 reply_serial=2
   string "<!DOCTYPE node PUBLIC "-//freedesktop//DTD D-BUS Object Introspection 1.0//EN"
"http://www.freedesktop.org/standards/dbus/1.0/introspect.dtd">
<node>
  <node name="bluez"/>
</node>
"

 するとさらに <node name="bluez"/> となって /org/bluez というパスがあることがわかるのでさらに掘り下げます。

pi@raspberrypi:~ $ sudo dbus-send --print-reply --system --dest=org.bluez /org/bluez --type=method_call org.freedesktop.DBus.Introspectable.Introspect                                                                                        
method return sender=:1.3 -> dest=:1.9 reply_serial=2
   string "<!DOCTYPE node PUBLIC "-//freedesktop//DTD D-BUS Object Introspection 1.0//EN"
"http://www.freedesktop.org/standards/dbus/1.0/introspect.dtd">
<node><interface name="org.freedesktop.DBus.Introspectable"><method name="Introspect"><arg name="xml" type="s" direction="out"/>
</method></interface><interface name="org.bluez.AgentManager1"><method name="RegisterAgent"><arg name="agent" type="o" direction="in"/>
<arg name="capability" type="s" direction="in"/>
</method><method name="UnregisterAgent"><arg name="agent" type="o" direction="in"/>
</method><method name="RequestDefaultAgent"><arg name="agent" type="o" direction="in"/>
</method></interface><interface name="org.bluez.ProfileManager1"><method name="RegisterProfile"><arg name="profile" type="o" direction="in"/>
<arg name="UUID" type="s" direction="in"/>
<arg name="options" type="a{sv}" direction="in"/>
</method><method name="UnregisterProfile"><arg name="profile" type="o" direction="in"/>
</method></interface><node name="hci0"/></node>"

 さらに <node name="hci0"/> となって、 /org/bluez/hci0 というパスがあることがわかります。 hci0 はBluetoothアダプタになりますので、複数のBluetoothアダプタがある場合は末尾の数字が連番になっていきます。さらに掘り下げてこのBluetoothアダプタが持っているオブジェクトのリストを表示します。

pi@raspberrypi:~ $ sudo dbus-send --print-reply --system --dest=org.bluez /org/bluez/hci0 --type=method_call org.freedesktop.DBus.Introspectable.Introspect                                                                                   
method return sender=:1.3 -> dest=:1.10 reply_serial=2
   string "<!DOCTYPE node PUBLIC "-//freedesktop//DTD D-BUS Object Introspection 1.0//EN"
"http://www.freedesktop.org/standards/dbus/1.0/introspect.dtd">
<node><interface name="org.freedesktop.DBus.Introspectable"><method name="Introspect"><arg name="xml" type="s" direction="out"/>
</method></interface><interface name="org.bluez.Adapter1"><method name="StartDiscovery"></method><method name="SetDiscoveryFilter"><arg name="properties" type="a{sv}" direction="in"/>
</method><method name="StopDiscovery"></method><method name="RemoveDevice"><arg name="device" type="o" direction="in"/>
</method><property name="Address" type="s" access="read"></property><property name="Name" type="s" access="read"></property><property name="Alias" type="s" access="readwrite"></property><property name="Class" type="u" access="read"></prop
erty><property name="Powered" type="b" access="readwrite"></property><property name="Discoverable" type="b" access="readwrite"></property><property name="DiscoverableTimeout" type="u" access="readwrite"></property><property name="Pairable
" type="b" access="readwrite"></property><property name="PairableTimeout" type="u" access="readwrite"></property><property name="Discovering" type="b" access="read"></property><property name="UUIDs" type="as" access="read"></property><pro
perty name="Modalias" type="s" access="read"></property></interface><interface name="org.freedesktop.DBus.Properties"><method name="Get"><arg name="interface" type="s" direction="in"/>
<arg name="name" type="s" direction="in"/>
<arg name="value" type="v" direction="out"/>
</method><method name="Set"><arg name="interface" type="s" direction="in"/>
<arg name="name" type="s" direction="in"/>
<arg name="value" type="v" direction="in"/>
</method><method name="GetAll"><arg name="interface" type="s" direction="in"/>
<arg name="properties" type="a{sv}" direction="out"/>
</method><signal name="PropertiesChanged"><arg name="interface" type="s"/>
<arg name="changed_properties" type="a{sv}"/>
<arg name="invalidated_properties" type="as"/>
</signal>
</interface><interface name="org.bluez.GattManager1"><method name="RegisterApplication"><arg name="application" type="o" direction="in"/>
<arg name="options" type="a{sv}" direction="in"/>
</method><method name="UnregisterApplication"><arg name="application" type="o" direction="in"/>
</method></interface><interface name="org.bluez.Media1"><method name="RegisterEndpoint"><arg name="endpoint" type="o" direction="in"/>
<arg name="properties" type="a{sv}" direction="in"/>
</method><method name="UnregisterEndpoint"><arg name="endpoint" type="o" direction="in"/>
</method><method name="RegisterPlayer"><arg name="player" type="o" direction="in"/>
<arg name="properties" type="a{sv}" direction="in"/>
</method><method name="UnregisterPlayer"><arg name="player" type="o" direction="in"/>
</method></interface><interface name="org.bluez.NetworkServer1"><method name="Register"><arg name="uuid" type="s" direction="in"/>
<arg name="bridge" type="s" direction="in"/>
</method><method name="Unregister"><arg name="uuid" type="s" direction="in"/>
</method></interface><node name="dev_49_25_2A_9A_90_44"/><node name="dev_43_19_24_21_00_5F"/><node name="dev_88_4A_EA_8A_3F_2B"/><node name="dev_FC_E9_98_21_23_B7"/></node>"

  <node name="dev_49_25_2A_9A_90_44"/> のようにこのBluetoothアダプタに検知されているBLEデバイスが表示されています。デバイスの情報を見る前にこのBluetoothアダプタのプロパティの一覧を表示してみます。プロパティ表示用のメソッドは org.freedesktop.DBus.Properties.GetAll で、引数にBlueZのインタフェース名を指定します。先ほどのIntrospectの結果に <interface name="org.bluez.Adapter1"> という内容が含まれていて、 org.bluez.Adapter1 というインタフェースがあることがわかりますので、これを指定します。

pi@raspberrypi:~ $ sudo dbus-send --print-reply --system --dest=org.bluez /org/bluez/hci0 --type=method_call org.freedesktop.DBus.Properties.GetAll string:org.bluez.Adapter1
method return sender=:1.3 -> dest=:1.11 reply_serial=2
   array [
      dict entry(
         string "Address"
         variant             string "B8:27:EB:19:76:07"
      )
      dict entry(
         string "Name"
         variant             string "raspberrypi"
      )
      dict entry(
         string "Alias"
         variant             string "raspberrypi"
      )
      dict entry(
         string "Class"
         variant             uint32 0
      )
      dict entry(
         string "Powered"
         variant             boolean true
      )
      dict entry(
         string "Discoverable"
         variant             boolean false
      )
      dict entry(
         string "DiscoverableTimeout"
         variant             uint32 180
      )
      dict entry(
         string "Pairable"
         variant             boolean true
      )
      dict entry(
         string "PairableTimeout"
         variant             uint32 0
      )
      dict entry(
         string "Discovering"
         variant             boolean false
      )
      dict entry(
         string "UUIDs"
         variant             array [
               string "00001801-0000-1000-8000-00805f9b34fb"
               string "0000110e-0000-1000-8000-00805f9b34fb"
               string "00001200-0000-1000-8000-00805f9b34fb"
               string "00001800-0000-1000-8000-00805f9b34fb"
               string "0000110c-0000-1000-8000-00805f9b34fb"
            ]
      )
      dict entry(
         string "Modalias"
         variant             string "usb:v1D6Bp0246d052D"
      )
   ]

 MACアドレスや、デバイスのスキャンを行なっているか(Discovering)といった情報が確認できます。

 それではhci0配下のデバイスの情報を見てみます。 --dest オプションの引数のパスにデバイスを追加します。

pi@raspberrypi:~ $ sudo dbus-send --print-reply --system --dest=org.bluez /org/bluez/hci0/dev_49_25_2A_9A_90_44 --type=method_call org.freedesktop.DBus.Introspectable.Introspect
method return sender=:1.3 -> dest=:1.9 reply_serial=2
   string "<!DOCTYPE node PUBLIC "-//freedesktop//DTD D-BUS Object Introspection 1.0//EN"
"http://www.freedesktop.org/standards/dbus/1.0/introspect.dtd">
<node><interface name="org.freedesktop.DBus.Introspectable"><method name="Introspect"><arg name="xml" type="s" direction="out"/>
</method></interface><interface name="org.bluez.Device1"><method name="Disconnect"></method><method name="Connect"></method><method name="ConnectProfile"><arg name="UUID" type="s" direction="in"/>
</method><method name="DisconnectProfile"><arg name="UUID" type="s" direction="in"/>
</method><method name="Pair"></method><method name="CancelPairing"></method><property name="Address" type="s" access="read"></property><property name="Name" type="s" access="read"></property><property name="Alias" type="s" access="readwrite"></property><property name="Class" type="u" access="read"></property><property name="Appearance" type="q" access="read"></property><property name="Icon" type="s" access="read"></property><property name="Paired" type="b" access="read"></property><property name="Trusted" type="b" access="readwrite"></property><property name="Blocked" type="b" access="readwrite"></property><property name="LegacyPairing" type="b" access="read"></property><property name="RSSI" type="n" access="read"></property><property name="Connected" type="b" access="read"></property><property name="UUIDs" type="as" access="read"></property><property name="Modalias" type="s" access="read"></property><property name="Adapter" type="o" access="read"></property><property name="ManufacturerData" type="a{qv}" access="read"></property><property name="ServiceData" type="a{sv}" access="read"></property><property name="TxPower" type="n" access="read"></property><property name="ServicesResolved" type="b" access="read"></property></interface><interface name="org.freedesktop.DBus.Properties"><method name="Get"><arg name="interface" type="s" direction="in"/>
<arg name="name" type="s" direction="in"/>
<arg name="value" type="v" direction="out"/>
</method><method name="Set"><arg name="interface" type="s" direction="in"/>
<arg name="name" type="s" direction="in"/>
<arg name="value" type="v" direction="in"/>
</method><method name="GetAll"><arg name="interface" type="s" direction="in"/>
<arg name="properties" type="a{sv}" direction="out"/>
</method><signal name="PropertiesChanged"><arg name="interface" type="s"/>
<arg name="changed_properties" type="a{sv}"/>
<arg name="invalidated_properties" type="as"/>
</signal>
</interface></node>"

 そしてこのデバイスに接続します。

pi@raspberrypi:~ $ sudo dbus-send --print-reply --system --dest=org.bluez /org/bluez/hci0/dev_49_25_2A_9A_90_44 --type=method_call org.bluez.Device1.Connect
method return sender=:1.3 -> dest=:1.14 reply_serial=2

 そして再度オブジェクトのリストを表示してみます。

pi@raspberrypi:~ $ sudo dbus-send --print-reply --system --dest=org.bluez /org/bluez/hci0/dev_49_25_2A_9A_90_44 --type=method_call org.freedesktop.DBus.Introspectable.Introspect
method return sender=:1.3 -> dest=:1.16 reply_serial=2
   string "<!DOCTYPE node PUBLIC "-//freedesktop//DTD D-BUS Object Introspection 1.0//EN"
"http://www.freedesktop.org/standards/dbus/1.0/introspect.dtd">
<node><interface name="org.freedesktop.DBus.Introspectable"><method name="Introspect"><arg name="xml" type="s" direction="out"/>
</method></interface><interface name="org.bluez.Device1"><method name="Disconnect"></method><method name="Connect"></method><method name="ConnectProfile"><arg name="UUID" type="s" direction="in"/>
</method><method name="DisconnectProfile"><arg name="UUID" type="s" direction="in"/>
</method><method name="Pair"></method><method name="CancelPairing"></method><property name="Address" type="s" access="read"></property><property name="Name" type="s" access="read"></property><property name="Alias" type="s" access="readwrite"></property><property name="Class" type="u" access="read"></property><property name="Appearance" type="q" access="read"></property><property name="Icon" type="s" access="read"></property><property name="Paired" type="b" access="read"></property><property name="Trusted" type="b" access="readwrite"></property><property name="Blocked" type="b" access="readwrite"></property><property name="LegacyPairing" type="b" access="read"></property><property name="RSSI" type="n" access="read"></property><property name="Connected" type="b" access="read"></property><property name="UUIDs" type="as" access="read"></property><property name="Modalias" type="s" access="read"></property><property name="Adapter" type="o" access="read"></property><property name="ManufacturerData" type="a{qv}" access="read"></property><property name="ServiceData" type="a{sv}" access="read"></property><property name="TxPower" type="n" access="read"></property><property name="ServicesResolved" type="b" access="read"></property></interface><interface name="org.freedesktop.DBus.Properties"><method name="Get"><arg name="interface" type="s" direction="in"/>
<arg name="name" type="s" direction="in"/>
<arg name="value" type="v" direction="out"/>
</method><method name="Set"><arg name="interface" type="s" direction="in"/>
<arg name="name" type="s" direction="in"/>
<arg name="value" type="v" direction="in"/>
</method><method name="GetAll"><arg name="interface" type="s" direction="in"/>
<arg name="properties" type="a{sv}" direction="out"/>
</method><signal name="PropertiesChanged"><arg name="interface" type="s"/>
<arg name="changed_properties" type="a{sv}"/>
<arg name="invalidated_properties" type="as"/>
</signal>
</interface><node name="service0006"/><node name="service000a"/><node name="service000e"/><node name="service0014"/><node name="service0019"/><node name="service0023"/><node name="service002f"/><node name="service0034"/><node name="service0039"/><node name="service004c"/></node>"

 接続前は表示されていなかった、 <node name="service0006"/> などのBLEサービスの情報が表示されているのがわかります。また、 org.bluez.Device1 というインタフェースがあることがわかります。

 デバイスのプロパティも確認してみます。

pi@raspberrypi:~ $ sudo dbus-send --print-reply --system --dest=org.bluez /org/bluez/hci0/dev_49_25_2A_9A_90_44 --type=method_call org.freedesktop.DBus.Properties.GetAll string:org.bluez.Device1
method return sender=:1.3 -> dest=:1.27 reply_serial=2
   array [
      dict entry(
         string "Address"
         variant             string "49:25:2A:9A:90:44"
      )
      dict entry(
         string "Name"
         variant             string "iPhone"
      )
      dict entry(
         string "Alias"
         variant             string "iPhone"
      )
      dict entry(
         string "Appearance"
         variant             uint16 64
      )
      dict entry(
         string "Icon"
         variant             string "phone"
      )
      dict entry(
         string "Paired"
         variant             boolean false
      )
      dict entry(
         string "Trusted"
         variant             boolean false
      )
      dict entry(
         string "Blocked"
         variant             boolean false
      )
      dict entry(
         string "LegacyPairing"
         variant             boolean false
      )
      dict entry(
         string "RSSI"
         variant             int16 -44
      )
      dict entry(
         string "Connected"
         variant             boolean true
      )
      dict entry(
         string "UUIDs"
         variant             array [
               string "00001800-0000-1000-8000-00805f9b34fb"
               string "00001801-0000-1000-8000-00805f9b34fb"
               string "00001805-0000-1000-8000-00805f9b34fb"
               string "0000180a-0000-1000-8000-00805f9b34fb"
               string "0000180d-0000-1000-8000-00805f9b34fb"
               string "0000180f-0000-1000-8000-00805f9b34fb"
               string "7905f431-b5ce-4e99-a40f-4b1e122d00d0"
               string "89d3502b-0f36-433a-8ef4-c502ad55f8dc"
               string "9fa480e0-4967-4542-9390-d343dc5d04ae"
               string "d0611e78-bbb4-4591-a5f8-487910ae4366"
            ]
      )
      dict entry(
         string "Adapter"
         variant             object path "/org/bluez/hci0"
      )
      dict entry(
         string "ServicesResolved"
         variant             boolean true
      )
   ]

 MACアドレスやデバイス名などが確認できます。

 続けてデバイス配下のBLEサービスの情報を参照してみます。

pi@raspberrypi:~ $ sudo dbus-send --print-reply --system --dest=org.bluez /org/bluez/hci0/dev_49_25_2A_9A_90_44/service004c --type=method_call org.freedesktop.DBus.Introspectable.Introspect
method return sender=:1.3 -> dest=:1.43 reply_serial=2
   string "<!DOCTYPE node PUBLIC "-//freedesktop//DTD D-BUS Object Introspection 1.0//EN"
"http://www.freedesktop.org/standards/dbus/1.0/introspect.dtd">
<node><interface name="org.freedesktop.DBus.Introspectable"><method name="Introspect"><arg name="xml" type="s" direction="out"/>
</method></interface><interface name="org.bluez.GattService1"><property name="UUID" type="s" access="read"></property><property name="Device" type="o" access="read"></property><property name="Primary" type="b" access="read"></property><property name="Includes" type="ao" access="read"></property></interface><interface name="org.freedesktop.DBus.Properties"><method name="Get"><arg name="interface" type="s" direction="in"/>
<arg name="name" type="s" direction="in"/>
<arg name="value" type="v" direction="out"/>
</method><method name="Set"><arg name="interface" type="s" direction="in"/>
<arg name="name" type="s" direction="in"/>
<arg name="value" type="v" direction="in"/>
</method><method name="GetAll"><arg name="interface" type="s" direction="in"/>
<arg name="properties" type="a{sv}" direction="out"/>
</method><signal name="PropertiesChanged"><arg name="interface" type="s"/>
<arg name="changed_properties" type="a{sv}"/>
<arg name="invalidated_properties" type="as"/>
</signal>
</interface><node name="char004d"/><node name="char0050"/><node name="char0052"/></node>"

 string:org.bluez.GattService1 というインタフェースがあることがわかりますのでプロパティを参照してみます。

pi@raspberrypi:~ $ sudo dbus-send --print-reply --system --dest=org.bluez /org/bluez/hci0/dev_49_25_2A_9A_90_44/service004c --type=method_call org.freedesktop.DBus.Properties.GetAll string:org.bluez.GattService1
method return sender=:1.3 -> dest=:1.44 reply_serial=2
   array [
      dict entry(
         string "UUID"
         variant             string "0000180d-0000-1000-8000-00805f9b34fb"
      )
      dict entry(
         string "Device"
         variant             object path "/org/bluez/hci0/dev_49_25_2A_9A_90_44"
      )
      dict entry(
         string "Primary"
         variant             boolean true
      )
      dict entry(
         string "Includes"
         variant             array [
            ]
      )
   ]

 さらにそのサービス配下のキャラクタリスティックを見てみます。

pi@raspberrypi:~ $ sudo dbus-send --print-reply --system --dest=org.bluez /org/bluez/hci0/dev_49_25_2A_9A_90_44/service004c/char0050 --type=method_call org.freedesktop.DBus.Introspectable.Introspect                                        
method return sender=:1.3 -> dest=:1.59 reply_serial=2
   string "<!DOCTYPE node PUBLIC "-//freedesktop//DTD D-BUS Object Introspection 1.0//EN"
"http://www.freedesktop.org/standards/dbus/1.0/introspect.dtd">
<node><interface name="org.freedesktop.DBus.Introspectable"><method name="Introspect"><arg name="xml" type="s" direction="out"/>
</method></interface><interface name="org.bluez.GattCharacteristic1"><method name="ReadValue"><arg name="options" type="a{sv}" direction="in"/>
<arg name="value" type="ay" direction="out"/>
</method><method name="WriteValue"><arg name="value" type="ay" direction="in"/>
<arg name="options" type="a{sv}" direction="in"/>
</method><method name="StartNotify"></method><method name="StopNotify"></method><property name="UUID" type="s" access="read"></property><property name="Service" type="o" access="read"></property><property name="Value" type="ay" access="re
ad"></property><property name="Notifying" type="b" access="read"></property><property name="Flags" type="as" access="read"></property></interface><interface name="org.freedesktop.DBus.Properties"><method name="Get"><arg name="interface" t
ype="s" direction="in"/>
<arg name="name" type="s" direction="in"/>
<arg name="value" type="v" direction="out"/>
</method><method name="Set"><arg name="interface" type="s" direction="in"/>
<arg name="name" type="s" direction="in"/>
<arg name="value" type="v" direction="in"/>
</method><method name="GetAll"><arg name="interface" type="s" direction="in"/>
<arg name="properties" type="a{sv}" direction="out"/>
</method><signal name="PropertiesChanged"><arg name="interface" type="s"/>
<arg name="changed_properties" type="a{sv}"/>
<arg name="invalidated_properties" type="as"/>
</signal>
</interface></node>"
pi@raspberrypi:~ $ 
pi@raspberrypi:~ $ sudo dbus-send --print-reply --system --dest=org.bluez /org/bluez/hci0/dev_49_25_2A_9A_90_44/service004c/char0050 --type=method_call org.freedesktop.DBus.Properties.GetAll string:org.bluez.GattCharacteristic1
method return sender=:1.3 -> dest=:1.58 reply_serial=2
   array [
      dict entry(
         string "UUID"
         variant             string "00002a38-0000-1000-8000-00805f9b34fb"
      )
      dict entry(
         string "Service"
         variant             object path "/org/bluez/hci0/dev_49_25_2A_9A_90_44/service004c"
      )
      dict entry(
         string "Value"
         variant             array [
            ]
      )
      dict entry(
         string "Flags"
         variant             array [
               string "read"
            ]
      )
   ]

 org.bluez.GattCharacteristic1 インタフェースには ReadValue メソッドがあり、キャラクタリスティックの値を参照するために使えます。ただ、このメソッドの引数には空の配列を渡したいのですが、 dbus-sendコマンドのドキュメントには下記のような記述があり、dbus-sendコマンドは空の配列やネストされた配列には対応してないようです。

D-Bus supports more types than these, but dbus-send currently does not. Also, dbus-send does not permit empty containers or nested containers (e.g. arrays of variants).

https://dbus.freedesktop.org/doc/dbus-send.1.html

 なので dbus-send での操作は一旦ここで諦め、RubyからD-Busを操作してみたいと思います。

RubyからD-Busを操作する

 RubyからD-Busを操作するためのgemとして、 ruby-dbus というgemが公開されているのでこちらを使用します。

github.com

 gemをインストールした上でirbを起動してrequireします。

pi@raspberrypi:~ $ sudo bundle exec irb
irb(main):001:0> require 'dbus'
=> true

 まずはD-Busのシステムバスのインスタンスを取得します。

irb(main):002:0> bus = DBus::SystemBus.instance
/home/pi/vendor/bundle/ruby/2.4.0/gems/ruby-dbus-0.13.0/lib/dbus/marshall.rb:299: warning: constant ::Fixnum is deprecated
=> #<DBus::SystemBus:0x56b32d08 @message_queue=#<DBus::MessageQueue:0x56b32cc0 @address="unix:path=/var/run/dbus/system_bus_socket", @buffer="l\x04\x01\x01\n\x00\x00\x00\x02\x00\x00\x00\x8D\x00\x00\x00\x01\x01o\x00\x15\x00\x00\x00/org/fre
edesktop/DBus\x00\x00\x00\x02\x01s\x00\x14\x00\x00\x00org.freedesktop.DBus\x00\x00\x00\x00\x03\x01s\x00\f\x00\x00\x00NameAcquired\x00\x00\x00\x00\x06\x01s\x00\x05\x00\x00\x00:1.46\x00\x00\x00\b\x01g\x00\x01s\x00\x00\a\x01s\x00\x14\x00\x00
\x00org.freedesktop.DBus\x00\x00\x00\x00\x05\x00\x00\x00:1.46\x00", @is_tcp=false, @socket=#<Socket:fd 9>, @client=#<DBus::Client:0x56b32570 @socket=#<Socket:fd 9>, @state=:Authenticated, @auth_list=[DBus::DBusCookieSHA1, DBus::Anonymous]
, @authenticator=#<DBus::External:0x56b31c70>>>, @unique_name=":1.46", @method_call_replies={}, @method_call_msgs={}, @signal_matchrules={}, @proxy=nil, @object_root=<DBus::Node {}>, @service=#<DBus::Service:0x56b17870 @name=":1.46", @bus
=#<DBus::SystemBus:0x56b32d08 ...>, @root=<DBus::Node {}>>>

 そして dbus-send の時と同様に、D-Busに登録されているサービスを確認してみます。

irb(main):003:0> bus.proxy.ListNames[0]
=> ["org.freedesktop.DBus", ":1.3", "org.freedesktop.login1", "org.freedesktop.systemd1", ":1.46", ":1.31", "org.freedesktop.Avahi", ":1.0", "org.bluez", ":1.1", ":1.2"]

 ruby-dbus でD-Busのサービスを参照するには、 service メソッドでサービス名を指定します。

irb(main):004:0> bluez = bus.service('org.bluez')
=> #<DBus::Service:0x56b0e8e8 @name="org.bluez", @bus=#<DBus::SystemBus:0x56b32d08 @message_queue=#<DBus::MessageQueue:0x56b32cc0 @address="unix:path=/var/run/dbus/system_bus_socket", @buffer="l\x04\x01\x01\n\x00\x00\x00\x02\x00\x00\x00\x
8D\x00\x00\x00\x01\x01o\x00\x15\x00\x00\x00/org/freedesktop/DBus\x00\x00\x00\x02\x01s\x00\x14\x00\x00\x00org.freedesktop.DBus\x00\x00\x00\x00\x03\x01s\x00\f\x00\x00\x00NameAcquired\x00\x00\x00\x00\x06\x01s\x00\x05\x00\x00\x00:1.46\x00\x00
\x00\b\x01g\x00\x01s\x00\x00\a\x01s\x00\x14\x00\x00\x00org.freedesktop.DBus\x00\x00\x00\x00\x05\x00\x00\x00:1.46\x00", @is_tcp=false, @socket=#<Socket:fd 9>, @client=#<DBus::Client:0x56b32570 @socket=#<Socket:fd 9>, @state=:Authenticated,
 @auth_list=[DBus::DBusCookieSHA1, DBus::Anonymous], @authenticator=#<DBus::External:0x56b31c70>>>, @unique_name=":1.46", @method_call_replies={}, @method_call_msgs={}, @signal_matchrules={}, @proxy=nil, @object_root=<DBus::Node {}>, @ser
vice=#<DBus::Service:0x56b17870 @name=":1.46", @bus=#<DBus::SystemBus:0x56b32d08 ...>, @root=<DBus::Node {}>>>, @root=<DBus::Node {}>>

 introspect メソッドでオブジェクトのリストを参照できます。

irb(main):005:0> bluez.introspect
=> #<DBus::Service:0x560d6990 @name="org.bluez", @bus=#<DBus::SystemBus:0x560f9448 @message_queue=#<DBus::MessageQueue:0x560f9388 @address="unix:path=/var/run/dbus/system_bus_socket", @buffer="", @is_tcp=false, @socket=#<Socket:fd 9>, @client=#<DBus::Client:0x560f8a58 @socket=#<Socket:fd 9>, @state=:Authenticated, @auth_list=[DBus::DBusCookieSHA1, DBus::Anonymous], @authenticator=#<DBus::External:0x560f89e0>>>, @unique_name=":1.6", @method_call_replies={36=>#<Proc:0x564acfb0@/home/pi/vendor/bundle/ruby/2.4.0/gems/ruby-dbus-0.13.0/lib/dbus/bus.rb:339>, 38=>#<Proc:0x5649f408@/home/pi/vendor/bundle/ruby/2.4.0/gems/ruby-dbus-0.13.0/lib/dbus/bus.rb:339>, 142=>#<Proc:0x55bc79b0@/home/pi/vendor/bundle/ruby/2.4.0/gems/ruby-dbus-0.13.0/lib/dbus/bus.rb:339>, 196=>#<Proc:0x56500038@/home/pi/vendor/bundle/ruby/2.4.0/gems/ruby-dbus-0.13.0/lib/dbus/bus.rb:339>, 216=>#<Proc:0x55dcebf0@/home/pi/vendor/bundle/ruby/2.4.0/gems/ruby-dbus-0.13.0/lib/dbus/bus.rb:339>, 224=>#<Proc:0x56135508@/home/pi/vendor/bundle/ruby/2.4.0/gems/ruby-dbus-0.13.0/lib/dbus/bus.rb:339>}, @method_call_msgs={36=>#<DBus::Message:0x564ad010 @message_type=1, @flags=0, @protocol=1, @body_length=0, @signature="", @serial=36, @params=[], @destination="org.bluez", @interface="org.bluez.Device1", @error_name=nil, @member="Connect", @path="/org/bluez/hci0/dev_53_B5_AD_3D_0E_8D", @reply_serial=nil, @sender=":1.6">, 38=>#<DBus::Message:0x5649f468 @message_type=1, @flags=0, @protocol=1, @body_length=0, @signature="", @serial=38, @params=[], @destination="org.bluez", @interface="org.bluez.Device1", @error_name=nil, @member="Disconnect", @path="/org/bluez/hci0/dev_53_B5_AD_3D_0E_8D", @reply_serial=nil, @sender=":1.6">, 142=>#<DBus::Message:0x55bc7a28 @message_type=1, @flags=0, @protocol=1, @body_length=0, @signature="", @serial=142, @params=[], @destination="org.bluez", @interface="org.bluez.Device1", @error_name=nil, @member="Connect", @path="/org/bluez/hci0/dev_55_6D_EC_78_2A_61", @reply_serial=nil, @sender=":1.6">, 196=>#<DBus::Message:0x565001d0 @message_type=1, @flags=0, @protocol=1, @body_length=34, @signature="s", @serial=196, @params=[["s", "org.bluez.GattCharacteristic1"]], @destination="org.bluez", @interface="org.freedesktop.DBus.Properties", @error_name=nil, @member="GetAll", @path="/org/bluez/hci0/dev_68_32_1E_76_3F_5D/service004c/char0050", @reply_serial=nil, @sender=":1.6">, 216=>#<DBus::Message:0x55dcf028 @message_type=1, @flags=0, @protocol=1, @body_length=16, @signature="aya{sv}", @serial=216, @params=[["ay", [3]], ["a{sv}", {}]], @destination="org.bluez", @interface="org.bluez.GattCharacteristic1", @error_name=nil, @member="WriteValue", @path="/org/bluez/hci0/dev_68_32_1E_76_3F_5D/service004c/char0050", @reply_serial=nil, @sender=":1.6">, 224=>#<DBus::Message:0x56135688 @message_type=1, @flags=0, @protocol=1, @body_length=16, @signature="aya{sv}", @serial=224, @params=[["ay", [3]], ["a{sv}", {}]], @destination="org.bluez", @interface="org.bluez.GattCharacteristic1", @error_name=nil, @member="WriteValue", @path="/org/bluez/hci0/dev_68_32_1E_76_3F_5D/service004c/char0050", @reply_serial=nil, @sender=":1.6">}, @signal_matchrules={}, @proxy=nil, @object_root=<DBus::Node {}>, @service=#<DBus::Service:0x560e0158 @name=":1.6", @bus=#<DBus::SystemBus:0x560f9448 ...>, @root=<DBus::Node {}>>>, @root=<DBus::Node 2b28631c {org => {bluez => 2b091c4c {hci0 => 2b0c82a0 {dev_04_05_F2_46_99_7D => 2b078efc {},dev_20_16_06_23_98_85 => 2adec438 {},dev_34_36_3B_C7_FB_E9 => 2b268f94 {},dev_43_19_24_21_00_5F => 2b0b3b64 {},dev_47_03_50_13_27_49 => 2b271ebc {},dev_55_6D_EC_78_2A_61 => 2b24713c {},dev_5A_81_CF_0B_28_3B => 2b094730 {},dev_5E_2A_AF_7F_B9_29 => 2ade5ab4 {},dev_68_32_1E_76_3F_5D => 2b264a34 {},dev_68_81_60_74_D0_31 => 2b23aa34 {},dev_69_96_A2_B0_24_B2 => 2af6fb88 {},dev_78_C3_DC_6E_59_BE => 2b275ad4 {},dev_88_4A_EA_8A_39_D2 => 2b242de0 {},dev_88_4A_EA_8A_3F_2B => 2af7da00 {},dev_FC_E9_98_21_23_B7 => 2afc0108 {}}}}}>>

 また、 root メソッドで配下のオブジェクトのツリー構造を確認することができます。

irb(main):006:0> bluez.root
=> <DBus::Node 2b28631c {org => {bluez => 2b091c4c {hci0 => 2b0c82a0 {dev_04_05_F2_46_99_7D => 2b078efc {},dev_20_16_06_23_98_85 => 2adec438 {},dev_34_36_3B_C7_FB_E9 => 2b268f94 {},dev_43_19_24_21_00_5F => 2b0b3b64 {},dev_47_03_50_13_27_49 => 2b271ebc {},dev_55_6D_EC_78_2A_61 => 2b24713c {},dev_5A_81_CF_0B_28_3B => 2b094730 {},dev_5E_2A_AF_7F_B9_29 => 2ade5ab4 {},dev_68_32_1E_76_3F_5D => 2b264a34 {},dev_68_81_60_74_D0_31 => 2b23aa34 {},dev_69_96_A2_B0_24_B2 => 2af6fb88 {},dev_78_C3_DC_6E_59_BE => 2b275ad4 {},dev_88_4A_EA_8A_39_D2 => 2b242de0 {},dev_88_4A_EA_8A_3F_2B => 2af7da00 {},dev_FC_E9_98_21_23_B7 => 2afc0108 {}}}}}>

 オブジェクトのインスタンスを取得するには object メソッドを使用します。hci0インタフェース配下のデバイスのインスタンスを取得してみます。

irb(main):007:0> device = bluez.object('/org/bluez/hci0/dev_55_6D_EC_78_2A_61')                                                                                                                                                               
=> #<DBus::ProxyObject:0x561831a8 @bus=#<DBus::SystemBus:0x560f9448 @message_queue=#<DBus::MessageQueue:0x560f9388 @address="unix:path=/var/run/dbus/system_bus_socket", @buffer="", @is_tcp=false, @socket=#<Socket:fd 9>, @client=#<DBus::Cl
ient:0x560f8a58 @socket=#<Socket:fd 9>, @state=:Authenticated, @auth_list=[DBus::DBusCookieSHA1, DBus::Anonymous], @authenticator=#<DBus::External:0x560f89e0>>>, @unique_name=":1.6", @method_call_replies={36=>#<Proc:0x564acfb0@/home/pi/ve
ndor/bundle/ruby/2.4.0/gems/ruby-dbus-0.13.0/lib/dbus/bus.rb:339>, 38=>#<Proc:0x5649f408@/home/pi/vendor/bundle/ruby/2.4.0/gems/ruby-dbus-0.13.0/lib/dbus/bus.rb:339>, 142=>#<Proc:0x55bc79b0@/home/pi/vendor/bundle/ruby/2.4.0/gems/ruby-dbus
-0.13.0/lib/dbus/bus.rb:339>}, @method_call_msgs={36=>#<DBus::Message:0x564ad010 @message_type=1, @flags=0, @protocol=1, @body_length=0, @signature="", @serial=36, @params=[], @destination="org.bluez", @interface="org.bluez.Device1", @err
or_name=nil, @member="Connect", @path="/org/bluez/hci0/dev_53_B5_AD_3D_0E_8D", @reply_serial=nil, @sender=":1.6">, 38=>#<DBus::Message:0x5649f468 @message_type=1, @flags=0, @protocol=1, @body_length=0, @signature="", @serial=38, @params=[
], @destination="org.bluez", @interface="org.bluez.Device1", @error_name=nil, @member="Disconnect", @path="/org/bluez/hci0/dev_53_B5_AD_3D_0E_8D", @reply_serial=nil, @sender=":1.6">, 142=>#<DBus::Message:0x55bc7a28 @message_type=1, @flags
=0, @protocol=1, @body_length=0, @signature="", @serial=142, @params=[], @destination="org.bluez", @interface="org.bluez.Device1", @error_name=nil, @member="Connect", @path="/org/bluez/hci0/dev_55_6D_EC_78_2A_61", @reply_serial=nil, @send
er=":1.6">}, @signal_matchrules={}, @proxy=nil, @object_root=<DBus::Node {}>, @service=#<DBus::Service:0x560e0158 @name=":1.6", @bus=#<DBus::SystemBus:0x560f9448 ...>, @root=<DBus::Node {}>>>, @destination="org.bluez", @path="/org/bluez/h
ci0/dev_68_32_1E_76_3F_5D", @introspected=false, @interfaces={}, @subnodes=[], @api=#<DBus::ApiOptions:0x55d91ee8 @proxy_method_returns_array=true>>
irb(main):008:0> 
irb(main):009:0* device.introspect
=> "<!DOCTYPE node PUBLIC \"-//freedesktop//DTD D-BUS Object Introspection 1.0//EN\"\n\"http://www.freedesktop.org/standards/dbus/1.0/introspect.dtd\">\n<node><interface name=\"org.freedesktop.DBus.Introspectable\"><method name=\"Introspe
ct\"><arg name=\"xml\" type=\"s\" direction=\"out\"/>\n</method></interface><interface name=\"org.bluez.Device1\"><method name=\"Disconnect\"></method><method name=\"Connect\"></method><method name=\"ConnectProfile\"><arg name=\"UUID\" ty
pe=\"s\" direction=\"in\"/>\n</method><method name=\"DisconnectProfile\"><arg name=\"UUID\" type=\"s\" direction=\"in\"/>\n</method><method name=\"Pair\"></method><method name=\"CancelPairing\"></method><property name=\"Address\" type=\"s
\" access=\"read\"></property><property name=\"Name\" type=\"s\" access=\"read\"></property><property name=\"Alias\" type=\"s\" access=\"readwrite\"></property><property name=\"Class\" type=\"u\" access=\"read\"></property><property name=
\"Appearance\" type=\"q\" access=\"read\"></property><property name=\"Icon\" type=\"s\" access=\"read\"></property><property name=\"Paired\" type=\"b\" access=\"read\"></property><property name=\"Trusted\" type=\"b\" access=\"readwrite\">
</property><property name=\"Blocked\" type=\"b\" access=\"readwrite\"></property><property name=\"LegacyPairing\" type=\"b\" access=\"read\"></property><property name=\"RSSI\" type=\"n\" access=\"read\"></property><property name=\"Connect
ed\" type=\"b\" access=\"read\"></property><property name=\"UUIDs\" type=\"as\" access=\"read\"></property><property name=\"Modalias\" type=\"s\" access=\"read\"></property><property name=\"Adapter\" type=\"o\" access=\"read\"></property>
<property name=\"ManufacturerData\" type=\"a{qv}\" access=\"read\"></property><property name=\"ServiceData\" type=\"a{sv}\" access=\"read\"></property><property name=\"TxPower\" type=\"n\" access=\"read\"></property><property name=\"Servi
cesResolved\" type=\"b\" access=\"read\"></property></interface><interface name=\"org.freedesktop.DBus.Properties\"><method name=\"Get\"><arg name=\"interface\" type=\"s\" direction=\"in\"/>\n<arg name=\"name\" type=\"s\" direction=\"in\"
/>\n<arg name=\"value\" type=\"v\" direction=\"out\"/>\n</method><method name=\"Set\"><arg name=\"interface\" type=\"s\" direction=\"in\"/>\n<arg name=\"name\" type=\"s\" direction=\"in\"/>\n<arg name=\"value\" type=\"v\" direction=\"in\"
/>\n</method><method name=\"GetAll\"><arg name=\"interface\" type=\"s\" direction=\"in\"/>\n<arg name=\"properties\" type=\"a{sv}\" direction=\"out\"/>\n</method><signal name=\"PropertiesChanged\"><arg name=\"interface\" type=\"s\"/>\n<ar
g name=\"changed_properties\" type=\"a{sv}\"/>\n<arg name=\"invalidated_properties\" type=\"as\"/>\n</signal>\n</interface></node>"

 Connectメソッドでデバイスに接続して、オブジェクトのリストを表示してみます。

irb(main):010:0* device.Connect
=> []
irb(main):011:0>
irb(main):012:0* device.introspect
=> "<!DOCTYPE node PUBLIC \"-//freedesktop//DTD D-BUS Object Introspection 1.0//EN\"\n\"http://www.freedesktop.org/standards/dbus/1.0/introspect.dtd\">\n<node><interface name=\"org.freedesktop.DBus.Introspectable\"><method name=\"Introspe
ct\"><arg name=\"xml\" type=\"s\" direction=\"out\"/>\n</method></interface><interface name=\"org.bluez.Device1\"><method name=\"Disconnect\"></method><method name=\"Connect\"></method><method name=\"ConnectProfile\"><arg name=\"UUID\" ty
pe=\"s\" direction=\"in\"/>\n</method><method name=\"DisconnectProfile\"><arg name=\"UUID\" type=\"s\" direction=\"in\"/>\n</method><method name=\"Pair\"></method><method name=\"CancelPairing\"></method><property name=\"Address\" type=\"s
\" access=\"read\"></property><property name=\"Name\" type=\"s\" access=\"read\"></property><property name=\"Alias\" type=\"s\" access=\"readwrite\"></property><property name=\"Class\" type=\"u\" access=\"read\"></property><property name=
\"Appearance\" type=\"q\" access=\"read\"></property><property name=\"Icon\" type=\"s\" access=\"read\"></property><property name=\"Paired\" type=\"b\" access=\"read\"></property><property name=\"Trusted\" type=\"b\" access=\"readwrite\">
</property><property name=\"Blocked\" type=\"b\" access=\"readwrite\"></property><property name=\"LegacyPairing\" type=\"b\" access=\"read\"></property><property name=\"RSSI\" type=\"n\" access=\"read\"></property><property name=\"Connect
ed\" type=\"b\" access=\"read\"></property><property name=\"UUIDs\" type=\"as\" access=\"read\"></property><property name=\"Modalias\" type=\"s\" access=\"read\"></property><property name=\"Adapter\" type=\"o\" access=\"read\"></property>
<property name=\"ManufacturerData\" type=\"a{qv}\" access=\"read\"></property><property name=\"ServiceData\" type=\"a{sv}\" access=\"read\"></property><property name=\"TxPower\" type=\"n\" access=\"read\"></property><property name=\"Servi
cesResolved\" type=\"b\" access=\"read\"></property></interface><interface name=\"org.freedesktop.DBus.Properties\"><method name=\"Get\"><arg name=\"interface\" type=\"s\" direction=\"in\"/>\n<arg name=\"name\" type=\"s\" direction=\"in\"
/>\n<arg name=\"value\" type=\"v\" direction=\"out\"/>\n</method><method name=\"Set\"><arg name=\"interface\" type=\"s\" direction=\"in\"/>\n<arg name=\"name\" type=\"s\" direction=\"in\"/>\n<arg name=\"value\" type=\"v\" direction=\"in\"
/>\n</method><method name=\"GetAll\"><arg name=\"interface\" type=\"s\" direction=\"in\"/>\n<arg name=\"properties\" type=\"a{sv}\" direction=\"out\"/>\n</method><signal name=\"PropertiesChanged\"><arg name=\"interface\" type=\"s\"/>\n<ar
g name=\"changed_properties\" type=\"a{sv}\"/>\n<arg name=\"invalidated_properties\" type=\"as\"/>\n</signal>\n</interface><node name=\"service0006\"/><node name=\"service000a\"/><node name=\"service000e\"/><node name=\"service0014\"/><no
de name=\"service0019\"/><node name=\"service0023\"/><node name=\"service002f\"/><node name=\"service0034\"/><node name=\"service0039\"/><node name=\"service004c\"/></node>"

 subnodes メソッドを使うと配下のオブジェクトのリストが参照できます。

irb(main):013:0> device.subnodes
=> ["service0006", "service000a", "service000e", "service0014", "service0019", "service0023", "service002f", "service0034", "service0039", "service004c"]

 配下のサービスとキャラクタリスティックを確認してみます。今回対象としているHeart Rateのサービスは service004c になります。

irb(main):014:0> service = bluez.object('/org/bluez/hci0/dev_55_6D_EC_78_2A_61/service004c')                                                                                                                                                  
=> #<DBus::ProxyObject:0x55ef9cd8 @bus=#<DBus::SystemBus:0x560f9448 @message_queue=#<DBus::MessageQueue:0x560f9388 @address="unix:path=/var/run/dbus/system_bus_socket", @buffer="", @is_tcp=false, @socket=#<Socket:fd 9>, @client=#<DBus::Cl
ient:0x560f8a58 @socket=#<Socket:fd 9>, @state=:Authenticated, @auth_list=[DBus::DBusCookieSHA1, DBus::Anonymous], @authenticator=#<DBus::External:0x560f89e0>>>, @unique_name=":1.6", @method_call_replies={36=>#<Proc:0x564acfb0@/home/pi/ve
ndor/bundle/ruby/2.4.0/gems/ruby-dbus-0.13.0/lib/dbus/bus.rb:339>, 38=>#<Proc:0x5649f408@/home/pi/vendor/bundle/ruby/2.4.0/gems/ruby-dbus-0.13.0/lib/dbus/bus.rb:339>}, @method_call_msgs={36=>#<DBus::Message:0x564ad010 @message_type=1, @fl
ags=0, @protocol=1, @body_length=0, @signature="", @serial=36, @params=[], @destination="org.bluez", @interface="org.bluez.Device1", @error_name=nil, @member="Connect", @path="/org/bluez/hci0/dev_53_B5_AD_3D_0E_8D", @reply_serial=nil, @se
nder=":1.6">, 38=>#<DBus::Message:0x5649f468 @message_type=1, @flags=0, @protocol=1, @body_length=0, @signature="", @serial=38, @params=[], @destination="org.bluez", @interface="org.bluez.Device1", @error_name=nil, @member="Disconnect", @
path="/org/bluez/hci0/dev_53_B5_AD_3D_0E_8D", @reply_serial=nil, @sender=":1.6">}, @signal_matchrules={}, @proxy=nil, @object_root=<DBus::Node {}>, @service=#<DBus::Service:0x560e0158 @name=":1.6", @bus=#<DBus::SystemBus:0x560f9448 ...>, 
@root=<DBus::Node {}>>>, @destination="org.bluez", @path="/org/bluez/hci0/dev_55_6D_EC_78_2A_61/service004c", @introspected=false, @interfaces={}, @subnodes=[], @api=#<DBus::ApiOptions:0x55d91ee8 @proxy_method_returns_array=true>>
irb(main):015:0> 
irb(main):016:0* service.introspect
=> "<!DOCTYPE node PUBLIC \"-//freedesktop//DTD D-BUS Object Introspection 1.0//EN\"\n\"http://www.freedesktop.org/standards/dbus/1.0/introspect.dtd\">\n<node><interface name=\"org.freedesktop.DBus.Introspectable\"><method name=\"Introspe
ct\"><arg name=\"xml\" type=\"s\" direction=\"out\"/>\n</method></interface><interface name=\"org.bluez.GattService1\"><property name=\"UUID\" type=\"s\" access=\"read\"></property><property name=\"Device\" type=\"o\" access=\"read\"></pr
operty><property name=\"Primary\" type=\"b\" access=\"read\"></property><property name=\"Includes\" type=\"ao\" access=\"read\"></property></interface><interface name=\"org.freedesktop.DBus.Properties\"><method name=\"Get\"><arg name=\"in
terface\" type=\"s\" direction=\"in\"/>\n<arg name=\"name\" type=\"s\" direction=\"in\"/>\n<arg name=\"value\" type=\"v\" direction=\"out\"/>\n</method><method name=\"Set\"><arg name=\"interface\" type=\"s\" direction=\"in\"/>\n<arg name=
\"name\" type=\"s\" direction=\"in\"/>\n<arg name=\"value\" type=\"v\" direction=\"in\"/>\n</method><method name=\"GetAll\"><arg name=\"interface\" type=\"s\" direction=\"in\"/>\n<arg name=\"properties\" type=\"a{sv}\" direction=\"out\"/>
\n</method><signal name=\"PropertiesChanged\"><arg name=\"interface\" type=\"s\"/>\n<arg name=\"changed_properties\" type=\"a{sv}\"/>\n<arg name=\"invalidated_properties\" type=\"as\"/>\n</signal>\n</interface><node name=\"char004d\"/><no
de name=\"char0050\"/><node name=\"char0052\"/></node>"
irb(main):017:0>
irb(main):018:0* service.subnodes
=> ["char004d", "char0050", "char0052"]

 そして Body Sensor Locationキャラクタリスティックは char0050 です。

irb(main):019:0* characteristic = bluez.object('/org/bluez/hci0/dev_55_6D_EC_78_2A_61/service004c/char0050')
=> #<DBus::ProxyObject:0x564f5418 @bus=#<DBus::SystemBus:0x560f9448 @message_queue=#<DBus::MessageQueue:0x560f9388 @address="unix:path=/var/run/dbus/system_bus_socket", @buffer="", @is_tcp=false, @socket=#<Socket:fd 9>, @client=#<DBus::Cl
ient:0x560f8a58 @socket=#<Socket:fd 9>, @state=:Authenticated, @auth_list=[DBus::DBusCookieSHA1, DBus::Anonymous], @authenticator=#<DBus::External:0x560f89e0>>>, @unique_name=":1.6", @method_call_replies={36=>#<Proc:0x564acfb0@/home/pi/ve
ndor/bundle/ruby/2.4.0/gems/ruby-dbus-0.13.0/lib/dbus/bus.rb:339>, 38=>#<Proc:0x5649f408@/home/pi/vendor/bundle/ruby/2.4.0/gems/ruby-dbus-0.13.0/lib/dbus/bus.rb:339>}, @method_call_msgs={36=>#<DBus::Message:0x564ad010 @message_type=1, @fl
ags=0, @protocol=1, @body_length=0, @signature="", @serial=36, @params=[], @destination="org.bluez", @interface="org.bluez.Device1", @error_name=nil, @member="Connect", @path="/org/bluez/hci0/dev_53_B5_AD_3D_0E_8D", @reply_serial=nil, @se
nder=":1.6">, 38=>#<DBus::Message:0x5649f468 @message_type=1, @flags=0, @protocol=1, @body_length=0, @signature="", @serial=38, @params=[], @destination="org.bluez", @interface="org.bluez.Device1", @error_name=nil, @member="Disconnect", @
path="/org/bluez/hci0/dev_53_B5_AD_3D_0E_8D", @reply_serial=nil, @sender=":1.6">}, @signal_matchrules={}, @proxy=nil, @object_root=<DBus::Node {}>, @service=#<DBus::Service:0x560e0158 @name=":1.6", @bus=#<DBus::SystemBus:0x560f9448 ...>, 
@root=<DBus::Node {}>>>, @destination="org.bluez", @path="/org/bluez/hci0/dev_55_6D_EC_78_2A_61/service004c/char0050", @introspected=false, @interfaces={}, @subnodes=[], @api=#<DBus::ApiOptions:0x55d91ee8 @proxy_method_returns_array=true>
>
irb(main):020:0> 
irb(main):021:0* characteristic.introspect                                                                                                                                                                                                    
=> "<!DOCTYPE node PUBLIC \"-//freedesktop//DTD D-BUS Object Introspection 1.0//EN\"\n\"http://www.freedesktop.org/standards/dbus/1.0/introspect.dtd\">\n<node><interface name=\"org.freedesktop.DBus.Introspectable\"><method name=\"Introspe
ct\"><arg name=\"xml\" type=\"s\" direction=\"out\"/>\n</method></interface><interface name=\"org.bluez.GattCharacteristic1\"><method name=\"ReadValue\"><arg name=\"options\" type=\"a{sv}\" direction=\"in\"/>\n<arg name=\"value\" type=\"a
y\" direction=\"out\"/>\n</method><method name=\"WriteValue\"><arg name=\"value\" type=\"ay\" direction=\"in\"/>\n<arg name=\"options\" type=\"a{sv}\" direction=\"in\"/>\n</method><method name=\"StartNotify\"></method><method name=\"StopN
otify\"></method><property name=\"UUID\" type=\"s\" access=\"read\"></property><property name=\"Service\" type=\"o\" access=\"read\"></property><property name=\"Value\" type=\"ay\" access=\"read\"></property><property name=\"Notifying\" t
ype=\"b\" access=\"read\"></property><property name=\"Flags\" type=\"as\" access=\"read\"></property></interface><interface name=\"org.freedesktop.DBus.Properties\"><method name=\"Get\"><arg name=\"interface\" type=\"s\" direction=\"in\"/
>\n<arg name=\"name\" type=\"s\" direction=\"in\"/>\n<arg name=\"value\" type=\"v\" direction=\"out\"/>\n</method><method name=\"Set\"><arg name=\"interface\" type=\"s\" direction=\"in\"/>\n<arg name=\"name\" type=\"s\" direction=\"in\"/>
\n<arg name=\"value\" type=\"v\" direction=\"in\"/>\n</method><method name=\"GetAll\"><arg name=\"interface\" type=\"s\" direction=\"in\"/>\n<arg name=\"properties\" type=\"a{sv}\" direction=\"out\"/>\n</method><signal name=\"PropertiesCh
anged\"><arg name=\"interface\" type=\"s\"/>\n<arg name=\"changed_properties\" type=\"a{sv}\"/>\n<arg name=\"invalidated_properties\" type=\"as\"/>\n</signal>\n</interface></node>"
irb(main):022:0> 
irb(main):023:0* characteristic.subnodes
=> []

 interfaces でオブジェクトが持っているインタフェースのリストを参照できます。

irb(main):024:0> characteristic.interfaces
=> ["org.freedesktop.DBus.Introspectable", "org.bluez.GattCharacteristic1", "org.freedesktop.DBus.Properties"]

 また、プロパティを参照するには GetAll メソッドを使用し、引数にインタフェース名を指定します。

irb(main):025:0> characteristic.GetAll('org.bluez.GattCharacteristic1')
=> [{"UUID"=>"00002a38-0000-1000-8000-00805f9b34fb", "Service"=>"/org/bluez/hci0/dev_55_6D_EC_78_2A_61/service004c", "Value"=>[], "Flags"=>["read"]}]

 そして、dbus-sendではできなかった、ReadValueメソッドを使った値の参照を実行してみます。LightBlueでBody Sensor Locationの値を 0x01 に設定しておきます。
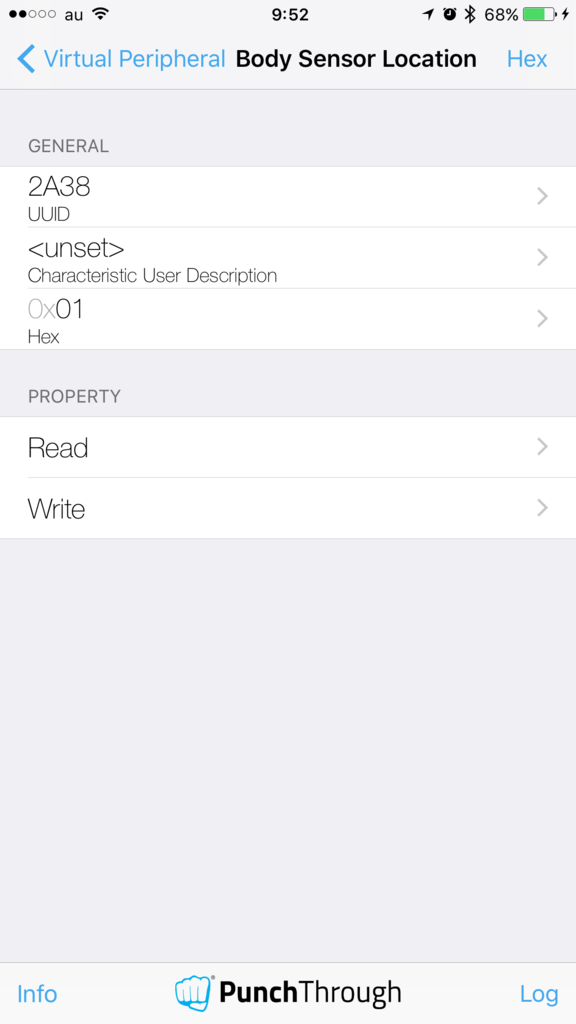
f:id:akanuma-hiroaki:20170610100405p:plain:w300

 ReadValueメソッドで参照してみます。

irb(main):026:0> characteristic.ReadValue([])
=> [[1]]

 配列として値が参照できました。LightBlueで値を 0x02 に変更してもう一度参照してみます。
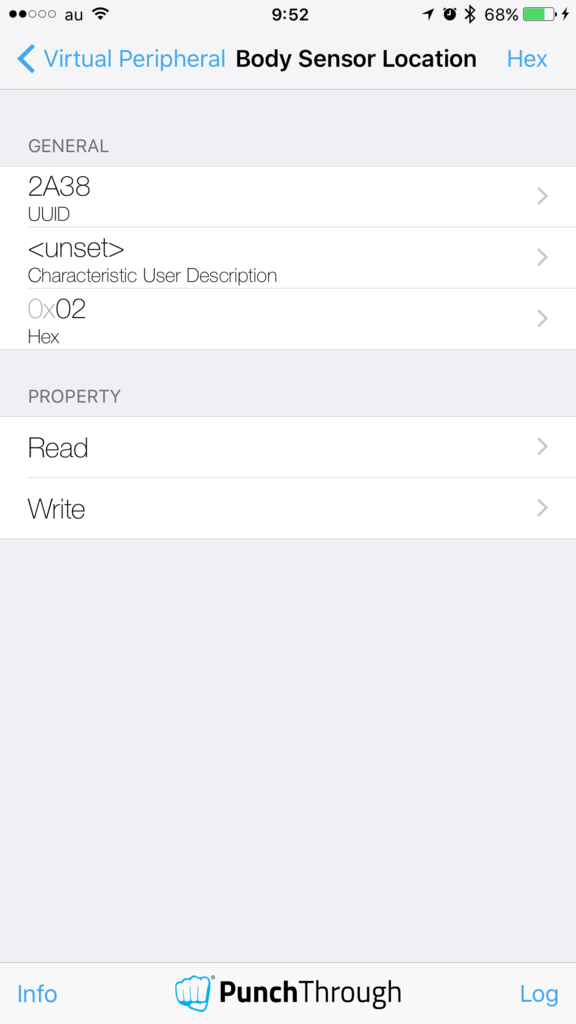
f:id:akanuma-hiroaki:20170610100721p:plain:w300

irb(main):027:0> characteristic.ReadValue([])
=> [[2]]

 今度はWriteValueメソッドで値を書き込んでみます。値は配列で指定します。また、第二引数にオプションをHashで指定しますが、今回は特にオプションはないので空のHashを渡します。

irb(main):028:0> characteristic.WriteValue([0x03], {})
=> []
irb(main):029:0> 
irb(main):030:0* characteristic.ReadValue([])                                                                                                                                                                                                 
=> [[3]]

 書き込んだ値が参照できました。LightBlue側で見ても値が変わっているのが確認できました。
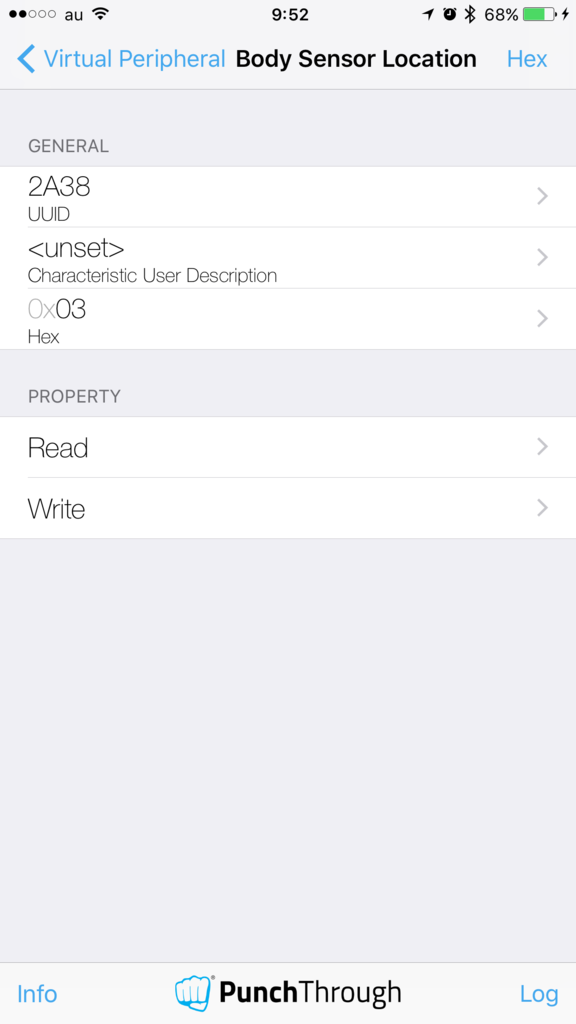
f:id:akanuma-hiroaki:20170610100922p:plain:w300

 今回は単純な値の読み書きだけで、Notificationなどはまだ使えていないですが、今後Notification周りも使えるようにして、デバイスの値の変化を検知して処理を行うようなものを作ってみたいと思います。

Raspberry Pi 3でBluetoothデバイス接続

 Raspberry Pi 3 からは標準でBluetoothモジュールが搭載されているということで、他のデバイスとの接続を試してみました。

BlueZインストール

 BlueZはオープンソースのBluetoothプロトコルスタックで、Linux上でBluetooth, BLEを扱う場合には標準的に使われているということなので、インストールします。

 まずはソースをダウンロードして解凍します。

pi@raspberrypi:~/tmp $ wget http://www.kernel.org/pub/linux/bluetooth/bluez-5.45.tar.xz
--2017-05-27 10:23:48--  http://www.kernel.org/pub/linux/bluetooth/bluez-5.45.tar.xz
Resolving www.kernel.org (www.kernel.org)... 147.75.110.187
Connecting to www.kernel.org (www.kernel.org)|147.75.110.187|:80... connected.
HTTP request sent, awaiting response... 301 Moved Permanently
Location: https://www.kernel.org/pub/linux/bluetooth/bluez-5.45.tar.xz [following]
--2017-05-27 10:23:48--  https://www.kernel.org/pub/linux/bluetooth/bluez-5.45.tar.xz
Connecting to www.kernel.org (www.kernel.org)|147.75.110.187|:443... connected.
HTTP request sent, awaiting response... 200 OK
Length: 1672404 (1.6M) [application/x-xz]
Saving to: ‘bluez-5.45.tar.xz’

bluez-5.45.tar.xz                                           100%[===========================================================================================================================================>]   1.59M  2.56MB/s   in 0.6s   

2017-05-27 10:23:49 (2.56 MB/s) - ‘bluez-5.45.tar.xz’ saved [1672404/1672404]

pi@raspberrypi:~/tmp $ xz -dv bluez-5.45.tar.xz 
bluez-5.45.tar.xz (1/1)
  100 %      1,633.2 KiB / 14.4 MiB = 0.111                                    
pi@raspberrypi:~/tmp $ tar -xf bluez-5.45.tar 
pi@raspberrypi:~/tmp $ cd bluez-5.45/

 ビルドに必要なライブラリをインストールします。configureしながら確認した結果、下記ライブラリをインストールしました。

pi@raspberrypi:~/tmp/bluez-5.45 $ sudo apt-get install -y libglib2.0-dev
pi@raspberrypi:~/tmp/bluez-5.45 $ sudo apt-get install -y libdbus-1-dev
pi@raspberrypi:~/tmp/bluez-5.45 $ sudo apt-get install -y libudev-dev
pi@raspberrypi:~/tmp/bluez-5.45 $ sudo apt-get install -y libical-dev

 そして下記コマンドでビルド、インストールします。

pi@raspberrypi:~/tmp/bluez-5.45 $ ./configure --enable-experimental
pi@raspberrypi:~/tmp/bluez-5.45 $ make
pi@raspberrypi:~/tmp/bluez-5.45 $ sudo make install

 無事にインストールできたらひとまずBluetoothデバイスをスキャンしてみます。hcitoolというコマンドを使って、Bluetoothデバイスを検索する場合は scan、BLEデバイスを検索する場合は lescan をオプションとして渡します。

pi@raspberrypi:~ $ hcitool
hcitool - HCI Tool ver 5.23
pi@raspberrypi:~ $ 
pi@raspberrypi:~ $ sudo hcitool lescan
LE Scan ...
74:DE:1A:E6:4E:4F (unknown)
34:36:3B:C7:FB:E9 (unknown)
74:DE:1A:E6:4E:4F (unknown)
F9:D8:AA:9A:CF:96 (unknown)
F9:D8:AA:9A:CF:96 Charge HR
pi@raspberrypi:~ $ 
pi@raspberrypi:~ $ sudo hcitool scan                                                                                                                                                                                                          
Scanning ...
        FC:E9:98:21:23:B7       Akanuma_Hiroaki_iPhone
pi@raspberrypi:~ $ 

 とりあえずデバイスの検知は行えているようです。

Bluetooth関連の各種ツール

 下記サイトを参考に、各種ツールのインストールやバージョンの確認をしてみました。

Raspberry Pi 3に Bluetooth BlueZ Version 5.42 BLE (ラズパイで Bluetooth 4.0の BLE gatt通信を行なう TIの SensorTagや iBeacon実験など)

 BlueZをインストールすると対話型の設定ツールとしてbluetoothctlが使えるようになっていますので、バージョンを確認してみます。

pi@raspberrypi:~/tmp/bluez-5.45 $ bluetoothctl 
[NEW] Controller B8:27:EB:19:76:07 raspberrypi [default]
[bluetooth]# version
Version 5.23
[bluetooth]# quit
[DEL] Controller B8:27:EB:19:76:07 raspberrypi [default]

 Bluetoothデバイス間のトラフィックのキャプチャツールとして、bluez-hcidumpをインストールしておきます。

pi@raspberrypi:~/tmp/bluez-5.45 $ sudo apt-get install bluez-hcidump
Reading package lists... Done
Building dependency tree       
Reading state information... Done
The following packages were automatically installed and are no longer required:
  libbison-dev libsigsegv2 m4
Use 'apt-get autoremove' to remove them.
The following NEW packages will be installed:
  bluez-hcidump
0 upgraded, 1 newly installed, 0 to remove and 0 not upgraded.
Need to get 157 kB of archives.
After this operation, 490 kB of additional disk space will be used.
Get:1 http://archive.raspberrypi.org/debian/ jessie/main bluez-hcidump armhf 5.23-2+rpi2 [157 kB]
Fetched 157 kB in 1s (91.8 kB/s)                          
Selecting previously unselected package bluez-hcidump.
(Reading database ... 36730 files and directories currently installed.)
Preparing to unpack .../bluez-hcidump_5.23-2+rpi2_armhf.deb ...
Unpacking bluez-hcidump (5.23-2+rpi2) ...
Processing triggers for man-db (2.7.0.2-5) ...
Setting up bluez-hcidump (5.23-2+rpi2) ...
pi@raspberrypi:~/tmp/bluez-5.45 $ 
pi@raspberrypi:~/tmp/bluez-5.45 $ hcidump
HCI sniffer - Bluetooth packet analyzer ver 5.23
device: hci0 snap_len: 1500 filter: 0xffffffff

 hciconfigではBluetoothインタフェースの状態が確認できます。

pi@raspberrypi:~/tmp/bluez-5.45 $ hciconfig
hci0:   Type: BR/EDR  Bus: UART
        BD Address: B8:27:EB:19:76:07  ACL MTU: 1021:8  SCO MTU: 64:1
        UP RUNNING 
        RX bytes:710 acl:0 sco:0 events:41 errors:0
        TX bytes:1496 acl:0 sco:0 commands:41 errors:0

iBeacon化してiPhoneから検知

 BlueZを使ってiBeacon化するためのツールとして下記が公開されているので、Raspberry Pi上で動かしてiPhoneから検知してみます。

github.com

 まずはソースをダウンロードして解凍します。

pi@raspberrypi:~/tmp $ git clone https://github.com/carsonmcdonald/bluez-ibeacon.git
Cloning into 'bluez-ibeacon'...
remote: Counting objects: 77, done.
remote: Total 77 (delta 0), reused 0 (delta 0), pack-reused 77
Unpacking objects: 100% (77/77), done.
Checking connectivity... done.
pi@raspberrypi:~/tmp $ 
pi@raspberrypi:~/tmp $ cd bluez-ibeacon/bluez-beacon/

 ビルドに必要なライブラリをインストール。

pi@raspberrypi:~/tmp/bluez-ibeacon/bluez-beacon $ sudo apt-get -y install libbluetooth-dev

 そしてビルドします。

pi@raspberrypi:~/tmp/bluez-ibeacon/bluez-beacon $ make
cc -g -o ibeacon ibeacon.c -lbluetooth

 無事ビルドできたら起動してみます。オプションはとりあえずサンプルと同じにしています。

pi@raspberrypi:~/tmp/bluez-ibeacon/bluez-beacon $ sudo ./ibeacon 200 e2c56db5dffb48d2b060d0f5a71096e0 1 1 -29                                                                                                                                 
Hit ctrl-c to stop advertising

 これでRaspberry Pi側はiBeaconとして動作しているはずなので、iPhoneに下記アプリをインストールしてiBeaconを検知してみます。

Locate Beacon

Locate Beacon

  • Radius Networks
  • Utilities
  • Free

f:id:akanuma-hiroaki:20170528203456p:plain:w300f:id:akanuma-hiroaki:20170528203505p:plain:w300

 距離の表示はだいぶずれてますが、ひとまず検知はされて、RSSIの情報も表示されました。

Bluetoothデバイスとペアリング&接続

 自宅にBluetooth接続のキーボードがあったのでペアリング&接続してみます。まずは bluetoothctl を起動して、デフォルトagentを設定します。

pi@raspberrypi:~ $ sudo bluetoothctl --agent=DisplayYesNo
[NEW] Controller B8:27:EB:19:76:07 raspberrypi [default]
[NEW] Device FC:E9:98:21:23:B7 Akanuma_Hiroaki_iPhone
Agent registered
[Akanuma_Hiroaki_iPhone]# default-agent
Default agent request successful

 続いてBluetoothデバイスのスキャンを開始します。Bluetooth 3.0 Keyboard が検知されたらスキャンを停止します。

[Akanuma_Hiroaki_iPhone]# scan on
Discovery started
[CHG] Controller B8:27:EB:19:76:07 Discovering: yes
[NEW] Device 34:36:3B:C7:FB:E9 34-36-3B-C7-FB-E9
[NEW] Device 20:16:06:23:98:85 20-16-06-23-98-85
[CHG] Device 20:16:06:23:98:85 LegacyPairing: no
[CHG] Device 20:16:06:23:98:85 Name: Bluetooth 3.0 Keyboard
[CHG] Device 20:16:06:23:98:85 Alias: Bluetooth 3.0 Keyboard
[CHG] Device 20:16:06:23:98:85 LegacyPairing: yes
[CHG] Device 34:36:3B:C7:FB:E9 RSSI: -65
[Akanuma_Hiroaki_iPhone]# scan off
[CHG] Device 20:16:06:23:98:85 RSSI is nil
[CHG] Device 34:36:3B:C7:FB:E9 RSSI is nil
Discovery stopped
[CHG] Controller B8:27:EB:19:76:07 Discovering: no

 対象のデバイスのMACアドレスを指定してペアリングします。

[Akanuma_Hiroaki_iPhone]# pair 20:16:06:23:98:85
Attempting to pair with 20:16:06:23:98:85
[CHG] Device 20:16:06:23:98:85 Connected: yes
[CHG] Device 20:16:06:23:98:85 Modalias: usb:v05ACp023Cd0102
[CHG] Device 20:16:06:23:98:85 UUIDs: 00001124-0000-1000-8000-00805f9b34fb
[CHG] Device 20:16:06:23:98:85 UUIDs: 00001200-0000-1000-8000-00805f9b34fb
[CHG] Device 20:16:06:23:98:85 ServicesResolved: yes
[CHG] Device 20:16:06:23:98:85 Paired: yes
Pairing successful
[CHG] Device 20:16:06:23:98:85 ServicesResolved: no
[CHG] Device 20:16:06:23:98:85 Connected: no
[Akanuma_Hiroaki_iPhone]# connect 20:16:06:23:98:85
Attempting to connect to 20:16:06:23:98:85
[CHG] Device 20:16:06:23:98:85 Connected: yes
Connection successful
[CHG] Device 20:16:06:23:98:85 ServicesResolved: yes
[DEL] Device 34:36:3B:C7:FB:E9 34-36-3B-C7-FB-E9
[DEL] Device 74:DE:1A:E6:4E:4F 74-DE-1A-E6-4E-4F
[CHG] Device 20:16:06:23:98:85 ServicesResolved: no
[CHG] Device 20:16:06:23:98:85 Connected: no

 そして接続してみます。

[bluetooth]# connect 20:16:06:23:98:85
Attempting to connect to 20:16:06:23:98:85
Failed to connect: org.bluez.Error.Failed
[bluetooth]# connect 20:16:06:23:98:85
Attempting to connect to 20:16:06:23:98:85
[CHG] Device 20:16:06:23:98:85 Connected: yes
Connection successful
[CHG] Device 20:16:06:23:98:85 ServicesResolved: yes

 無事接続できたようです。正しく通信できているか確認するために、evtest というインプットイベントのモニタツールを使ってみます。

evtest
~whot/evtest - Simple tool for input event debugging.

 インストールした後で下記のように実行します。evtestを起動した状態でキーボード入力してみたところ、下記のように検知され、正しく通信できていることが確認できました。

pi@raspberrypi:~/tmp/evtest $ evtest
No device specified, trying to scan all of /dev/input/event*
Not running as root, no devices may be available.
Available devices:
/dev/input/event0:      FC:E9:98:21:23:B7
/dev/input/event1:      Bluetooth 3.0 Keyboard
Select the device event number [0-1]: 1
Input driver version is 1.0.1
Input device ID: bus 0x5 vendor 0x5ac product 0x23c version 0x102
Input device name: "Bluetooth 3.0 Keyboard"
Supported events:
  Event type 0 (EV_SYN)
  Event type 1 (EV_KEY)
    Event code 1 (KEY_ESC)
    Event code 2 (KEY_1)
    Event code 3 (KEY_2)
    Event code 4 (KEY_3)
    Event code 5 (KEY_4)
    Event code 6 (KEY_5)
    Event code 7 (KEY_6)
    Event code 8 (KEY_7)
    Event code 9 (KEY_8)
    Event code 10 (KEY_9)
    Event code 11 (KEY_0)
    Event code 12 (KEY_MINUS)
    Event code 13 (KEY_EQUAL)
    Event code 14 (KEY_BACKSPACE)
    Event code 15 (KEY_TAB)
〜〜〜中略〜〜〜
    Event code 217 (KEY_SEARCH)
    Event code 240 (KEY_UNKNOWN)
    Event code 374 (KEY_KEYBOARD)
    Event code 581 (?)
  Event type 3 (EV_ABS)
    Event code 40 (ABS_MISC)
      Value      0
      Min        0
      Max      255
    Event code 41 (?)
      Value      0
      Min        0
      Max        1
    Event code 42 (?)
      Value      0
      Min        0
      Max        1
    Event code 43 (?)
      Value      0
      Min        0
      Max        1
  Event type 4 (EV_MSC)
    Event code 4 (MSC_SCAN)
  Event type 17 (EV_LED)
    Event code 0 (LED_NUML)
    Event code 1 (LED_CAPSL)
    Event code 2 (LED_SCROLLL)
    Event code 3 (LED_COMPOSE)
    Event code 4 (LED_KANA)
  Event type 20 (EV_REP)
Properties:
Testing ... (interrupt to exit)
Event: time 1495901204.274595, type 4 (EV_MSC), code 4 (MSC_SCAN), value 70004
Event: time 1495901204.274595, type 1 (EV_KEY), code 30 (KEY_A), value 1
Event: time 1495901204.274595, -------------- SYN_REPORT ------------
Event: time 1495901204.323288, type 4 (EV_MSC), code 4 (MSC_SCAN), value 70004
Event: time 1495901204.323288, type 1 (EV_KEY), code 30 (KEY_A), value 0
Event: time 1495901204.323288, -------------- SYN_REPORT ------------
Event: time 1495901206.455897, type 4 (EV_MSC), code 4 (MSC_SCAN), value 70005
Event: time 1495901206.455897, type 1 (EV_KEY), code 48 (KEY_B), value 1
Event: time 1495901206.455897, -------------- SYN_REPORT ------------
Event: time 1495901206.568359, type 4 (EV_MSC), code 4 (MSC_SCAN), value 70005
Event: time 1495901206.568359, type 1 (EV_KEY), code 48 (KEY_B), value 0
Event: time 1495901206.568359, -------------- SYN_REPORT ------------
Event: time 1495901208.728378, type 4 (EV_MSC), code 4 (MSC_SCAN), value 70006
Event: time 1495901208.728378, type 1 (EV_KEY), code 46 (KEY_C), value 1
Event: time 1495901208.728378, -------------- SYN_REPORT ------------
Event: time 1495901208.818369, type 4 (EV_MSC), code 4 (MSC_SCAN), value 70006
Event: time 1495901208.818369, type 1 (EV_KEY), code 46 (KEY_C), value 0
Event: time 1495901208.818369, -------------- SYN_REPORT ------------

RubyでBluetoothデバイスとペアリング&接続

 Bluetoothデバイスの検知、ペアリング、接続までをRubyでやってみます。RubyからBLEデバイスを操作するための gem として、ruby-bleというのがあるようなのでそちらを使ってみます。

github.com

Documentation for ble (0.1.0)

 Gemfileに下記エントリを追加して、bundle installしておきます。

gem 'ble'

   今回はとりあえずirbで試してみます。irbを起動して'ble'をrequireします。warningメッセージが気になるところですが、今回はスルー。

pi@raspberrypi:~ $ sudo bundle exec irb
irb(main):001:0> require 'ble'
/home/pi/vendor/bundle/ruby/2.4.0/gems/ruby-dbus-0.13.0/lib/dbus/marshall.rb:299: warning: constant ::Fixnum is deprecated
=> true

 BLEアダプタのリストを表示してみます。

irb(main):002:0> BLE::Adapter.list
/home/pi/vendor/bundle/ruby/2.4.0/gems/ruby-dbus-0.13.0/lib/dbus/marshall.rb:299: warning: constant ::Fixnum is deprecated
=> ["hci0"]

 hci0というアダプタが見つかるので、インスタンスを作成します。

irb(main):003:0> adapter = BLE::Adapter.new('hci0')

 Bluetoothデバイスの検知を開始します。目的のBLEデバイスのMACアドレスが検知されたら停止します。

irb(main):008:0* adapter.start_discovery
=> true
irb(main):011:0> adapter.devices
=> ["20:16:06:23:98:85", "34:36:3B:C7:FB:E9", "43:19:24:21:00:5F", "74:DE:1A:E6:4E:4F", "FC:E9:98:21:23:B7"]
irb(main):012:0> adapter.stop_discovery
=> true

 該当のBluetoothデバイスのオブジェクトを取得します。

irb(main):013:0> kb = adapter['20:16:06:23:98:85']

 デバイス名等を確認してみます。

irb(main):015:0* kb.name
=> "Bluetooth 3.0 Keyboard"
irb(main):016:0> kb.alias
=> "Bluetooth 3.0 Keyboard"
irb(main):017:0> kb.address
=> "20:16:06:23:98:85"

 続けてペアリングします。

irb(main):020:0> kb.pair
=> true
irb(main):021:0> kb.is_paired?
=> true

 そして接続してみます。

irb(main):026:0> kb.connect
=> true
irb(main):027:0> kb.is_connected?
=> true

 無事接続できたようです。この状態で evtest を実行すると、 bluetoothctl から接続した時と同じように、キーボードの入力内容が確認できます。

 ここまでだとまだBluetoothクラシックのデバイスと接続したところまでなので、次回以降でBLEデバイスとの通信を試してみたいと思います。

超音波センサー + SORACOM Beam でSlack通知

 IoTエンジニア養成読本のハンズオンのラスト、距離を測定するための超音波センサーの測定結果を元にした情報をSORACOM Beamを経由してSlackに通知する処理を実装してみました。

gihyo.jp

超音波センサーの接続

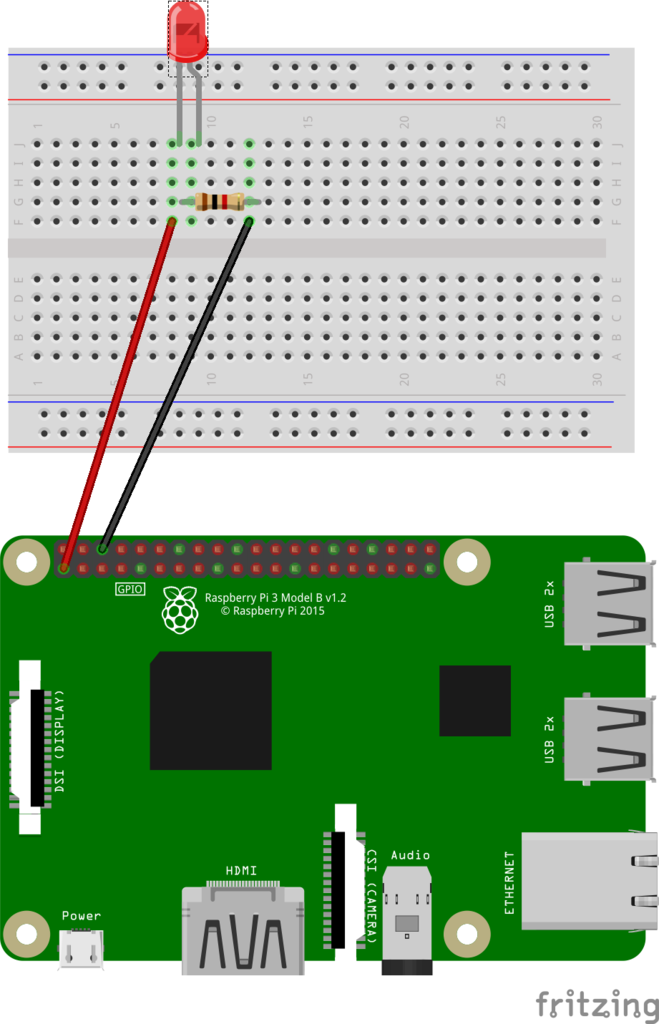
 まずは超音波センサー(HC-SR04)を下記の図のようにRaspberry Piに接続します。動作状況の確認用にLEDも一緒に接続しています。センサーの向きを間違えるとショートしてセンサーやRaspberry Piが壊れる可能性があるということなので注意して配線します。

f:id:akanuma-hiroaki:20170504232728p:plain:w300:left

超音波センサー
赤:2番ピン(+5V) - VCC
黒:20番ピン(GND) - GND
黄:13番ピン(GPIO27) - ECHO
青:11番ピン(GPIO17) - TRIG

LED
黒:6番ピン(GND)
黄:12番ピン(GPIO18)


f:id:akanuma-hiroaki:20170526062708j:plain:w500

距離の測定処理

 まずは距離の測定処理を実装します。超音波センサーでは送信した超音波が物体に当たって跳ね返り、戻ってくるまでにかかる時間から距離を測定しています。超音波センサーの端子としては、送信用がTRIG、受信用がECHOになります。今回はそれぞれGPIO17と27を使用しています。

require 'bundler/setup'
require 'pi_piper'

TRIG_GPIO = 17
ECHO_GPIO = 27

def read_distance(trig_pin_no, echo_pin_no)
  # 送信用(TRIG)、受信用(ECHO)のピンの設定
  trig_pin = PiPiper::Pin.new(pin: trig_pin_no, direction: :out)
  echo_pin = PiPiper::Pin.new(pin: echo_pin_no, direction: :in, trigger: :both)
  trig_pin.off
  sleep(0.3)

  # TRIGに短いパルスを送る
  trig_pin.on
  sleep(0.00001)
  trig_pin.off

  # ECHOがONになる(待ち受け状態になる)まで待ち、時間を記録
  echo_pin.wait_for_change
  signal_off = Time.now

  # ECHOがOFFになる(音波を受信して停止する)まで待ち、時間を記録
  echo_pin.wait_for_change
  signal_on = Time.now

  # 送出時刻と受信時刻の差分を求め、距離を計算する
  time_passed = signal_on - signal_off
  distance = time_passed * 17_000

  # ピンを解放
  PiPiper::Platform.driver.unexport_pin(trig_pin_no)
  PiPiper::Platform.driver.unexport_pin(echo_pin_no)

  return distance if distance <= 500
end

if $0 == __FILE__
  loop do
    start_time = Time.now
    distance = read_distance(TRIG_GPIO, ECHO_GPIO)
    unless distance.nil?
      puts "Distance: %.1f cm" % distance
    end

    wait = start_time + 3 - Time.now
    sleep(wait) if wait > 0
  end
end

 今回使用している距離センサーの使い方は、TRIGに10μs電圧をかけるとパルスが8回送出され、同時にECHOがHIGHになり、音波を受信するとLOWになるとのことでした。

www.switch-science.com

 元のPythonコードではループでECHOのHIGH/LOWの状態を検知して処理していますが、同僚からエッジ検出という手があると聞いて調べたところ、ピンの状態の変化を検知する wait_for_change というメソッドがあったのでこれを使っています。

PiPiper::Pin#wait_for_change
Method: PiPiper::Pin#wait_for_change — Documentation for jwhitehorn/pi_piper (master)

 このメソッドは指定した方向のピンの状態変化を検知するまでそこで待ち、検知するとそれ以降の処理に進みます。wait_for_change のソースは下記のようになっていて、 pin_wait_for というメソッドを呼び出しています。

def wait_for_change
  Platform.driver.pin_wait_for(@pin, @trigger)
end

 pin_wait_for メソッドの実装は下記のようになっていて、ループでピンの状態を検知して、ピンのオブジェクト作成時に trigger オプションに指定した内容次第で、ONになった時、OFFになった時、もしくは両方の場合で変更を検知します。今回は trigger に :both を指定していますので、両方の場合で変更を検知してループを抜けます。

def self.pin_wait_for(pin, trigger)
  pin_set_edge(pin, trigger)

  fd = File.open("/sys/class/gpio/gpio#{pin}/value", "r")
  value = nil
  loop do
    fd.read
    IO.select(nil, nil, [fd], nil)
    last_value = value
    value = self.pin_read(pin)
    if last_value != value
      next if trigger == :rising and value == 0
      next if trigger == :falling and value == 1
      break
    end
  end
end

 自前でループ処理を書かなくても良いのでコードがスッキリするのですが、タイムアウトは設定できません。今回使用している距離センサーはケースによっては状態の変化が起こらなくなってしまうケースもあるようなので、それを考慮すると一定時間でタイムアウトさせて再度測定を開始する必要があります。その場合はやはり自前でループ処理を書いてタイムアウトを設定した方が良いかもしれません。今回はひとまずこのまま pin_for_wait を使った実装で進めてみます。

 これを実行すると下記のように測定結果が出力されていきます。

pi@raspberrypi:~ $ sudo bundle exec ruby distance.rb                                                                                                                                                                                          
Distance: 9.3 cm
Distance: 9.2 cm
Distance: 9.1 cm
Distance: 9.0 cm
Distance: 9.0 cm
Distance: 9.3 cm
Distance: 9.4 cm
Distance: 8.9 cm
Distance: 9.0 cm
Distance: 9.3 cm
Distance: 9.5 cm
Distance: 9.1 cm
Distance: 8.6 cm
Distance: 9.4 cm
Distance: 10.1 cm
Distance: 10.1 cm
Distance: 9.4 cm
Distance: 8.8 cm
Distance: 8.3 cm

 ちなみに書籍で紹介されていたPythonのコードで測定すると、上記と同じ条件で実行しても下記のように測定距離やばらつき度合いが異なります。

pi@raspberrypi:~ $ python distance.py 
Distance: 67.7 cm
Distance: 10.1 cm
Distance: 10.0 cm
Distance: 10.1 cm
Distance: 10.0 cm
Distance: 10.0 cm
Distance: 10.1 cm
Distance: 10.0 cm
Distance: 10.0 cm
Distance: 10.0 cm
Distance: 10.0 cm
Distance: 10.0 cm
Distance: 10.7 cm
Distance: 10.0 cm
Distance: 10.0 cm
Distance: 10.1 cm
Distance: 10.0 cm
Distance: 10.1 cm

 実際の距離は10cm程なので、Pythonの方がばらつきが少なく、実際の距離との誤差も少ないようです。この辺りはECHOでの待ち受け処理やピンの状態検知処理の部分に差があるように思いますが、まだ詳細は調べられてないので、今後時間があるときに調べてみたいと思います。今回はそんなに厳密な測定精度は必要ないので、このままRubyの実装を使用します。

SORACOM Beam + Slackの使用設定

 今回は状態判定結果をSlackへ通知するために、SORACOM Beamを使用します。もちろんRaspberry Piから直接SlackのAPIにリクエストを送ることもできますが、その場合、セキュリティートークンを含むURLをコードの中に書く必要がありますし、IoTデバイスを設置した後で送信先を変更したくなった場合などは設置場所まで行くか、デバイスを回収する等の対応が必要になってしまいます。SORACOM Beamを利用すると、デバイスからはBeamのAPIにリクエストを投げておけば、Beamからアクセスする先のURLはWebコンソールから後からでも変更できますし、その際にセキュリティートークンなどの情報を追加することができます。また、デバイスからBeamへはAir SIMから3G/LTE回線での接続になるので安全に接続できますし、そこから外部のAPIへリクエストを投げる時にTLSによる暗号化を行うことで、デバイス側で暗号化の処理を行う必要もなくなります。

 SORACOM Beamを使うには、ユーザーコンソールからあらかじめ設定しておく必要があります。SIMグループのメニューから該当するグループの「SORACOM Beam設定」をクリックして開き、「+」メニューから「HTTPエントリポイント」を選び、開いたフォームにSlackのIncoming webhook APIのURL等を入力します。ここではSlack側でのIncoming webhook APIの設定方法は割愛します。

f:id:akanuma-hiroaki:20170504232825p:plain

測定結果からの状態判定 + SORACOM Beamへの送信処理実装

 ここまでで実装した距離の測定処理を使って、測定結果から状態を判定し、今までと状態が変わった場合はSORACOM Beamへリクエストを送信する処理を実装します。また、検知状態がわかるようにLEDのON/OFFも行います。

 弊社の会議室はドアを閉めてしまうと外から中の様子は見えないので、使用中かどうかを示すためにドアに「使用中 / 空室」のプレートを貼ってあるのですが、入退室時に変更を忘れてそのままになってしまって結局使っているのかどうか開けてみないとわからないという状態がよく発生します。そこで今回は距離センサーを使って、会議室のテーブルに誰かいる = 会議室使用中ということで、その状態変化をSlackに通知して、会議室が使われているのかどうかわかるようにしてみたいと思います。

require 'bundler/setup'
require 'httpclient'
require 'logger'
require 'pi_piper'
require './distance.rb'

BEAM_URL = 'http://beam.soracom.io:8888/room'

TRIG_GPIO = 17
ECHO_GPIO = 27
LED_GPIO  = 18
INTERVAL  = 5.0 # sec

logger = Logger.new('room_notify.log')

led_pin  = PiPiper::Pin.new(pin: LED_GPIO,  direction: :out)

occupied = false
state_changed_at = Time.now

threshold = 50 # cm
unless ARGV.empty?
  threshold = ARGV.first.to_f
end

http_client = HTTPClient.new
loop do
  start_time = Time.now
  distance = read_distance(TRIG_GPIO, ECHO_GPIO)

  current_status = distance < threshold
  if occupied != current_status
    duration = Time.now - state_changed_at
    state_changed_at = Time.now
    message = "Distance: %.1f cm - Status changed to %s. (Duration: %d sec)" % [distance, current_status ? 'OCCUPIED' : 'EMPTY', duration]
    payload = '{"text":"%s"}' % message
    res = http_client.post(BEAM_URL, payload, 'Content-Type' => 'application/json')
    logger.info("PAYLOAD: #{payload} / BEAM Response: #{res.status}")
    occupied = current_status
  end

  occupied ? led_pin.on : led_pin.off

  if Time.now < start_time + INTERVAL
    sleep(start_time + INTERVAL - Time.now)
    next
  end
end

 5秒毎にセンサーから距離を読み取り、閾値(デフォルト50cm)を下回った場合は会議室使用中と判定しています。そして前回のステータスと異なっていた場合はSORACOM Beamへリクエストを送信します。また、使用中の場合はLEDを点灯させています。

 これを実行するとセンサーの測定距離に応じてステータスが判定され、ステータスが変更になった場合はSORACOM Beamへリクエストが送信されます。

pi@raspberrypi:~ $ sudo bundle exec ruby room_notify.rb &                                                                                                                                                                                     
[2] 9426

 ログファイルにはPAYLOADとBEAMからのレスポンスを出力しています。

pi@raspberrypi:~ $ tail room_notify.log                                                                                                                                                                                                       
I, [2017-05-24T23:09:50.528556 #5596]  INFO -- : PAYLOAD: {"text":"Distance: 52.7 cm - Status changed to EMPTY. (Duration: 25 sec)"} / BEAM Response: 200
I, [2017-05-24T23:10:05.498609 #5596]  INFO -- : PAYLOAD: {"text":"Distance: 10.1 cm - Status changed to OCCUPIED. (Duration: 14 sec)"} / BEAM Response: 200
I, [2017-05-24T23:18:39.312326 #7964]  INFO -- : PAYLOAD: {"text":"Distance: 9.9 cm - Status changed to OCCUPIED. (Duration: 0 sec)"} / BEAM Response: 200
I, [2017-05-24T23:18:49.242184 #7964]  INFO -- : PAYLOAD: {"text":"Distance: 98.0 cm - Status changed to EMPTY. (Duration: 10 sec)"} / BEAM Response: 200
I, [2017-05-24T23:18:54.314298 #7964]  INFO -- : PAYLOAD: {"text":"Distance: 14.3 cm - Status changed to OCCUPIED. (Duration: 4 sec)"} / BEAM Response: 200
I, [2017-05-24T23:23:33.491639 #9430]  INFO -- : PAYLOAD: {"text":"Distance: 11.3 cm - Status changed to OCCUPIED. (Duration: 0 sec)"} / BEAM Response: 200
I, [2017-05-24T23:23:48.761726 #9430]  INFO -- : PAYLOAD: {"text":"Distance: 54.2 cm - Status changed to EMPTY. (Duration: 15 sec)"} / BEAM Response: 200
I, [2017-05-24T23:23:53.451585 #9430]  INFO -- : PAYLOAD: {"text":"Distance: 46.9 cm - Status changed to OCCUPIED. (Duration: 5 sec)"} / BEAM Response: 200
I, [2017-05-24T23:23:58.791505 #9430]  INFO -- : PAYLOAD: {"text":"Distance: 51.0 cm - Status changed to EMPTY. (Duration: 5 sec)"} / BEAM Response: 200
I, [2017-05-24T23:24:18.531670 #9430]  INFO -- : PAYLOAD: {"text":"Distance: 10.2 cm - Status changed to OCCUPIED. (Duration: 19 sec)"} / BEAM Response: 200

 Slackにも下記のように通知されます。

f:id:akanuma-hiroaki:20170504232956p:plain:w500

 IoTデバイスはWebサービスと違って、設置してしまうとコードを変更したりするのは大変なので、SORACOM Beamのようなサービスで設置後も柔軟に設定を変更できるようになり、同時にセキュリティ面の信頼性も向上できるというのはとても便利だと感じました。

 今回実装したコードは下記リポジトリにも公開してあります。

github.com

温度センサーデータをSORACOM Harvestで可視化する

 引き続きIoTエンジニア養成読本のハンズオンの内容を実践中です。今度は温度センサーのデータを読み取って、そのデータをSORACOM Harvestへ送って可視化する処理をRubyで実装してみます。

gihyo.jp

温度センサーの接続

 まずは下記のように温度センサー(DS18B20)を接続します。温度センサーの3本の端子はそれぞれ用途が決まってるので、向きを間違えないように注意です。抵抗は4.7kΩのものを使っています。

f:id:akanuma-hiroaki:20170518013514p:plain:w300

Raspbianの設定

 次に温度センサーの情報を読み取れるようにRaspbianを設定します。まずは /boot/config.txt に下記差分の内容を追記します。gpioponは温度センサーをどのGPIOに接続するかの指定です。デフォルトが4とのことです。ちなみにここの数字を変えて該当するGPIOに接続を変更してみましたがうまくいかなかったので、変更する場合は他にも変更が必要なのかもしれません。

pi@raspberrypi:~ $ diff /boot/config.txt.20170513 /boot/config.txt
56a57,59
> 
> # Enable thermo sensor (DS18B20+)
> dtoverlay=w1-gpio-pullup,gpiopin=4

 そして /etc/modules にも起動時にモジュールが有効になるように下記差分の内容を追記します。

pi@raspberrypi:~ $ diff /etc/modules.20170513 /etc/modules
5c5,6
< 
---
> w1-gpio
> w1-therm

 設定を有効にするために再起動します。

pi@raspberrypi:~ $ sudo shutdown -r now

温度センサーの計測値を読み出してみる

 Rubyでの処理を実装する前に、まずは直接温度センサーの計測値を表示してみます。ここまでの設定がうまくいっていれば、温度センサーは /sys/bus/w1/devices/28-XXXXXXXXXXXX というディレクトリができ、温度センサーにアクセスできます。XXXXXXXXXXXX の部分は個体によって変わります。

pi@raspberrypi:~ $ ls -l /sys/bus/w1/devices/
total 0
lrwxrwxrwx 1 root root 0 May 13 04:33 28-01162e298eee -> ../../../devices/w1_bus_master1/28-01162e298eee
lrwxrwxrwx 1 root root 0 May 13 04:33 w1_bus_master1 -> ../../../devices/w1_bus_master1
pi@raspberrypi:~ $ 

 計測値を表示するにはデバイスのファイルをcatで開きます。

pi@raspberrypi:~ $ cat /sys/bus/w1/devices/28-*/w1_slave
7e 01 4b 46 7f ff 0c 10 f9 : crc=f9 YES
7e 01 4b 46 7f ff 0c 10 f9 t=23875
pi@raspberrypi:~ $ 

 t=XXXXX の部分が温度データで、摂氏を1,000倍したものが表示されています。

定期的な温度測定&Harvestへの送信処理

 それではこの温度センサーのデータを定期的に読み出して、SORACOM Harvestへデータを送信する処理を書いてみます。

require 'bundler/setup'
require 'httpclient'
require 'logger'

SENSOR_FILE_PATH = "/sys/bus/w1/devices/28-*/w1_slave"
HARVEST_URL = 'http://harvest.soracom.io/'

logger = Logger.new('temperature.log')

interval = 60.0
unless ARGV.empty?
  interval = ARGV.first.to_f
end

device_file_name = Dir.glob(SENSOR_FILE_PATH).first
http_client = HTTPClient.new
loop do
  sensor_data = File.read(device_file_name)
  temperature = sensor_data.match(/t=(.*$)/)[1].to_f / 1000
  payload = '{"temperature":"%.3f"}' % temperature
  res = http_client.post(HARVEST_URL, payload, 'Content-Type' => 'application/json')
  logger.info("PAYLOAD: #{payload} / HARVEST Response: #{res.status}")

  sleep(interval)
end

 Harvestへのデータの送信は、SORACOM Air SIMでネットワークに接続した上で、HarvestのエントリポイントへHTTP、TCPもしくはUDPでデータを送信するだけです。今回はHTTPでJSONデータをPOSTしていますので、Content-Typeには application/json を指定します。1分おきにセンサーデータを読み出し、温度データを1,000で割って摂氏の温度に変換し、Harvestに送信しています。データのPOSTにはhttpclientを使っていますので、gem install等でインストールしておきます。

SORACOM Harvest 使用設定

 Harvestでのデータ集計を利用するにはユーザコンソールで設定をしておく必要があります。SORACOMユーザコンソールの左上のメニューから「グループ」を選択し、該当のSimが所属するグループを開いたら、SORACOM Harvest設定を開き、スライドスイッチをONに切り替えます。

f:id:akanuma-hiroaki:20170518015451p:plain

 なお、Harvestを有効にすると、書き込み回数に応じて通信料とは別に料金が発生しますのでご注意ください。

soracom.jp

処理の実行

 それでは処理を実行します。SORACOM Harvestを利用するにはSoracom AIR Simからネットワークに接続している必要がありますので、接続した上で下記のように処理を実行します。

pi@raspberrypi:~ $ ruby temperature.rb &
[2] 2939

 ログファイルには下記のように出力されます。

pi@raspberrypi:~ $ tail -f temperature.log 
I, [2017-05-13T06:06:37.734748 #3352]  INFO -- : PAYLOAD: {"temperature":"24.062"} / HARVEST Response: 201
I, [2017-05-13T06:08:12.354801 #3419]  INFO -- : PAYLOAD: {"temperature":"23.875"} / HARVEST Response: 201
I, [2017-05-13T10:50:18.103700 #2915]  INFO -- : PAYLOAD: {"temperature":"26.500"} / HARVEST Response: 201
I, [2017-05-13T10:50:25.385651 #2939]  INFO -- : PAYLOAD: {"temperature":"26.562"} / HARVEST Response: 201
I, [2017-05-13T10:51:27.733886 #2939]  INFO -- : PAYLOAD: {"temperature":"26.375"} / HARVEST Response: 201
I, [2017-05-13T10:52:29.934142 #2939]  INFO -- : PAYLOAD: {"temperature":"26.437"} / HARVEST Response: 201
I, [2017-05-13T10:53:32.343927 #2939]  INFO -- : PAYLOAD: {"temperature":"26.375"} / HARVEST Response: 201
I, [2017-05-13T10:54:34.634204 #2939]  INFO -- : PAYLOAD: {"temperature":"26.625"} / HARVEST Response: 201
I, [2017-05-13T10:55:36.983980 #2939]  INFO -- : PAYLOAD: {"temperature":"26.625"} / HARVEST Response: 201
I, [2017-05-13T10:56:39.254179 #2939]  INFO -- : PAYLOAD: {"temperature":"26.687"} / HARVEST Response: 201

集計データの確認

 SORACOM Harvestで集計されたデータを見るには、ユーザコンソールのSIM Management画面から該当のSIMを選択し、ActionsからHarvest dataを選択します。

f:id:akanuma-hiroaki:20170518073208p:plain

 すると下記のように集計データがグラフで表示されます。

f:id:akanuma-hiroaki:20170518073321p:plain

 アップロードされたデータの保存期間は40日間ということなので、継続的にデータを保存する必要があるサービスを構築する場合には自前で環境を用意する必要がありますが、センサーで集めたデータをとりあえず集約してみてみたいというような場合には手軽に使えてとても便利だと思います。

SORACOM Air のメタデータとLEDを連動させる

 引き続きIoTエンジニア養成読本のハンズオンの内容を実践中なわけですが、今度はSORACOM AirのメタデータとLEDの点灯を連動させてる処理をRubyで実装してみます。

gihyo.jp

ユーザーコンソールからの設定

 メタデータサービスを使うにはまずユーザコンソールから、グループ設定とメタデータサービスの使用設定をしておく必要があります。

 ユーザコンソールのメニューからグループを作成した後、そのグループのSORACOM Airの設定で、メタデータサービスの使用設定をONにし、Readonlyのチェックを外して設定を保存します。

f:id:akanuma-hiroaki:20170504175133p:plain

 次にSORACOM AirのSim管理画面から、該当のSimのグループを先ほど作成したグループに変更して設定を保存します。

f:id:akanuma-hiroaki:20170504175303p:plain

f:id:akanuma-hiroaki:20170507161630p:plain:w500

SORACOM Air のメタデータサービスに接続

 まずはSORACOM Airで3Gネットワークに接続します。

pi@raspberrypi:~ $ sudo /usr/local/sbin/connect_air.sh &
[1] 30291
pi@raspberrypi:~ $ Found AK-020
waiting for modem device
--> WvDial: Internet dialer version 1.61
--> Cannot get information for serial port.
--> Initializing modem.
--> Sending: ATZ
ATZ
OK
--> Sending: ATQ0 V1 E1 S0=0 &C1 &D2 +FCLASS=0
ATQ0 V1 E1 S0=0 &C1 &D2 +FCLASS=0
OK
--> Sending: AT+CGDCONT=1,"IP","soracom.io"
AT+CGDCONT=1,"IP","soracom.io"
OK
--> Modem initialized.
--> Sending: ATD*99***1#
--> Waiting for carrier.
ATD*99***1#
OK
CONNECT 21000000
--> Carrier detected.  Starting PPP immediately.
--> Starting pppd at Thu May  4 05:36:43 2017
--> Pid of pppd: 30314
--> Using interface ppp0
--> local  IP address 10.247.81.162
--> remote IP address 10.64.64.64
--> primary   DNS address 100.127.0.53
--> secondary DNS address 100.127.1.53

 続いてcurlで直接メタデータサービスに接続してみます。(レスポンスの内容は省略しています)

pi@raspberrypi:~ $ curl http://metadata.soracom.io/v1/subscriber
{...}

 SORACOM Airでネットワークに接続していないとメタデータサービスにはアクセスできません。

 レスポンスのjsonを整形してみると下記のようになります。(一部マスクしています)

{
    "apn": "soracom.io", 
    "createdAt": 1493055578551, 
    "createdTime": 1493055578551, 
    "expiredAt": null, 
    "expiryAction": null, 
    "expiryTime": null, 
    "groupId": "d79b3210-8d23-4a41-8003-6b6acdec5e55", 
    "iccid": "XXXXXXXXXXXXXXXXXX", 
    "imeiLock": null, 
    "imsi": "XXXXXXXXXXXXX", 
    "ipAddress": "10.XXX.XX.XXX", 
    "lastModifiedAt": 1493876507132, 
    "lastModifiedTime": 1493876507132, 
    "moduleType": "nano", 
    "msisdn": "XXXXXXXXXXX", 
    "operatorId": "OPXXXXXXXXX", 
    "plan": 0, 
    "serialNumber": "AXXXXXXXXXXXXX", 
    "sessionStatus": {
        "dnsServers": [
            "100.127.0.53", 
            "100.127.1.53"
        ], 
        "gatewayPublicIpAddress": "54.XXX.XXX.XX", 
        "imei": "XXXXXXXXXXXXX", 
        "lastUpdatedAt": 1493876215192, 
        "location": null, 
        "online": true, 
        "ueIpAddress": "10.XXX.XX.XXX"
    }, 
    "speedClass": "s1.slow", 
    "status": "active", 
    "tags": {}, 
    "terminationEnabled": false, 
    "type": "s1.slow"
}

 取得できるデータの特定の項目だけ取得したい場合は下記のようにURLの末尾に項目名を追加します。

pi@raspberrypi:~ $ curl http://metadata.soracom.io/v1/subscriber.type
s1.slow

メタデータの更新

 メタデータのタグはAPIで取得だけでなく更新も可能です。curlでJSON形式でPUTリクエストを送信してみます。

pi@raspberrypi:~ $ curl http://metadata.soracom.io/v1/subscriber.tags
{}
pi@raspberrypi:~ $ 
pi@raspberrypi:~ $ curl -X PUT -H content-type:application/json -d '[{"tagName":"led","tagValue" :"off"}]' http://metadata.soracom.io/v1/subscriber/tags
{...}
pi@raspberrypi:~ $ 
pi@raspberrypi:~ $ curl http://metadata.soracom.io/v1/subscriber.tags
{"led":"off"}
pi@raspberrypi:~ $ 
pi@raspberrypi:~ $ curl http://metadata.soracom.io/v1/subscriber.tags.led
off
pi@raspberrypi:~ $ 

メタデータのタグ情報によってLEDの状態を変更する

 それではRubyスクリプトからメタデータサービスにアクセスして、タグの内容によってLEDを点灯/消灯してみます。

require 'bundler/setup'
require 'pi_piper'
require 'open-uri'

interval = 60.0
unless ARGV.empty?
  interval = ARGV[0].to_f
end

led_pin = PiPiper::Pin.new(pin: 22, direction: :out)

loop do
  print 'Connecting to Meta-data service... '
  begin
    res = OpenURI.open_uri('http://metadata.soracom.io/v1/subscriber.tags.led', read_timeout: 5)
    code = res.status.first.to_i

    if code != 200
      puts "ERROR: Invalid response code: #{code} message: #{res.status[1]}"
      break
    end

    led_tag = res.read.rstrip
    if led_tag.downcase == 'off'
      puts 'LED tag is OFF. Turn off the LED.'
      led_pin.off
    elsif led_tag.downcase == 'on'
      puts 'LED tag is ON. Turn on the LED.'
      led_pin.on
    end
  rescue => e
    puts e.message
    puts e.backtrace.join("\n")
    break
  end

  if interval > 0
    sleep(interval)
    next
  end

  break
end

 実行結果は下記のようになります。最初はonだったタグ情報をユーザコンソールからoffに変更すると、LEDが消灯されます。またonに変更すると、LEDが点灯されます。

pi@raspberrypi:~ $ sudo bundle exec ruby degital_twin1.rb 10
Connecting to Meta-data service... LED tag is ON. Turn on the LED.
Connecting to Meta-data service... LED tag is OFF. Turn off the LED. ← この直前にユーザコンソールからタグの値をoffに変更
Connecting to Meta-data service... LED tag is OFF. Turn off the LED.
Connecting to Meta-data service... LED tag is ON. Turn on the LED. ← この直前にユーザコンソールからタグの値をonに変更
Connecting to Meta-data service... LED tag is ON. Turn on the LED.

LEDの状態をメタデータに反映する

 次は、スイッチが押されたらLEDのON/OFFを切り替え、その情報をメタデータの方にも反映します。

require 'bundler/setup'
require 'pi_piper'
require 'net/http'
require 'open-uri'

interval = 60.0
unless ARGV.empty?
  interval = ARGV[0].to_f
end

led_pin = PiPiper::Pin.new(pin: 22, direction: :out)
led_pin.off

switch_pin = PiPiper::Pin.new(pin: 23, direction: :in, pull: :up)

start_time = nil

loop do
  start_time = Time.now.to_i

  print '- Connecting to Meta-data service... '
  begin
    res = OpenURI.open_uri('http://metadata.soracom.io/v1/subscriber.tags.led', read_timeout: 5)
    code = res.status.first.to_i

    if code != 200
      puts "ERROR: Invalid response code: #{code} message: #{res.status[1]}"
      break
    end

    led_tag = res.read.rstrip
    if led_tag.downcase == 'off'
      puts 'LED tag is OFF. Turn off the LED.'
      led_pin.off
    elsif led_tag.downcase == 'on'
      puts 'LED tag is ON. Turn on the LED.'
      led_pin.on
    end
  rescue => e
    puts e.message
    puts e.backtrace.join("\n")
    break
  end

  puts "- Waiting input via the switch (%.1f sec)" % (start_time + interval - Time.now.to_i)
  loop do
    switch_pin.read
    led_pin.read
    if switch_pin.value == 0
      puts "The switch has been pushed. Turn %s the LED" % (led_pin.off? ? 'ON' : 'OFF')
      led_pin.off? ? led_pin.on : led_pin.off
      led_pin.read

      print 'Updating Meta-data... '
      payload = '[{"tagName":"led","tagValue":"%s"}]' % (led_pin.on? ? 'on' : 'off')
      uri = URI.parse('http://metadata.soracom.io/v1/subscriber/tags')
      http = Net::HTTP.new(uri.host, uri.port)
      req = Net::HTTP::Put.new(uri.path, initheader = { 'Content-Type' => 'application/json'})
      req.body = payload
      res = http.start {|http| http.request(req) }
      puts "response_code: #{res.code}"
    end

    if Time.now.to_i > start_time + interval
      break
    end

    sleep(0.1)
  end
end

 実行結果は下記の通りです。30秒ごとにメタデータサービスからタグ情報を取得していますが、その間にスイッチが押された場合はその情報をメタデータサービスに反映しています。

pi@raspberrypi:~ $ sudo bundle exec ruby degital_twin2.rb 30
- Connecting to Meta-data service... LED tag is ON. Turn on the LED.
- Waiting input via the switch (29.0 sec)
- Connecting to Meta-data service... LED tag is ON. Turn on the LED.
- Waiting input via the switch (29.0 sec)
The switch has been pushed. Turn OFF the LED ← スイッチを押下
Updating Meta-data... response_code: 200
- Connecting to Meta-data service... LED tag is OFF. Turn off the LED.
- Waiting input via the switch (29.0 sec)
The switch has been pushed. Turn ON the LED ← スイッチを押下
Updating Meta-data... response_code: 200
- Connecting to Meta-data service... LED tag is ON. Turn on the LED.
- Waiting input via the switch (29.0 sec)

Raspberry Pi + RubyでLチカ

 前回でRaspberry Piの初期設定がだいたい終わったので、引き続きIoTエンジニア養成読本のハンズオンの内容をベースにLチカ(LED点滅)をやってみました。

gihyo.jp

 書籍の例ではPythonが使われていますが、そのままやっても面白くないのでRubyで挑戦しました。mrubyでやりたかったのですが、mrubyでGPIOを操作するためのライブラリのmruby-WiringPiとmruby-raspberryを試してみたもののビルドがうまくいかなかったので、ひとまずCRubyでやってみます。

まずは常時点灯

 まずは特に制御はせずに、常時LEDが点灯するように接続してみます。下記の図のように接続するとLEDが点灯します。書籍で使われている抵抗は330Ωですが、購入した抵抗セットの中には含まれてなかったので、1kΩのものを使っています。また、回路図は Fritzing を使って作成しました。

Fritzing
http://fritzing.org/home/

f:id:akanuma-hiroaki:20170504133715p:plain:w300:left

f:id:akanuma-hiroaki:20170504135253j:plain:w300

赤:1番ピン
黒:6番ピン(GND)

コマンドラインからLED点灯

 次にコマンドラインから直接GPIIOを操作してみます。GPIOへの入出力はOSの擬似ファイルとして提供されているようなので、それを操作します。

 まず使用するGPIOのピンをexportファイルに対して設定します。今回はGPIO22のピンを使います。

f:id:akanuma-hiroaki:20170504134511p:plain:w300:left

黒:15番ピン(GPIO22)
赤:6番ピン(GND)


pi@raspberrypi:~ $ ls -l /sys/class/gpio/export 
-rwxrwx--- 1 root gpio 4096 May  1 05:36 /sys/class/gpio/export
pi@raspberrypi:~ $ 
pi@raspberrypi:~ $ file /sys/class/gpio/export                                                                                                                                                                                                
/sys/class/gpio/export: ERROR: cannot read `/sys/class/gpio/export' (Input/output error)
pi@raspberrypi:~ $ 
pi@raspberrypi:~ $ cat /sys/class/gpio/export                                                                                                                                                                                                 
cat: /sys/class/gpio/export: Input/output error
pi@raspberrypi:~ $ 
pi@raspberrypi:~ $ echo 22 > /sys/class/gpio/export                                                                                                                                                                                           
pi@raspberrypi:~ $ 

 するとそのGPIOピンを操作するためのディレクトリが作られるので、まずは入出力の向きを指定します。今回はLEDの点灯のための出力なので、outを設定します。

pi@raspberrypi:~ $ ls -l /sys/class/gpio/gpio22/direction 
-rwxrwx--- 1 root gpio 4096 May  1 06:16 /sys/class/gpio/gpio22/direction
pi@raspberrypi:~ $ 
pi@raspberrypi:~ $ file /sys/class/gpio/gpio22/direction                                                                                                                                                                                      
/sys/class/gpio/gpio22/direction: ASCII text
pi@raspberrypi:~ $ 
pi@raspberrypi:~ $ cat /sys/class/gpio/gpio22/direction                                                                                                                                                                                       
in
pi@raspberrypi:~ $ 
pi@raspberrypi:~ $ echo out > /sys/class/gpio/gpio22/direction                                                                                                                                                                                
pi@raspberrypi:~ $ 

 そしてそのピンの値を1にすると点灯状態になり、0にすると消灯状態に戻ります。

pi@raspberrypi:~ $ ls -l /sys/class/gpio/gpio22/value 
-rwxrwx--- 1 root gpio 4096 May  1 06:16 /sys/class/gpio/gpio22/value
pi@raspberrypi:~ $ 
pi@raspberrypi:~ $ file /sys/class/gpio/gpio22/value 
/sys/class/gpio/gpio22/value: ASCII text
pi@raspberrypi:~ $ 
pi@raspberrypi:~ $ cat /sys/class/gpio/gpio22/value 
0
pi@raspberrypi:~ $ 
pi@raspberrypi:~ $ echo 1 > /sys/class/gpio/gpio22/value 
pi@raspberrypi:~ $ 
pi@raspberrypi:~ $ echo 0 > /sys/class/gpio/gpio22/value 
pi@raspberrypi:~ $ 

RubyスクリプトでLチカ

 ではRubyスクリプトでLチカをやってみたいと思います。まずはRaspberry Pi上にRuby環境を作るために、gitとrbenvと、その他必要なライブラリをインストールします。

pi@raspberrypi:~ $ sudo apt-get install git
pi@raspberrypi:~ $ sudo apt-get install rbenv
pi@raspberrypi:~ $ echo 'export PATH="$HOME/.rbenv/bin:$PATH"' >> .bashrc
pi@raspberrypi:~ $ echo 'eval "$(rbenv init -)"' >> .bashrc
pi@raspberrypi:~ $ 
pi@raspberrypi:~ $ tail .bashrc
# sources /etc/bash.bashrc).
if ! shopt -oq posix; then
  if [ -f /usr/share/bash-completion/bash_completion ]; then
    . /usr/share/bash-completion/bash_completion
  elif [ -f /etc/bash_completion ]; then
    . /etc/bash_completion
  fi
fi
export PATH="$HOME/.rbenv/bin:$PATH"
eval "$(rbenv init -)"
pi@raspberrypi:~ $ 
pi@raspberrypi:~ $ git clone https://github.com/rbenv/ruby-build.git ~/.rbenv/plugins/ruby-build
Cloning into '/home/pi/.rbenv/plugins/ruby-build'...
remote: Counting objects: 7534, done.
remote: Compressing objects: 100% (48/48), done.
remote: Total 7534 (delta 36), reused 0 (delta 0), pack-reused 7483
Receiving objects: 100% (7534/7534), 1.54 MiB | 850.00 KiB/s, done.
Resolving deltas: 100% (4567/4567), done.
Checking connectivity... done.
pi@raspberrypi:~ $ 
pi@raspberrypi:~ $ sudo apt-get install -y libssl-dev libreadline-dev

 そしてruby2.4.1をインストール。

pi@raspberrypi:~ $ rbenv install 2.4.1                                                                                                                                                                                                        
perl: warning: Setting locale failed.
perl: warning: Please check that your locale settings:
        LANGUAGE = (unset),
        LC_ALL = (unset),
        LC_CTYPE = "UTF-8",
        LANG = "en_GB.UTF-8"
    are supported and installed on your system.
perl: warning: Falling back to a fallback locale ("en_GB.UTF-8").
Downloading ruby-2.4.1.tar.bz2...
-> https://cache.ruby-lang.org/pub/ruby/2.4/ruby-2.4.1.tar.bz2
Installing ruby-2.4.1...
Installed ruby-2.4.1 to /home/pi/.rbenv/versions/2.4.1
pi@raspberrypi:~ $ 
pi@raspberrypi:~ $ rbenv global 2.4.1
pi@raspberrypi:~ $ 
pi@raspberrypi:~ $ rbenv version
2.4.1 (set by /home/pi/.rbenv/version)
pi@raspberrypi:~ $ 
pi@raspberrypi:~ $ ruby -v
ruby 2.4.1p111 (2017-03-22 revision 58053) [armv7l-linux-eabihf]

 gemの管理にはbundlerを使います。

pi@raspberrypi:~ $ gem install bundler
Fetching: bundler-1.14.6.gem (100%)
Successfully installed bundler-1.14.6
Parsing documentation for bundler-1.14.6
Installing ri documentation for bundler-1.14.6
Done installing documentation for bundler after 27 seconds
1 gem installed
pi@raspberrypi:~ $ 
pi@raspberrypi:~ $ bundle init
Writing new Gemfile to /home/pi/Gemfile
pi@raspberrypi:~ $ 

 GPIOの操作にはroot権限が必要なので、sudoでbundlerが使えるように、visudoでrbenvのパスを追加しておきます。

pi@raspberrypi:~ $ sudo visudo

secure_path に /home/pi/.rbenv/shims を追加

 そして今回はRubyからGPIOを操作するために、Pi Piper を使用してみます。

github.com

 Gemfileに pi_piper の記述を追加してbundle installします。

pi@raspberrypi:~ $ vi Gemfile 
pi@raspberrypi:~ $ 
pi@raspberrypi:~ $ cat Gemfile
# frozen_string_literal: true
source "https://rubygems.org"

gem 'pi_piper'
pi@raspberrypi:~ $ 
pi@raspberrypi:~ $ bundle install --path vendor/bundle
Fetching gem metadata from https://rubygems.org/...........
Fetching version metadata from https://rubygems.org/.
Resolving dependencies...
Installing eventmachine 1.0.9 with native extensions
Installing ffi 1.9.18 with native extensions
Using bundler 1.14.6
Installing pi_piper 2.0.0
Bundle complete! 1 Gemfile dependency, 4 gems now installed.
Bundled gems are installed into ./vendor/bundle.
pi@raspberrypi:~ $ 

 ここまででスクリプトを実行する準備はできたので、スクリプトを用意します。内容は下記の通り。

require 'bundler/setup'
require 'pi_piper'

pin = PiPiper::Pin.new(pin: 22, direction: :out)

loop do
  pin.on
  sleep 1
  pin.off
  sleep 1
end

 GPIOナンバーと入出力の方向を指定してPinオブジェクトを生成し、onメソッドで点灯、offメソッドで消灯しています。実行にはroot権限が必要なので、sudoでbundler経由でスクリプトを実行します。

pi@raspberrypi:~ $ sudo bundle exec ruby led-flash.rb

youtu.be

スイッチの入力検出

 では次にタクトスイッチを追加して、その入力を検出してみたいと思います。

f:id:akanuma-hiroaki:20170504135109p:plain:w300:left

f:id:akanuma-hiroaki:20170504135454j:plain:w300

赤:15番ピン(GPIO22)
黒:6番ピン(GND)
黄:16番ピン(GPIO23)


require 'bundler/setup'                                    
require 'pi_piper'                                         
                                                           
pin = PiPiper::Pin.new(pin: 23, direction: :in, pull: :up) 
                                                           
loop do                                                    
  pin.read                                                 
  if pin.value == 0                                        
    puts 'The switch has been pushed.'                     
  end                                                      
  sleep 1                                                  
end                                                        

 GPIOナンバーは23で、入出力の向きはinを指定します。プルアップ・プルダウン抵抗はプルアップを指定します。readメソッドで入力値を読み取って、ボタンが押されたら(valueが0だったら)コンソールにメッセージを出力します。

スイッチ押下中だけLED点灯

 次にスイッチの入力とLEDへの出力を組み合わせて、スイッチを押している間だけLEDを点灯させます。

require 'bundler/setup'                                            
require 'pi_piper'                                                 
                                                                   
led_pin = PiPiper::Pin.new(pin: 22, direction: :out)               
switch_pin = PiPiper::Pin.new(pin: 23, direction: :in, pull: :up)  
                                                                   
loop do                                                            
  switch_pin.read                                                  
  if switch_pin.off?                                               
    led_pin.on                                                     
  else                                                             
    led_pin.off                                                    
  end                                                              
  sleep(0.5)                                                       
end                                                                

 スイッチの入力値の関係がまだよくわかっていないのですが、押された時はvalueが0になり、off?メソッドがtrueになるので、その場合はLEDを点灯しています。

スイッチ押下でLEDのON/OFF切り替え

 そして最後にスイッチを押すことでLEDのON/OFFを切り替えるようにしてみます。

require 'bundler/setup'                                                                       
require 'pi_piper'                                                                            
                                                                                              
led_pin = PiPiper::Pin.new(pin: 22, direction: :out)                                          
led_pin.off                                                                                   
                                                                                              
switch_pin = PiPiper::Pin.new(pin: 23, direction: :in, pull: :up)                             
                                                                                              
loop do                                                                                       
  switch_pin.read                                                                             
  if switch_pin.value == 0                                                                    
    puts "Turn %s the LED since the switch has been pushed." % (led_pin.off? ? 'ON' : 'OFF')  
    led_pin.off? ? led_pin.on : led_pin.off                                                   
    led_pin.read                                                                              
  end                                                                                         
  sleep(0.5)                                                                                  
end                                                                                           

 スイッチが押されたらLEDの点灯状態を反転させています。ON/OFF切り替え後にreadメソッドを実行しないと現在の状態が認識されないようだったので、実行しています。

 Pi Piperではループを回して待ち受けるのではなく、watch や after メソッドを使ってイベントドリブンな形で実装することもできるようなのですが、ちょっと試した限りではうまくいかなかったので、いずれそちらの形で実装できるようにしてみたいと思います。