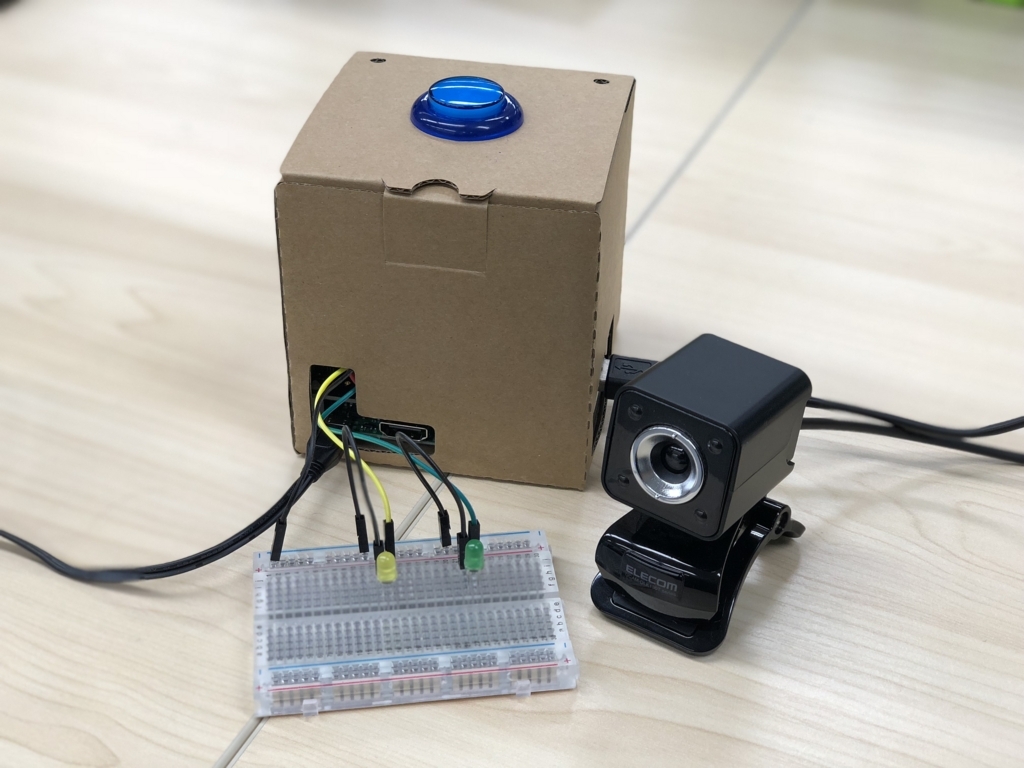
前回は Voice Kit にブレッドボードとLEDをつないで音声で操作してみました。今回は手持ちの Web カメラを繋げて音声で操作して写真を撮ってみたいと思います。

Web カメラの接続
今回はUSB接続の Web カメラを使用します。まず接続前の USB デバイスの認識状況です。
pi@raspberrypi:~ $ lsusb
Bus 001 Device 003: ID 0424:ec00 Standard Microsystems Corp. SMSC9512/9514 Fast Ethernet Adapter
Bus 001 Device 002: ID 0424:9514 Standard Microsystems Corp. SMC9514 Hub
Bus 001 Device 001: ID 1d6b:0002 Linux Foundation 2.0 root hub
pi@raspberrypi:~ $
pi@raspberrypi:~ $ ls /dev/video*
ls: '/dev/video*' にアクセスできません: そのようなファイルやディレクトリはありません
そして Raspberry Pi の USB ポートに Web カメラを接続した後は下記のようになります。
pi@raspberrypi:~ $ lsusb
Bus 001 Device 004: ID 056e:700f Elecom Co., Ltd
Bus 001 Device 003: ID 0424:ec00 Standard Microsystems Corp. SMSC9512/9514 Fast Ethernet Adapter
Bus 001 Device 002: ID 0424:9514 Standard Microsystems Corp. SMC9514 Hub
Bus 001 Device 001: ID 1d6b:0002 Linux Foundation 2.0 root hub
pi@raspberrypi:~ $
pi@raspberrypi:~ $ ls /dev/video*
/dev/video0
Device 004 として Elecom の Web カメラが認識され、デバイスファイルも作成されました。とりあえずのカメラの動作テスト用に、 guvcview をインストールします。
pi@raspberrypi:~ $ sudo apt-get install guvcview
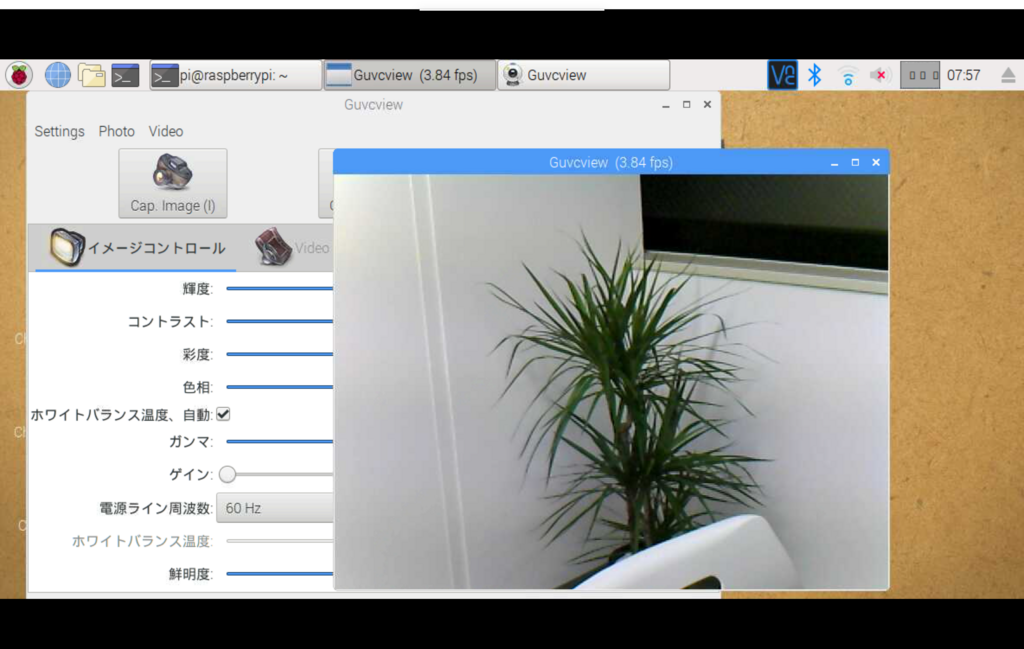
無事にインストールできたら下記のように起動します。 ssh ではなく VNC か直接デスクトップにログインして実行する必要があります。
pi@raspberrypi:~ $ guvcview &
起動すると Web カメラの映像がデスクトップ上に表示されます。

OpenCV のインストールと動作確認
今回は Web カメラからの画像のキャプチャ用に OpenCV を使います。
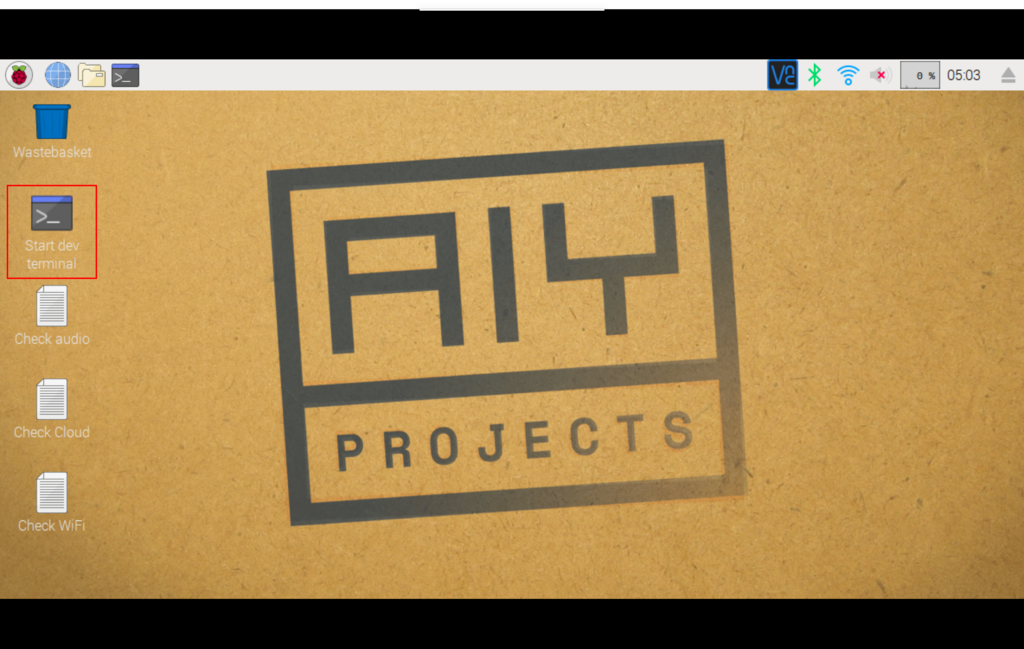
Voice Kit ではスクリプトを実行する場合にデスクトップの Start dev terminal ショートカットからシェルを起動します。

このショートカットの中身は下記のようになっていて、 /home/pi/bin/AIY-projects-shell.sh が実行されていますので、 VNC ではなく ssh 等でログインしている場合にはこの AIY-projects-shell.sh を実行してシェルを起動してからスクリプトを実行します。
[Desktop Entry]
Encoding=UTF-8
Type=Application
Name=Start dev terminal
Commment=Start a terminal with the environment for the AIY projects kit.
Exec=/home/pi/bin/AIY-projects-shell.sh
Terminal=true
Icon=utilities-terminal
AIY-projects-shell.sh の中身は下記のようになっていて、 env/bin/activate で Voice Kit のコード実行用の環境設定が行われています。
#!/bin/bash --rcfile

source /etc/bash.bashrc
source ~/.bashrc

cat /etc/aiyprojects.info

cd ~/AIY-projects-python
source env/bin/activate

echo "Dev terminal is ready! See the demos in 'src/examples' to get started."
AIY-projects-shell.sh を起動して環境設定が行われると $PATH の先頭は /home/pi/AIY-projects-python/env/bin になり、 python や pip 等のコマンドもそちらのものが参照されるようになります。
(env) pi@raspberrypi:~ $ which python
/home/pi/AIY-projects-python/env/bin/python
(env) pi@raspberrypi:~ $ which pip3
/home/pi/AIY-projects-python/env/bin/pip3
なので OpenCV のインストールも AIY-projects-shell.sh を起動した後に pip でインストールします。
(env) pi@raspberrypi:~ $ pip3 install opencv-python
Collecting opencv-python
  Using cached https://www.piwheels.hostedpi.com/simple/opencv-python/opencv_python-3.3.0.10-cp35-cp35m-linux_armv7l.whl
Requirement already satisfied: numpy>=1.12.1 in /usr/lib/python3/dist-packages (from opencv-python)
Installing collected packages: opencv-python
Successfully installed opencv-python-3.3.0.10
インストールされたら簡単に動作確認をしてみます。
(env) pi@raspberrypi:~ $ python -c 'import cv2'
Traceback (most recent call last):
  File "<string>", line 1, in <module>
  File "/home/pi/AIY-projects-python/env/lib/python3.5/site-packages/cv2/__init__.py", line 9, in <module>
    from .cv2 import *
ImportError: libcblas.so.3: cannot open shared object file: No such file or directory
libcblas.so.3 がないと言われてしまったので、 libatlas-base-dev を apt-get でインストールします。
(env) pi@raspberrypi:~ $ sudo apt-get install libatlas-base-dev
再度動作確認してみます。
(env) pi@raspberrypi:~ $ python -c 'import cv2'
(env) pi@raspberrypi:~ $
ライブラリが参照できるようになったようなので、インタラクティブシェルで動作を確認してみます。
(env) pi@raspberrypi:~ $ python
Python 3.5.3 (default, Jan 19 2017, 14:11:04)
[GCC 6.3.0 20170124] on linux
Type "help", "copyright", "credits" or "license" for more information.
>>>
>>> import cv2
>>>
>>> c = cv2.VideoCapture(0)
>>>
>>> r, img = c.read()
>>>
>>> cv2.imwrite('capture.jpg', img)
True
>>>
キャプチャ画像が capture.jpg というファイルに保存されていれば正常に動作しています。今回は下記のような画像がキャプチャされました。

サンプルコード実行時のエラー
途中で Voice Kit で提供されているサンプルコードを動かしてみたところ、下記のようにエラーになってしまいました。
(env) pi@raspberrypi:~/AIY-projects-python $ src/examples/voice/assistant_library_demo.py
ALSA lib pcm.c:8403:(snd_pcm_set_params) Rate doesn't match (requested 16000Hz, get 48000Hz)
[1013:1028:ERROR:audio_input_processor.cc(755)] Input error
/home/pi/AIY-projects-python/src/aiy/_drivers/_led.py:51: RuntimeWarning: This channel is already in use, continuing anyway.  Use GPIO.setwarnings(False) to disable warnings.
  GPIO.setup(channel, GPIO.OUT)
Say "OK, Google" then speak, or press Ctrl+C to quit...
[1013:1031:ERROR:audio_input_processor.cc(755)] Input error
Segmentation fault
オーディオ入力のサンプリングレートがマッチしないという感じのエラーのようです。ググってみたところ下記の情報を見つけました。
.asoundrc の設定内容が合っていないということのようなので、 /etc/asound.conf をコピーして使用します。
pi@raspberrypi:~ $ cat .asoundrc
pcm.!default {
        type hw
        card 0
}

ctl.!default {
        type hw
        card 0
}
pi@raspberrypi:~ $
pi@raspberrypi:~ $ cat /etc/asound.conf
options snd_rpi_googlevoicehat_soundcard index=0

pcm.softvol {
    type softvol
    slave.pcm dmix
    control {
        name Master
        card 0
    }
}

pcm.micboost {
    type route
    slave.pcm dsnoop
    ttable {
        0.0 30.0
        1.1 30.0
    }
}

pcm.!default {
    type asym
    playback.pcm "plug:softvol"
    capture.pcm "plug:micboost"
}

ctl.!default {
    type hw
    card 0
}
pi@raspberrypi:~ $
pi@raspberrypi:~ $ mv .asoundrc .asoundrc.20180202
pi@raspberrypi:~ $ cp /etc/asound.conf .asoundrc
これで無事動作するようになりました。
スクリプト実装
動作確認が取れたのでスクリプトを実装していきます。前回の LED のスクリプトの発話内容による分岐に下記の処理を追加します。「Take a picture.」と発話するとカウントダウンして写真を撮影します。また、カウントダウンに合わせて LED も使用してみました。
elif text == 'take a picture':
    assistant.stop_conversation()
    GPIO.output(MyAssistant.GPIO_LED_GREEN, GPIO.LOW)
    GPIO.output(MyAssistant.GPIO_LED_YELLOW, GPIO.LOW)

    now = datetime.now()
    filename = 'capture_%s.jpg' % now.strftime('%Y%m%d_%H%M%S')

    aiy.audio.say('OK, 3')
    GPIO.output(MyAssistant.GPIO_LED_GREEN, GPIO.HIGH)
    time.sleep(1)

    aiy.audio.say('2')
    GPIO.output(MyAssistant.GPIO_LED_GREEN, GPIO.LOW)
    GPIO.output(MyAssistant.GPIO_LED_YELLOW, GPIO.HIGH)
    time.sleep(1)

    aiy.audio.say('1')
    GPIO.output(MyAssistant.GPIO_LED_GREEN, GPIO.HIGH)
    time.sleep(1)

    c = cv2.VideoCapture(0)
    r, img = c.read()
    if cv2.imwrite(filename, img):
        self.print_and_say('I took nice one.')
    else:
        self.print_and_say("I couldn't take a picture.")

    c.release()
    GPIO.output(MyAssistant.GPIO_LED_GREEN, GPIO.LOW)
    GPIO.output(MyAssistant.GPIO_LED_YELLOW, GPIO.LOW)
    print('Captured Image: %s' % filename)
スクリプト全体は下記のようになります。
#!/usr/bin/env python3

import sys
import time
import cv2
from datetime import datetime

import aiy.assistant.auth_helpers
import aiy.audio
import aiy.voicehat
from google.assistant.library import Assistant
from google.assistant.library.event import EventType

import RPi.GPIO as GPIO

class MyAssistant:
    GPIO_LED_GREEN = 2
    GPIO_LED_YELLOW = 3

    def __init__(self):
        self.print_and_say('Initializing MyAssistant.')
        self.credentials = aiy.assistant.auth_helpers.get_assistant_credentials()
        self.status_ui = aiy.voicehat.get_status_ui()

        GPIO.setmode(GPIO.BCM)
        GPIO.setup(MyAssistant.GPIO_LED_GREEN, GPIO.OUT)
        GPIO.setup(MyAssistant.GPIO_LED_YELLOW, GPIO.OUT)

    def print_and_say(self, text):
        print(text)
        aiy.audio.say(text)

    def process_event(self, assistant, event):
        print('Processing event. The event is %s.' % event.type)

        if event.type == EventType.ON_START_FINISHED:
            self.status_ui.status('ready')
            if sys.stdout.isatty():
                print('Say "OK, Google" then speak.')
        elif event.type == EventType.ON_CONVERSATION_TURN_STARTED:
            self.status_ui.status('listening')
        elif event.type == EventType.ON_RECOGNIZING_SPEECH_FINISHED and event.args:
            print('You said: %s' % event.args['text'])
            text = event.args['text'].lower()

            if text == 'turn on green led':
                assistant.stop_conversation()
                GPIO.output(MyAssistant.GPIO_LED_GREEN, GPIO.HIGH)
                self.print_and_say('Turned on green LED.')
            elif text == 'turn off green led':
                assistant.stop_conversation()
                GPIO.output(MyAssistant.GPIO_LED_GREEN, GPIO.LOW)
                self.print_and_say('Turned off green LED.')
            elif text == 'turn on yellow led':
                assistant.stop_conversation()
                GPIO.output(MyAssistant.GPIO_LED_YELLOW, GPIO.HIGH)
                self.print_and_say('Turned on yellow LED.')
            elif text == 'turn off yellow led':
                assistant.stop_conversation()
                GPIO.output(MyAssistant.GPIO_LED_YELLOW, GPIO.LOW)
                self.print_and_say('Turned off yellow LED.')

            elif text == 'turn on all led':
                assistant.stop_conversation()
                GPIO.output(MyAssistant.GPIO_LED_GREEN, GPIO.HIGH)
                GPIO.output(MyAssistant.GPIO_LED_YELLOW, GPIO.HIGH)
                self.print_and_say('Turned on all LED.')
            elif text == 'turn off all led':
                assistant.stop_conversation()
                GPIO.output(MyAssistant.GPIO_LED_GREEN, GPIO.LOW)
                GPIO.output(MyAssistant.GPIO_LED_YELLOW, GPIO.LOW)
                self.print_and_say('Turned off all LED.')
            elif text == 'take a picture':
                assistant.stop_conversation()
                GPIO.output(MyAssistant.GPIO_LED_GREEN, GPIO.LOW)
                GPIO.output(MyAssistant.GPIO_LED_YELLOW, GPIO.LOW)

                now = datetime.now()
                filename = 'capture_%s.jpg' % now.strftime('%Y%m%d_%H%M%S')

                aiy.audio.say('OK, 3')
                GPIO.output(MyAssistant.GPIO_LED_GREEN, GPIO.HIGH)
                time.sleep(1)

                aiy.audio.say('2')
                GPIO.output(MyAssistant.GPIO_LED_GREEN, GPIO.LOW)
                GPIO.output(MyAssistant.GPIO_LED_YELLOW, GPIO.HIGH)
                time.sleep(1)

                aiy.audio.say('1')
                GPIO.output(MyAssistant.GPIO_LED_GREEN, GPIO.HIGH)
                time.sleep(1)

                c = cv2.VideoCapture(0)
                r, img = c.read()
                if cv2.imwrite(filename, img):
                    self.print_and_say('I took nice one.')
                else:
                    self.print_and_say("I couldn't take a picture.")

                c.release()
                GPIO.output(MyAssistant.GPIO_LED_GREEN, GPIO.LOW)
                GPIO.output(MyAssistant.GPIO_LED_YELLOW, GPIO.LOW)
                print('Captured Image: %s' % filename)
            elif text == 'goodbye':
                self.status_ui.status('stopping')
                assistant.stop_conversation()
                aiy.audio.say('Goodbye. See you again.')
                print('Stopping...')
                sys.exit()

        elif event.type == EventType.ON_END_OF_UTTERANCE:
            self.status_ui.status('thinking')
        elif event.type == EventType.ON_CONVERSATION_TURN_FINISHED:
            self.status_ui.status('ready')
        elif event.type == EventType.ON_ASSISTANT_ERROR and event.args and event.args['is_fatal']:
            sys.exit(1)

    def main(self):
        self.status_ui.status('starting')
        self.print_and_say('Starting main method.')
        with Assistant(self.credentials) as assistant:
            for event in assistant.start():
                self.process_event(assistant, event)

if __name__ == '__main__':
    sample = MyAssistant()
    sample.main()
動作確認
スクリプトを実行して動作を確認してみます。下記の動画のような動作になりました。
撮影された写真は下記のようになります。

まとめ
USBカメラの接続も特に苦労することなく、 OpenCV でのキャプチャーもすんなり行えました。この辺りの自由度が Google Home と違う面白さかと思います。今回の内容だと撮影してみないとどんな画像かがわからないので、映像を確認しながら撮影できるようにしたり、撮影後にデスクトップに画像を表示するなどの対応を試してみたいと思います。