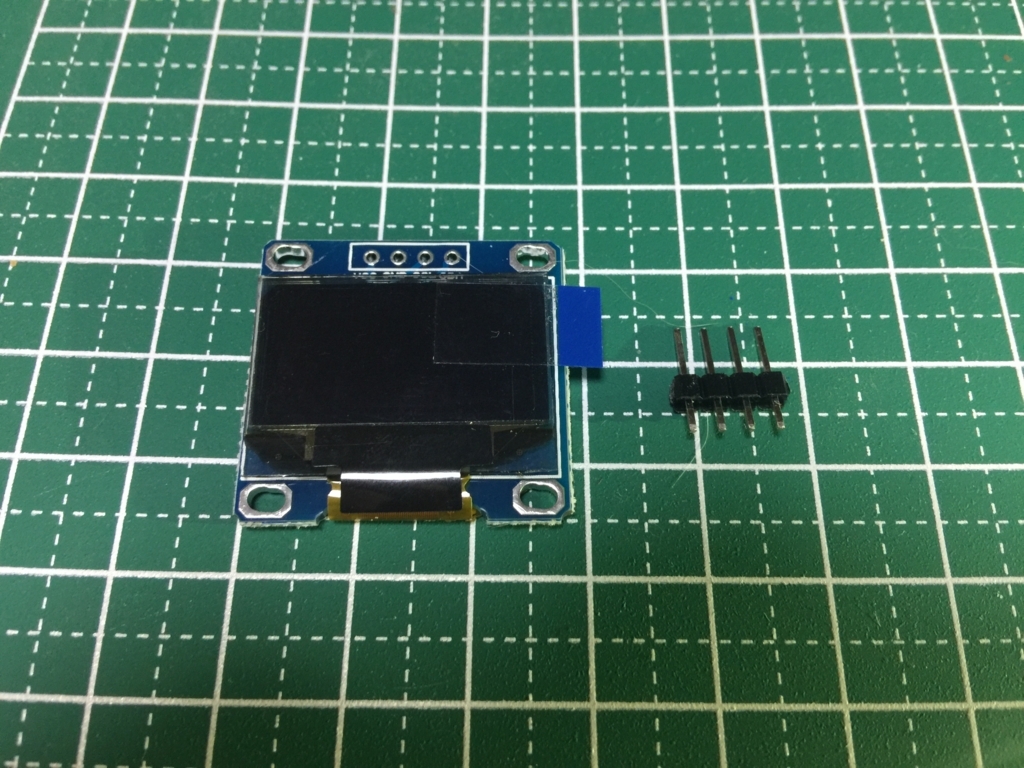
今回は Raspberry Pi と OLED(有機EL)ディスプレイを接続して表示させてみたいと思います。使用したディスプレイは aitendo さんで販売されていた下記パーツです。
購入時は下記写真のように、ディスプレイとピンヘッダが同封されていますが別々になっていますので、自分で半田付けして使用します。

Raspberry Pi と接続
それでは Raspberry Pi と OLED ディスプレイを接続します。今回下記サイトを参考にさせていただきました。
Overview | SSD1306 OLED Displays with Raspberry Pi and BeagleBone Black | Adafruit Learning System
raspberry pi でI2C接続の有機ELを使って時計を作る - Qiita
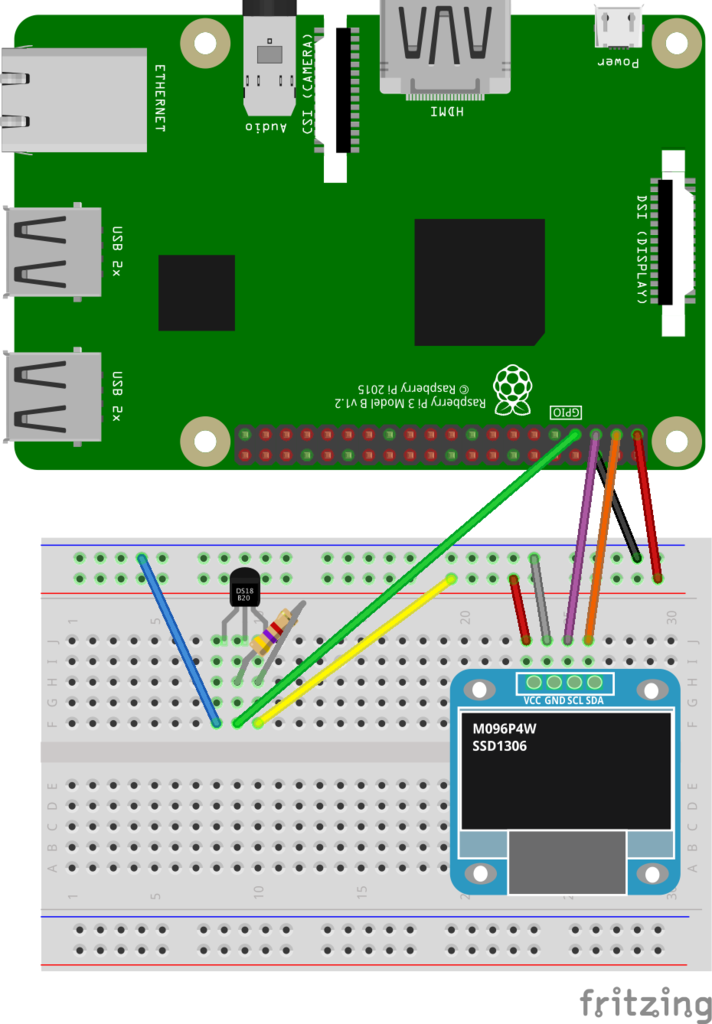
実際の配線は下記のようにシンプルです。今回使用しているディスプレイは I2C 接続なので、Raspberry Pi では 3番(SDA)と5番(SCL)のピンを使うことになります。

VCC: 1番ピン(3.3V Power)
GND: 6番ピン(GND)
SCL: 5番ピン(SCL)
SDA: 3番ピン(SDA)
I2C の使用設定
Raspberry Pi の I2C 接続を使うにはいくつか設定が必要です。設定方法については下記サイトを参考にさせていただきました。
Configuring I2C | Adafruit's Raspberry Pi Lesson 4. GPIO Setup | Adafruit Learning System
まずは I2C 接続をするためのモジュール設定を追加します。
pi@raspberrypi:~/display_sample $ sudo vi /etc/modules
下記内容を追記します。
i2c-bcm2708
i2c-dev
そして再起動します。
pi@raspberrypi:~/display_sample $ sudo reboot
次に必要なライブラリをインストールします。 python-smbus をインストールすると i2c-tools もインストールされます。
pi@raspberrypi:~/display_sample $ sudo apt-get install python-smbus
Reading package lists... Done
Building dependency tree
Reading state information... Done
The following package was automatically installed and is no longer required:
  libbison-dev
Use 'apt-get autoremove' to remove it.
The following extra packages will be installed:
  i2c-tools
Suggested packages:
  libi2c-dev
The following NEW packages will be installed:
  i2c-tools python-smbus
0 upgraded, 2 newly installed, 0 to remove and 53 not upgraded.
Need to get 60.8 kB of archives.
After this operation, 286 kB of additional disk space will be used.
Do you want to continue? [Y/n] Y
Get:1 http://archive.raspberrypi.org/debian/ jessie/main i2c-tools armhf 3.1.1+svn-2 [51.3 kB]
Get:2 http://archive.raspberrypi.org/debian/ jessie/main python-smbus armhf 3.1.1+svn-2 [9,462 B]
Fetched 60.8 kB in 1s (35.8 kB/s)
Selecting previously unselected package i2c-tools.
(Reading database ... 60922 files and directories currently installed.)
Preparing to unpack .../i2c-tools_3.1.1+svn-2_armhf.deb ...
Unpacking i2c-tools (3.1.1+svn-2) ...
Selecting previously unselected package python-smbus.
Preparing to unpack .../python-smbus_3.1.1+svn-2_armhf.deb ...
Unpacking python-smbus (3.1.1+svn-2) ...
Processing triggers for man-db (2.7.0.2-5) ...
Setting up i2c-tools (3.1.1+svn-2) ...
/run/udev or .udevdb or .udev presence implies active udev.  Aborting MAKEDEV invocation.
Setting up python-smbus (3.1.1+svn-2) ...
次にシステムの設定ファイルを編集します。
pi@raspberrypi:~/display_sample $ sudo vi /boot/config.txt
編集前後の差分は下記のようになります。
pi@raspberrypi:~/display_sample $ diff /boot/config.txt.20171014 /boot/config.txt
46c46,47
< #dtparam=i2c_arm=on
---
> dtparam=i2c1=on
> dtparam=i2c_arm=on
起動時に I2C のドライバが有効になっていることを確認しておきます。
pi@raspberrypi:~/display_sample $ dmesg | grep i2c
[    2.429468] i2c /dev entries driver
ここまでで設定変更は終了です。OLEDディスプレイを接続すると、下記のように接続デバイスのアドレスが表示されます。
pi@raspberrypi:~/display_sample $ sudo i2cdetect -y 1
     0  1  2  3  4  5  6  7  8  9  a  b  c  d  e  f
00:          -- -- -- -- -- -- -- -- -- -- -- -- --
10: -- -- -- -- -- -- -- -- -- -- -- -- -- -- -- --
20: -- -- -- -- -- -- -- -- -- -- -- -- -- -- -- --
30: -- -- -- -- -- -- -- -- -- -- -- -- 3c -- -- --
40: -- -- -- -- -- -- -- -- -- -- -- -- -- -- -- --
50: -- -- -- -- -- -- -- -- -- -- -- -- -- -- -- --
60: -- -- -- -- -- -- -- -- -- -- -- -- -- -- -- --
70: -- -- -- -- -- -- -- --
Ruby でディスプレイに表示させてみる
ここまでで接続と設定が完了したので、ディスプレイに何か表示させてみたいと思います。今回使用しているディスプレイのコントローラは SSD1306 で、公式では Python のライブラリが公開されています。
Ruby のライブラリを探したところ、公式ではありませんが、下記の Gem が公開されていましたので、今回は試しにこれを使ってみます。
Gemfile には下記のように書いておきます。
pi@raspberrypi:~/display_sample $ cat Gemfile
# frozen_string_literal: true
source "https://rubygems.org"

gem 'SSD1306'
この Gem を使うには ImageMagick が必要なので、インストールします。
pi@raspberrypi:~/display_sample $ sudo apt-get update
pi@raspberrypi:~/display_sample $ sudo apt-get install imagemagick
そして bundle install します。
pi@raspberrypi:~/display_sample $ bundle install
Fetching gem metadata from https://rubygems.org/...
Fetching version metadata from https://rubygems.org/..
Resolving dependencies...
Using i2c 0.4.0
Installing rmagick 2.16.0 with native extensions
Using bundler 1.14.6
Gem::Ext::BuildError: ERROR: Failed to build gem native extension.

    current directory: /home/pi/display_sample/vendor/bundle/gems/rmagick-2.16.0/ext/RMagick
/home/pi/.rbenv/versions/2.4.1/bin/ruby -r ./siteconf20171014-3193-1tivtgl.rb extconf.rb
checking for gcc... yes
checking for Magick-config... no
checking for pkg-config... yes
Package MagickCore was not found in the pkg-config search path.
Perhaps you should add the directory containing `MagickCore.pc'
to the PKG_CONFIG_PATH environment variable
No package 'MagickCore' found
checking for outdated ImageMagick version (<= 6.4.9)... *** extconf.rb failed ***
Could not create Makefile due to some reason, probably lack of necessary
libraries and/or headers.  Check the mkmf.log file for more details.  You may
need configuration options.

Provided configuration options:
        --with-opt-dir
        --without-opt-dir
        --with-opt-include
        --without-opt-include=${opt-dir}/include
        --with-opt-lib
        --without-opt-lib=${opt-dir}/lib
        --with-make-prog
        --without-make-prog
        --srcdir=.
        --curdir
        --ruby=/home/pi/.rbenv/versions/2.4.1/bin/$(RUBY_BASE_NAME)

To see why this extension failed to compile, please check the mkmf.log which can be found here:

  /home/pi/display_sample/vendor/bundle/extensions/armv7l-linux/2.4.0-static/rmagick-2.16.0/mkmf.log

extconf failed, exit code 1

Gem files will remain installed in /home/pi/display_sample/vendor/bundle/gems/rmagick-2.16.0 for inspection.
Results logged to /home/pi/display_sample/vendor/bundle/extensions/armv7l-linux/2.4.0-static/rmagick-2.16.0/gem_make.out

An error occurred while installing rmagick (2.16.0), and Bundler cannot continue.
Make sure that `gem install rmagick -v '2.16.0'` succeeds before bundling.
No package 'MagickCore' found ということでエラーになってしまったので、追加で必要なライブラリをインストールします。
pi@raspberrypi:~/display_sample $ sudo apt-get install libmagickcore-dev libmagickwand-dev
そして再度 bundle install 実行。
pi@raspberrypi:~/display_sample $ bundle install
Fetching gem metadata from https://rubygems.org/...
Fetching version metadata from https://rubygems.org/..
Resolving dependencies...
Using i2c 0.4.0
Installing rmagick 2.16.0 with native extensions
Using bundler 1.14.6
Installing SSD1306 0.6.1
Bundle complete! 1 Gemfile dependency, 4 gems now installed.
Bundled gems are installed into ./vendor/bundle.
今度は成功しました。
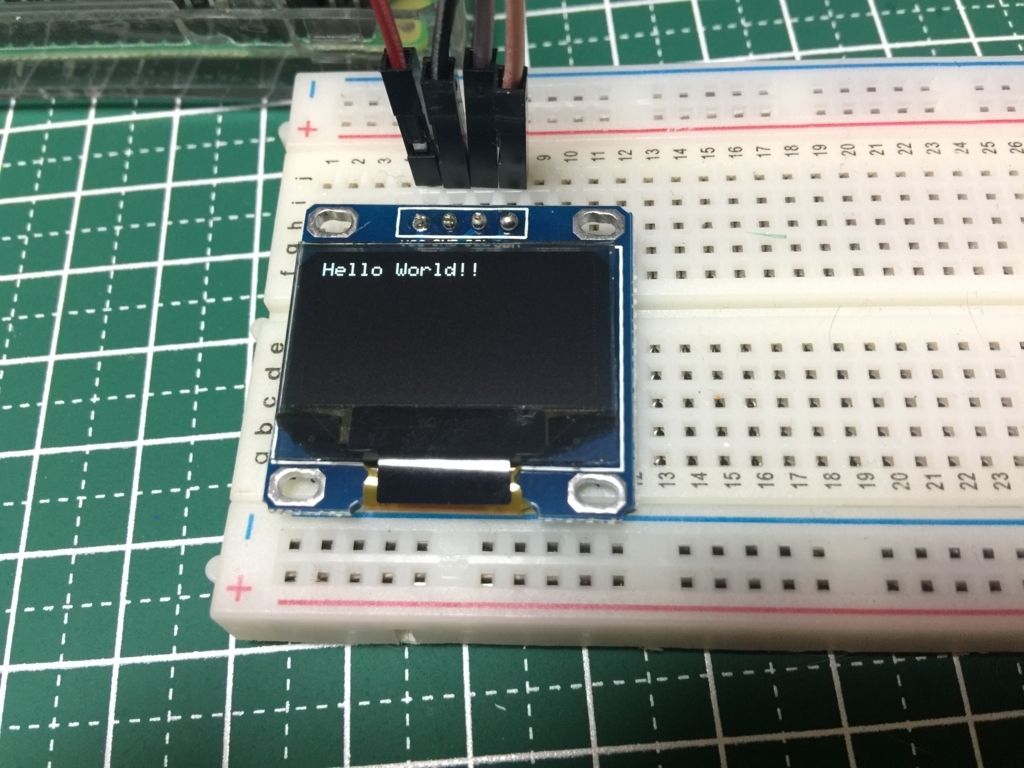
ではまずは Hello World ということで、文字を表示してみます。サンプルコードは下記のようにしました。
require 'bundler/setup'
require 'SSD1306'

class Display
  def initialize
    @disp = SSD1306::Display.new
  end

  def execute
    @disp.println('Hello World!!')
    @disp.display!
  end
end

if $0 == __FILE__
  display = Display.new
  display.execute
end
そして実行します。
pi@raspberrypi:~/display_sample $ bundle exec ruby display.rb
すると下記のようにディスプレイに文字が表示されます。

フォントを大きくしてみます。上記コードの execute メソッドに下記のようにフォントサイズの設定を追加して実行します。
  def execute
    @disp.font_size = 2 # フォントサイズの設定
    @disp.println('Hello World!!')
    @disp.display!
  end
すると先ほどと比べて縦横が二倍になった大きさで文字が表示されます。

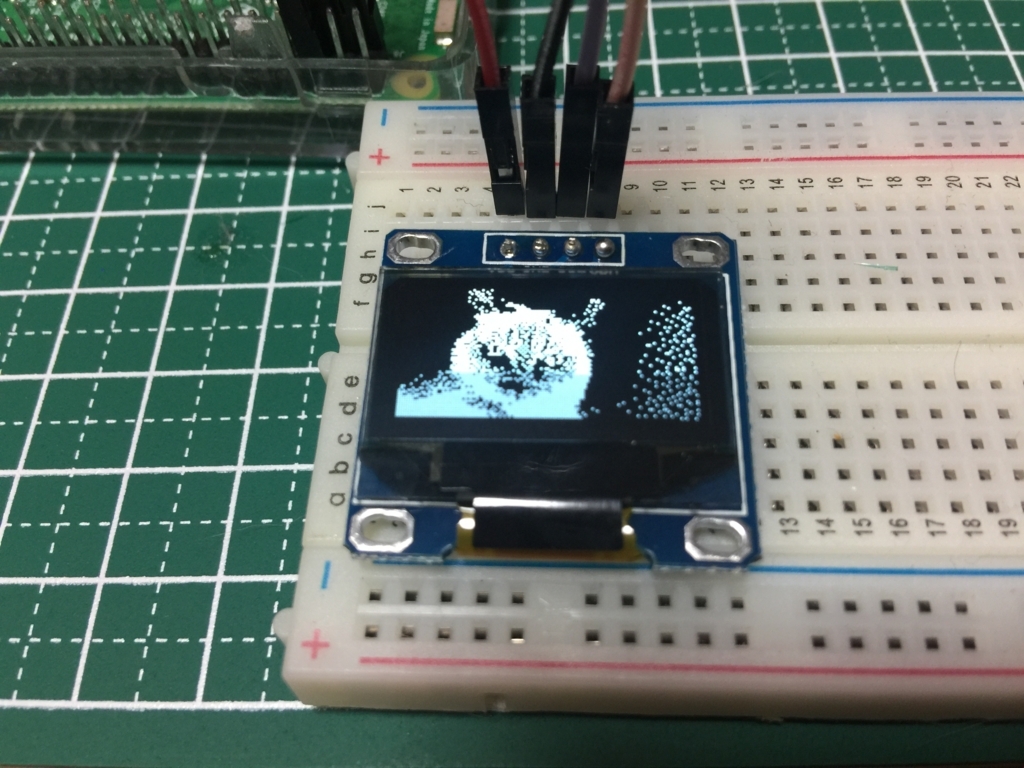
次に画像を表示してみます。今回のディスプレイの解像度は 128 x 64 なので、下記のような 128 x 64 のモノクロ画像を用意し、 Raspberry Pi 上に cat.png として配置しておきます。

そしてコードは下記のようにしました。 ImageMagick の Image クラスで画像を読み込んで、それを画像表示用メソッドに渡す形になります。
require 'bundler/setup'
require 'SSD1306'

include Magick

class Display

  def initialize
    @disp = SSD1306::Display.new
  end

  def execute
    img = Image.read('/home/pi/display_sample/cat.png').first
    @disp.image(img)
    @disp.display!
  end
end

if $0 == __FILE__
  display = Display.new
  display.execute
end
これを実行すると下記のような感じで画像が表示されます。比較用に元の画像を並べておきます。


温度計付き時計の実装
それではここまでの内容を踏まえて時計を表示させてみたいと思います。ついでに温度センサーを組み合わせて温度も一緒に表示します。温度センサーは以前使ったことのある DS18B20 を使います。モジュールの設定方法などについてはこちらの記事をご参照ください。配線は下記のようにしています。

まずは温度計のクラスを下記のように実装します。 DS18B20 からの温度データの読み出し方の詳細については先ほどのリンク先の記事をご覧いただくとして、ここでは割愛します。
require 'bundler/setup'

SENSOR_FILE_PATH = '/sys/bus/w1/devices/28-*/w1_slave'.freeze

# For using thermo sensor DS18B20.
class ThermoMeter
  def initialize
    @device_file_name = Dir.glob(SENSOR_FILE_PATH).first
  end

  def read
    sensor_data = File.read(@device_file_name)
    sensor_data.match(/t=(.*$)/)[1].to_f / 1000
  end
end
次に SSD1306 を使うためのクラスを下記のように実装します。 SSD1306::Display のメソッドをラップした形です。
require 'bundler/setup'
require 'SSD1306'

include Magick

class Display
  def initialize
    @disp = SSD1306::Display.new
  end

  def font_size(size)
    @disp.font_size = size
  end

  def show
    @disp.display!
  end

  def clear
    @disp.clear!
  end

  def println(str)
    @disp.println(str)
  end

  def print(str)
    @disp.print(str)
  end
end
そして時計を表示するためのクラスを下記のように実装します。やっていることは単純で、ループを回して一秒ごとに前回ループ時の時刻と今回の時刻が分単位で同じかをチェックし、変わっていれば温度データも取得して画面の表示を更新しています。
require 'bundler/setup'
require './display.rb'
require './thermometer.rb'

class Clock
  TIMEZONE     = 'Asia/Tokyo'
  DATE_FORMAT  = '%Y/%m/%d'
  TIME_FORMAT  = '%H:%M'
  DATE_FONT_PX = 2
  TIME_FONT_PX = 4
  TEMP_FONT_PX = 2

  def initialize
    ENV['TZ'] = 'Asia/Tokyo'
    @display = Display.new
    @thermo_meter = ThermoMeter.new
    @time_str_buffer = ''
  end

  def redisplay_time(date_str, time_str)
    @display.clear
    @display.font_size(DATE_FONT_PX)
    @display.println(date_str)
    @display.font_size(TIME_FONT_PX)
    @display.println(time_str)
    @display.font_size(TEMP_FONT_PX)
    @display.println("#{@thermo_meter.read.round(1)} deg.C")
    @display.show
  end

  def start
    begin
      loop do
        sleep(1)

        now = Time.now.localtime

        date_str = now.strftime(DATE_FORMAT)
        time_str = now.strftime(TIME_FORMAT)

        next if @time_str_buffer == time_str

        @time_str_buffer = time_str
        redisplay_time(date_str, time_str)
      end
    rescue => e
      puts e.backtrace.join("\n")
    ensure
      @display.clear
    end
  end
end

if $PROGRAM_NAME == __FILE__
  clock = Clock.new
  clock.start
end
これを下記のように実行すると、ディスプレイに現在時刻と気温が表示されます。
pi@raspberrypi:~/display_sample $ bundle exec ruby clock.rb

まとめ
液晶ディスプレイが使えるようになるとできることの幅も広がりそうですし、デバッグも便利になりそうです。今回は公開されている Gem をそのまま使っただけなので細かい制御まではできていませんが、表示している内容の一部分だけを書き換えたりできるようになると、レイアウトも柔軟にできそうな気がします。
今回のコードは下記にも公開しました。
おまけで画像の表示サンプルに使った画像の元画像を載せておきます。
